Thursday, September 19, 2013

Easy roasted tomatoes for instant meal upgrades


Easy oven-roasted tomatoes to fix any meal

I have fallen head over heels for roasted tomatoes. Roasting tomatoes slowly in the oven is an easy, hands-off technique to coax the deepest flavor from even out-of-season tomatoes. And having a stash on hand means you can upgrade almost any meal at a moment's notice.

A jar of roasted tomatoes keeps for nearly a week and is amazingly versatile. They're the magic elixir for fixing bland dishes. These are just a few of the ways I've used them:

    Easy oven-roasted tomatoes to fix any meal
  • omelets and frittatas
  • spooned over simply baked salmon, chicken, and steak
  • bean salad
  • pasta
  • salsa
  • cold and warm soups
  • grains
  • mixed with other roasted vegetables
  • plain, just as they are!
Sometimes I spoon just the juicy good stuff from the tomato jar. My boys don't care much for tomatoes, but they don't notice when I use the tomato juice to boost the flavor of their plain pasta or a vinaigrette.

We're enjoying the late tomato season here, but as fall settles in I'll rely heavily on roasted plum and cherry tomatoes to see me through to next summer. Those wintertime tomatoes are just ... sad. Roasting gives them such a boost.

Roasted peak-season tomatoes, however, are divine. If you're blessed with an abundance of late-season tomatoes — cherry tomatoes never want to quit! — try roasting and freezing some.

Easy oven-roasted tomatoes to fix any meal

Oven-Roasted Tomatoes

This takes time, but not much work. If time is short, crank up the temperature by 25 or 50 degrees and shorten the roasting time.

tomatoes
garlic cloves (optional)
fresh herb sprigs, such as oregano, thyme, rosemary (optional)
olive oil
salt and pepper

Easy oven-roasted tomatoes to fix any meal
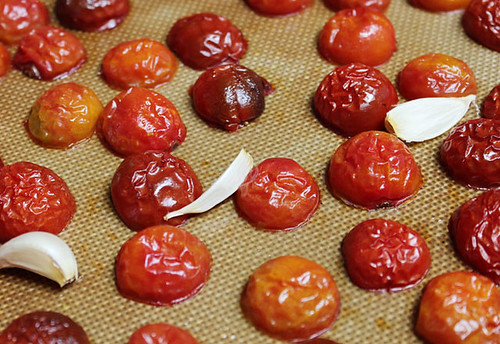
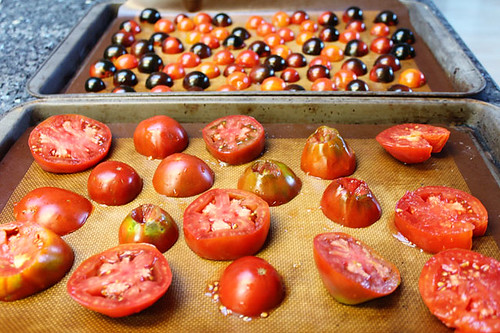
Heat oven to 250 degrees. Line a baking tray with foil or a silicone mat. Core and slice large tomatoes and set on pan. Remove stems from cherry tomatoes and slice in half, and set on pan with cut-side down. Add garlic cloves and herbs, if using. Drizzle or mist with a little olive oil and sprinkle with salt and pepper to taste.

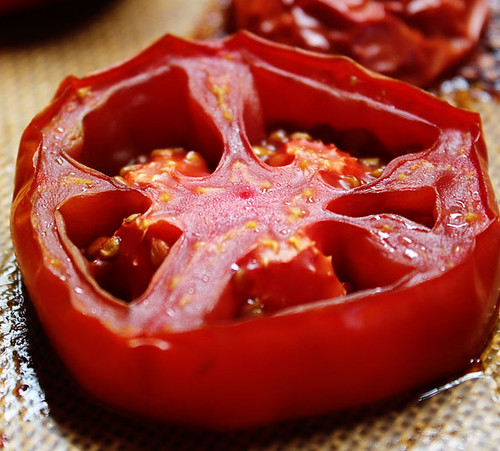
Bake tomatoes for two and a half to three hours. The skins will be shriveled and darkened. Taste as you go and take them out when you love them. They'll get drier the longer they're in the oven.

Enjoy immediately, store in the refrigerator for up to a week, or freeze. 

Wednesday, September 4, 2013

Soda experiments, part 2: Ginger ale


Soda remains a rare treat for my kids. My husband and I kicked a vicious Coke Zero addiction not too long ago, and we try to avoid having soda in the house. But on special occasions, my sons delight in a simple Shirley Temple cocktail: ginger ale, a bit of grenadine, and a sickly sweet maraschino cherry.

Given their love of ginger ale and the success of our home-brewed root beer (three years ago — how can it have been that long ago?!), I thought we should give ginger ale a try. I did a bit of research and decided to try two different approaches.

1. The fancy brew

First we tried a truly home-brewed soda, requiring a bit of yeast for carbonation. We used this recipe, subbing dry ale yeast for the champagne yeast (and you can use regular bread yeast, to keep things simple). Other than the yeast, the ingredients were straightforward: fresh ginger, water, salt, lemon juice, and only half a cup of sugar per 2-liter. Nice!


The boys took turns grating ginger and squeezing lemons. We made a double batch to fill two recycled bottles, then let the kids shake things up.


The original recipe recommends keeping the bottle out at room temperature for 12 to 48 hours, until the bottle is firm to the touch — the important sign that your soda is carbonated and should be refrigerated before it explodes. Our bottle took longer, about 60 hours.

We chilled it for a day, then cautiously cracked it open ... but there was almost no fizz. Disappointing. We poured out three glasses, straining out bits of ginger, and eagerly took a sip.

This is ginger beer, probably best for grownups. Even with a dash of grenadine, my sons agreed it had way too much bite for their tastes. (I'll work it into some adult cocktails with pleasure, however.)

UPDATE: We cracked this open after another five days in the refrigerator — it was much mellower and fizzier. This is the winner!

2. The simple syrup

On to the next version: a gingery simple syrup to mix with sparkling water. We chopped the rest of our ginger and combined one part ginger with one part sugar and three parts water, used an immersion blender to whirl everything together, then brought it to a boil on the stove. We let it simmer for 45 minutes or so until it was reduced by half, then took it off the heat to steep for another half-hour. Finally, we poured it through a fine-mesh strainer and chilled it in the fridge.

For our taste test, we poured a bit of ginger syrup into each glass and added sparkling water. This was the reaction:


I preferred this version, but it still has quite a bite. Strong, tasty stuff for ginger lovers like me, but it looks like I'm the only one who'll be drinking it. My sons preferred the fancy brew with yeast (and less sugar!). (UPDATE: And after a few days, it was very drinkable and much tastier.)

We have a few more soda experiments planned — I'll share them here if they're more successful than this adventure!


LinkWithin

Related Posts Plugin for WordPress, Blogger...