Showing posts with label Darienne. Show all posts

Wednesday, July 2, 2014

How to make souvenir sea salt


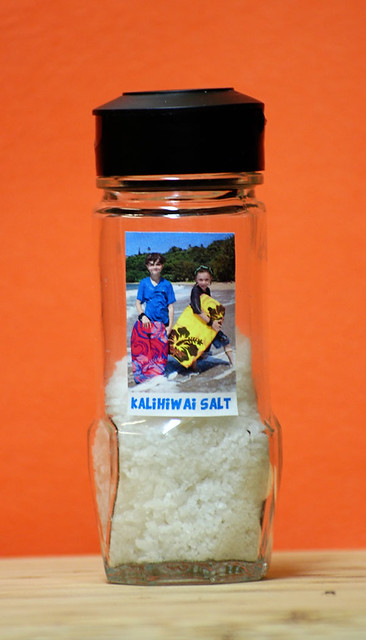
1407_CPE-salt-6 We brought home a special souvenir from our recent vacation: sea salt collected at our newest favorite beach.

The north shore of Kauai is one of our happiest places. We visit Hanalei Bay every year or two, swimming and snorkeling and waking up early to the sound of roosters.

This year, we tried something new. One of my fantastic editors insisted we get boogie boards and head to Kalihiwai Beach, a beautiful little crescent of sand with a river running to the sea.

So we did. And it was all that she promised and more. My boys — often timid in the waves — took to the water like dolphins and rode the surf for days. My husband and I loved it too. I can't believe we waited this long to try it!

1407_CPE-salt-2

1407_CPE-salt-3
It was the perfect place to experiment with making sea salt. My 10-year-old son enthusiastically helped make two batches. He was so happy with the results he's added "making salt" to his grand plan for some sort of hybrid invention/manufacturing commune he expects to launch with his friends.

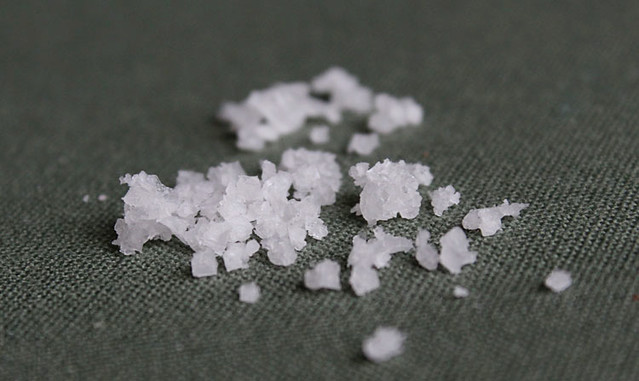
We ended up with large crystals of salt with a pleasantly briny bite. They'll make excellent finishing salt.

1407_CPE-salt-5

Harvesting salt is a simple process, provided you have a few resources: a container to carry salt water, something to filter the water, and a stove (or several weeks to let the water naturally evaporate).

A common sense warning up front: Only use sea water you think is reasonably clean. I'm no expert, but my feeling is that anywhere you're OK letting your kids swim and swallow a bit of water is probably OK for harvesting salt. And since flavors are unique to each location, be aware that your final product might be good, amazing, meh, or blech.

With that out of the way, here’s how we did it:

We filled empty bottles with ocean water. (From what I've read elsewhere, it's generally advisable to do this on a good-weather day.) Back at our room, we first poured the water through a paper towel-lined strainer and then through a coffee filter to remove sand, bits of seaweed, and other tiny debris. After the second straining, the water looked perfectly clear.

Next, we put the filtered water into a small pot and began boiling it on the stove top. Boiling of course speeds up evaporation, but it also kills any nasty things in the water. Since the Kalihiwai River flows into the bay where we gathered our batch, I wanted to be sure to eliminate any potential leptospirosis contamination.

Once the water was reduced by about half, I lowered the temperature and let it simmer until it was reduced by half again. Be careful not to burn the salt! Better to let it go too slow than too fast.
1407_CPE-salt-4

I poured out what was left into a shallow plate and put it in the oven on the lowest setting — for us, that was 170 degrees. I have no idea how long it took for the water to fully evaporate. It was at least a few hours. There's no need to baby-sit the salt. I simply turned the oven on when we were around, then turned it off when we went out for an adventure or turned in for the night.

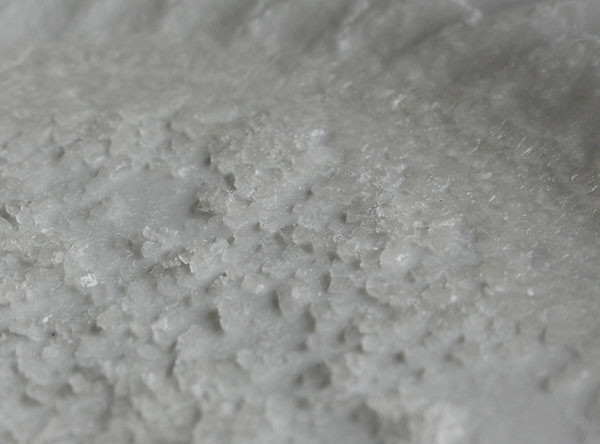
Eventually the crystals were completely dry. We carefully scraped them loose from the plate, stirred them with a fork, and packaged them to take home.

Alternatively, you could set the salt water in the sun to dry, which can take weeks, or try a dehydrator. Make do with whatever you have.

We ended up with fairly large crystals, like kosher salt. And they're delicious. About five cups of sea water yielded about a third of a cup of salt.We sent some home with my mother, and took an itty-bitty amount home with us. But it's OK: We know how to make more.

1407_CPE-salt-1

Tuesday, May 6, 2014

Homemade sugar cubes — a sweet gift


My kids lead a sheltered life. My 10-year-old encountered sugar cubes for the first time just last month, at a café in Paris. His chocolat chaud was served with a small bowl of perfect little sugar cubes — he thought they were the best part of the drink. I let him believe it was an only-in-Europe kind of thing ... until I was inspired to make sugar cubes with the boys for Mother's Day and Teacher Appreciation Week.

Sugar cubes are such fun to make with kids! Minimal effort, big payoff — and you can make them at the last minute or ages ahead of time. The hardest part is keeping the kids from licking their fingers over and over and over.

Here's how you do it: Add a tiny bit of liquid — flavored extract, juice, water, coffee, even liqueur — into sugar. Then firmly press the mixture into small molds, or shape into a flat brick and cut into cubes or with shaped cutters. Let the cubes dry a few hours until they're rock solid.


Packaged in a little jar, they make a beautiful gift all on their own. They're even better presented with a mug and tea (or sparkling wine!).

The flavor possibilities are limitless. The boys decided to make heart-shaped vanilla cubes using a scraped vanilla bean and vanilla extract. I threw together a few more varieties: rose-scented hearts and stars, bright pink cubes made with grenadine, and hearts using lemon verbena-infused simple syrup I had made for lemonade and iced tea.

I added a dab of food coloring to the lemon verbena cubes. They came out VERY BRIGHT.


A few tips:
  • Don't add too much liquid. The mixture should be grainy. Think wet sand for castle building, or a good snowball. If you use food coloring, add just a teeny tiny dab so you don't end up with, say, Day-Glo yellow.

  • Keep them small. If you have tiny candy molds or cute little cookie cutters, use them. Big, thick pieces take longer to dry — and are a lot of sugar per bite. Mine are a little bigger than ideal, but the kids aren't complaining.

  • Pack firmly. Too loose, and they'll be crumbly.

  • Leave them alone to dry. Just let them sit on the counter, in the mold if you're using one, and resist the urge to poke them. After a few hours, check them carefully. When they're hard enough to handle, gently remove them from the mold and turn all of them upside-down. Ours were done within 3 to 5 hours, except for the grenadine batch. I put those in the oven at 200 degrees for half an hour to finish drying them. 
The colorful grenadine ones ended up being the kids' favorites — they ate them straight, and popped them in ginger ale for an instant Shirley Temple. But they took a full 24 hours to dry thoroughly. We kept poking them impatiently and mashed quite a few.


The small cutters were my favorite tool for crisply edged shapes, but the molds were easiest for the kids. I love our rough-cut cubes, but if you want something dainty and perfect, this silicone mini cube tray would be perfect. I'm loving the idea of using this tiny leaf mold for minty sugar cubes to serve with tea.


Homemade sugar cubes

To fancy things up, try rose water, orange blossom water, or extracts such as almond, mint, or lemon. Or you can make simple syrup infused with whole spices or herbs (follow this technique for lavender syrup). You can even add vanilla bean, edible flowers, or a bit of spice.

1 cup sugar
2 to 4 teaspoons water, infused syrup, extract, or a combination
optional: food coloring
molding equipment suggestions: candy molds, cookie cutters, spatula, dough scraper

Add 2 teaspoons of liquid to the sugar (and a tiny bit of food coloring, if using) and stir with a fork until well blended. Stir in more liquid, just a few drops at a time, until the texture is like wet sand. It should be almost slushy, but not so wet that the sugar dissolves.

For molded cubes, press sugar firmly into molds and smooth away loose sugar.

To make cubes or use cookie cutter shapes, pour sugar into a straight-sided square or rectangular container and press down to pack it in firmly. It doesn't need to cover the whole bottom — use a dough scraper, spatula, or even an old credit card to press it down and square off the edge (see photo at right).

For cubes, use a sharp knife to cut cubes. Leave them in place for an hour or so, until they're pretty firm, then gently separate them a little bit.

To use cookie cutters, press cookie cutter into sugar, then carefully lift up the cutter and drop the shaped sugar on a piece of parchment paper. If it doesn't slide out easily, use your finger to gently push it down.

Leave the sugar cubes in the mold or on the paper to dry completely. Once they're hard enough to handle, gently remove cubes from the molds and turn them over to finish drying completely. You can put them in a 180 degree oven for 30 to 60 minutes to speed things up.

Store cubes in an airtight container.


Tuesday, April 29, 2014

Simple sweet potato soup for spring


This is a light, fresh soup just right for spring. You can pull it together in minutes with just two pantry basics: a sweet potato and a can of coconut milk, which adds creaminess without overwhelming the flavor.

Add a little something extra — a touch of vinegar, a stalk of lemongrass and some time, if you have it, or a few drops of hot sauce — and you have a refreshing soup that's a perfect bridge from cold-weather curries to summertime gazpacho.

I threw this together after coming home from a long holiday to a mostly-empty pantry. Spring showers called for soup, but all I had for veggies were some lettuce and a lone sweet potato.

I zapped the potato in the microwave, opened a can of light coconut milk, and pulled a stalk of lemongrass from the garden. (I know, lemongrass is hardly a pantry staple. But if you have some, use it!) Everything went into a pot for half an hour, and I stirred whenever I passed through the kitchen. A splash of vinegar and a squeeze of lemon, and it was ready to go.

The result is a little sweet without being cloying — the vinegar really elevates the taste. Adults and spice-happy kids might like it with a drop or two of Sriracha. This one is definitely going into regular rotation: Even my coconut milk-averse, sweet potato-hating husband liked this and helped himself to a second bowl. (He says it doesn't taste like sweet potato; I say it does, and he just hasn't given sweet potatoes a fair chance.)


Springtime Sweet Potato Soup

To cook a sweet potato quickly, prick it several times with a fork and set it on a plate in the microwave. Cook on high for 8-10 minutes until soft, turning once halfway through. Let cool and peel.

The vinegar and lemon/lemongrass aren't essential, but they elevate this soup from good enough to mighty tasty.

1 medium sweet potato, cooked and mashed
1 cup coconut milk
1 cup water (or broth)
1 to 3 teaspoons cider vinegar or rice wine vinegar
salt and pepper
2 stalks lemongrass, stalk only, peeled and split in half lengthwise, and/or a squeeze of lemon juice
Sriracha (optional)

Stir together mashed sweet potato, coconut milk, and water in a saucepan over medium heat. Add lemongrass stalks, if using. Warm to barely a simmer, stirring occasionally. If using lemongrass, keep on the burner for 20 to 30 minutes, then remove the lemongrass stalks.

Purée soup with an immersion blender (or blend in batches, carefully, in a blender or food processor). Stir in vinegar, a teaspoon at a time, until it has the right amount of zip to suit your taste. (If you're adding lemon juice, this is the time to do it.) Season with salt and pepper. If it's too thick, stir in a little more water, broth, or coconut  milk.

Optional:  Serve with Sriracha for those who want to add a little more heat.

Thursday, February 6, 2014

Fortune cookies made easy


140206_fortune-cookies-4

Making fortune cookies has been on my list for years. Every time I started to poke around recipes online, I balked because of the reviews. For every person who said such-and-such recipe was easy and perfect, there was another who said it was an utter disaster. I wanted better odds of success before wading into that territory.

But this year, I forgot to get a new bag of fortune cookies on our annual Lunar New Year shopping trip to Chinatown. We usually swing by Golden Gate Fortune Cookie Co. to see the treats being made and bring a bag home. This year we filled up on dim sum, boba tea, and egg tarts, but rushed home without our cookies.

This was it: The Year of the Horse would be the year I tried fortune cookies.

And they were a success! They tasted delicious and the kids loved them. And they weren't too difficult. We'll happily make them again soon. Probably within a few days.

140206_fortune-cookies-1
One of these is not like the others... the one on the left is smoother and has more defined edges because we used parchment paper to help shape it.

Anna solved the trickiest challenge: getting each cookie thin and flat. These cookies need to be ridiculously thin — almost translucent. Most recipes say to use a spatula or spoon to spread the dough in a circle on a greased sheet or silicon mat. We did that for most of ours, and they came out OK but were uneven, a little bumpy, and with crumbly edges.

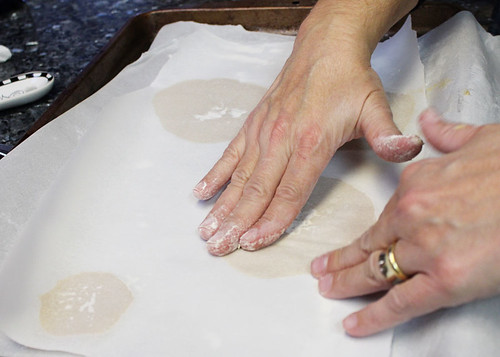
Our trick: Anna spread them on floured parchment paper, then used another sheet of floured parchment paper to press them flat. We popped them in the oven, covered in parchment paper, and they came out beautifully. (That's a little pastry technique she picked up in Paris. Never miss a chance to give credit to things from Paris.) You can see the difference in the photo above: The cookie at the bottom left is from the parchment paper batch. Perfect!

140206_CPE_fortune-cookie-2

Before you try them, you need to know a few hard truths:
  • Your fortunes will have grease spots. You could try making the cookies without butter, but reviewers of butter-free versions often say the cookies needed butter, for taste and to avoid sticking to the pan. (With Anna's parchment paper technique, butter-free might work. I hope to try it soon and report back.)
  • There will be losses. It takes some practice to get the hang of it, and even then there will be casualties.
  • Making fortune cookies is time-consuming. Relax and make an afternoon of it.
  • Crispiness is a high goal. A few of ours crisped evenly and nicely, but most had slightly chewy centers. Practice will help, and some advise returning the shaped cookies to a 250 degree oven for a few minutes to crisp. We ate all ours, and so didn't try it.
This is a fun one to do with kids. Spreading the batter and shaping the cookies may be difficult for young ones, but kids who can write or draw of course can prepare the fortunes. (Ours, not surprisingly, turned out to be focused on the boys' current obsession: "Your mom will let you play Minecraft" and the like.)

140206_fortune-cookies-3
Hey, look! Another fortune about Minecraft!

Fortune Cookies

This recipe makes 18-20 cookies. Adapted from Allrecipes and Fifteen Spatulas

2 egg whites
1/2 cup sugar
1/4 cup butter, melted
scant 1/4 teaspoon almond extract
scant 1/4 teaspoon vanilla extract
2 tablespoons water
2/3 cup flour

Write your fortunes before you bake the cookies. Cut paper into strips, about 1/2 inch wide and 2 1/2 inches long, and write fortunes. (This is a great job for the kids. We used ballpoint pen, to make sure the ink didn't bleed onto the cookies.)

Preheat the oven to 375 degrees. Line a baking sheet with parchment paper (trace 3" circles onto the paper as a guide, if you wish) and dust lightly with flour. Lightly dust a second sheet of parchment paper with flour and set aside.

In a medium bowl, whisk the egg whites and sugar until they're frothy. Whisk in the melted butter, extracts, and water, then mix in the flour just until it's blended in — don't over-mix. The mixture should be like a light pancake batter, not a doughy cookie batter.

Scoop a generous 1/2 tablespoon of batter onto the prepared baking sheet. Use the measuring spoon to spread it into a very thin circle, about 3 inches across. Do no more than 3 or 4 cookies at a time (and for your first try, I recommend doing only two). Lay the second piece of parchment over the batter, floured side down, and press down to ensure evenly flat, thin cookies. Leave the paper in place.

Bake cookies on the middle rack of the oven for 6 to 7 minutes. They're done when they're just golden around the edges. They need to be soft and pliable for folding.

Be ready to work quickly: Peel off the parchment paper, flip each cookie over, and lay the fortune across the middle. With a spatula or your fingers (gloves might help), fold each cookie in half — don't crease it flat, just pinch the open edges together. Then set the cookie on the edge of a cup, with the folded edge on the rim and the open side on top, and pushing the corners down while you hold the pinched edges together. Tuck each folded cookie into a muffin pan so it will hold its shape as it cools and hardens. (Check out these videos for helping shaping cookies.)

Repeat with the remaining batter.

Monday, December 30, 2013

Farro with Sweet Potato and Black Garlic

131217_CPE_farro-salad_3


As the holiday break neared, Anna and I commiserated (with good humor) about how busy we were. "Eh, it's going to be a Trader Joe's week, right?"
I knew exactly what she was talking about. I had already planned for a Trader Joe's week to make the busy season a little easier. My menu plan was based on whatever good stuff TJ's had to make meal time as easy as possible.

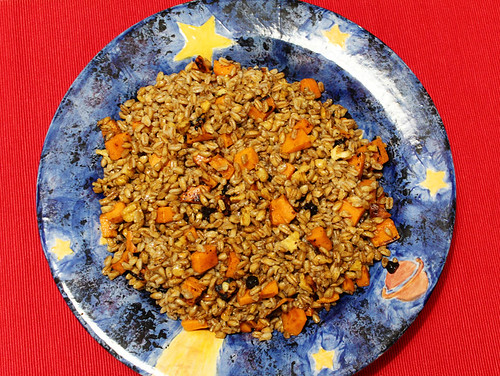
Here's one of the dishes I made, perfect for the post-holiday detox. This grain salad makes up for the stale holiday cookies we're all still nibbling. Delicious warm or cold, it's on the sweet side — a nice bridge as I retrain my taste buds to be happy with less sugary fare. It's filling and full of good-for-you ingredients. The photograph doesn't do it justice. I'm not sure it's possible to take a good photo of farro.

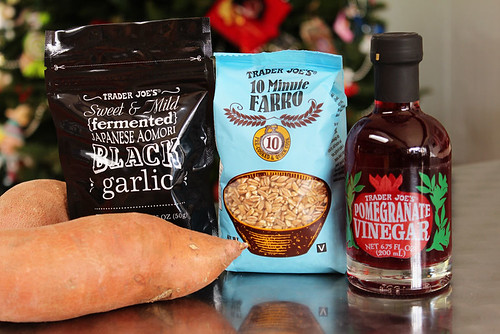
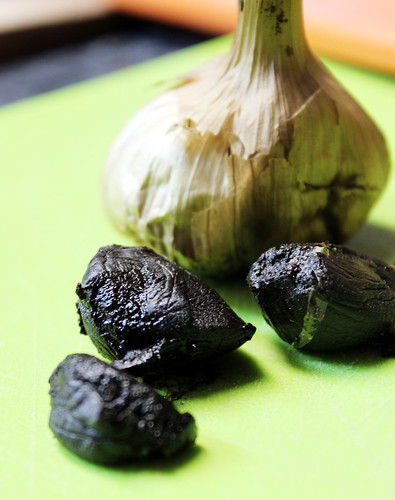
Everything in it can be found at Trader Joe's: fast-cooking farro, sweet potato, pomegranate vinegar, and — my favorite! — black garlic.

131217_CPE_farro-salad_1


If you're unfamiliar with it, black garlic is simply fermented garlic. It's savory-sweet, garlicky without the bite. TJ's just recently started carrying black garlic, but it isn't always easy to find. I didn't see it the last time I was there and was worried they had already dropped it. The manager admitted "it's been sort of a dog for us," but they do still stock it. You can find it in specialty stores and online (including Amazon).

131217_CPE_farro salad_2


If you can't find it, no problem. Just sub some regular garlic. And if you don't have a Trader Joe's near you, of course you can find these ingredients elsewhere.

Farro with Sweet Potatoes and Black Garlic

If you can't find black garlic, you can leave it out or substitute a clove or two of minced garlic, sautéed in a bit of oil. A bit of cooked sausage also would be a tasty replacement. Farro is one of my favorite grains, but if it's out of your comfort zone swap brown rice.

1 package Trader Joe's 10-Minute Farro (or 1 1/2 cups raw farro)
1 sweet potato, diced
1/2 head of black garlic, chopped
1/2 cup toasted walnuts, chopped
olive oil

Dressing:
4 tablespoons orange juice
2 tablespoons pomegranate vinegar (or other fruity vinegar)
1 tablespoon honey
1 tablespoon olive oil
1 teaspoon Dijon mustard

Cook farro according to package directions (if you're using raw farro, cook it however you do that — I've only used TJ's!). Whisk dressing ingredients together in a bowl.

Warm a spoonful of oil in a skillet over medium heat. Add diced sweet potato and cook until soft and slightly browned.

Combine farro, sweet potato, garlic, walnuts, and dressing in a bowl. Season with salt and pepper to taste. If salad is too dry for your taste, add a splash of olive oil and stir.

Wednesday, December 4, 2013

Persimmon Cranberry Tea Bread (Vegan)

131203_CPE_persimmon-bread-1

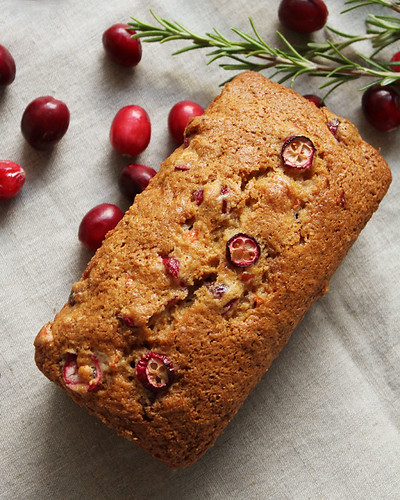
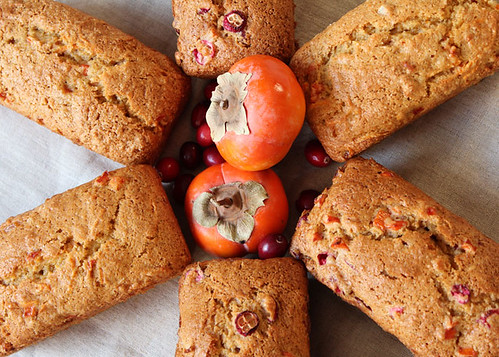
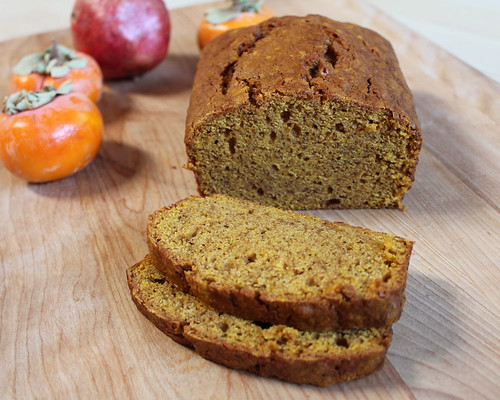
Persimmons and cranberries look like colorful jewels in these golden-colored little loaves. These make lovely gifts for neighbors, hosts, teachers and more during the holiday season. You can freeze them and thaw for gift-giving, or as a treat for your own holiday table.

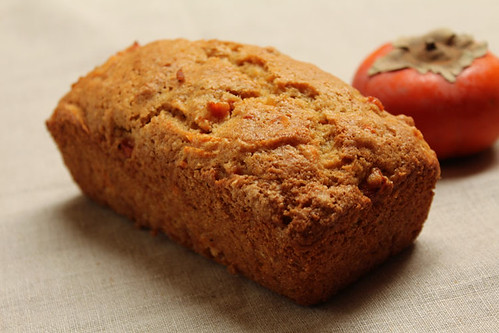
Persimmons are one of my favorite California fruits and they’re plentiful and inexpensive. If you don’t have them near you, you can substitute apples or pears. I made one batch pairing persimmons with cranberries, with just a bit of candied orange peel, and a second batch with sweet potatoes instead of berries.

131203_CPE_persimmon-bread-3


I’m baking vegan, nut-free loaves to minimize any awkward gift-giving issues. Don’t let the V-word scare you! These treats are perfectly tasty, though I admit they’re a little more crumbly than they would be with egg. You can substitute butter and egg for the vegan alternatives in the recipe if you prefer.

This is riffing off Mark Bittman’s master recipe for quick bread made with almost any fruit or vegetable. It’s a terrifically versatile recipe, much like buttermilk quick bread. You can tinker with fruit, veggies, and mix-ins as you like, and bake a full-size loaf, mini loaves, or muffins to brighten a wintry morning. If cranberries aren't your thing, try the sweet potato variation.

131203_CPE_persimmon-bread-2


Persimmon Cranberry Tea Bread

Based on Mark Bittman’s Fruit-and-Nut or Vegetable-and-Nut Bread. To make the flaxseed egg replacer, blend 1 tablespoon flaxseed meal with 3 tablespoons water, and let sit 5 to 10 minutes until gelled. 

4 tablespoons Earth Balance spread, or butter, chilled
1 cup white whole wheat flour, or all-purpose flour
1 cup all-purpose flour
3/4 to 1 cup sugar
1 1/2 teaspoons baking powder
1/2 teaspoon baking soda
1 teaspoon salt
1/2 teaspoon cardamom or cinnamon
3/4 cup apple or orange juice
1 tablespoon grated orange or lemon zest
flaxseed egg replacer equivalent to 1 egg (see note), or 1 egg
1/2 cup persimmon, peeled and diced
1/2 cup cranberries, chopped
optional extras: ½ cup chopped nuts, raisins, or other dried fruit (crystallized ginger would be tasty too)

Preheat oven to 350°F. Grease three mini loaf pans or a 9x5-inch loaf pan.

Combine dry ingredients — flour through spices — in a bowl, then cut in Earth Balance until the mixture resembles coarse crumbs. (I do this in a food processor, pulsing it a few times. Or you can rub the spread in with your fingers until no large lumps remain.)

In another bowl, blend the juice, zest, and flaxseed egg replacer. Pour the wet mixture into the dry ingredients and stir just until moistened — don’t overmix. Fold in the fruit and any extras.

Pour batter into prepared pans. Bake about 40 minutes for mini loaves or an hour for a full-size loaf, until the bread is golden brown and a toothpick inserted in the middle of the loaf comes out clean. Let cool before removing from the pan.

Persimmon and Sweet Potato Tea Bread: Substitute ½ cup grated, raw, peeled sweet potato for the cranberries, and ½ teaspoon nutmeg or cinnamon for the cardamom.

Muffins: Bake at 400°F for 20 to 30 minutes.

Tuesday, November 12, 2013

Grandma's pumpkin bread


Grandma's Pumpkin Bread

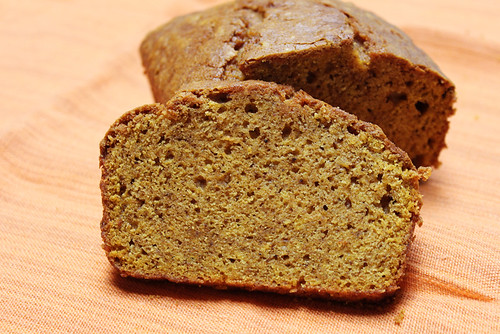
Going to lunch at Grandma's was often a mixed bag. She served foods way outside my comfort zone — I recall a lot of gravy and canned green beans — but there was a chance she'd make pumpkin bread. Moist and sweet, it was the best thing on earth. It's long been a star at my family's Thanksgiving dinner, and it's my go-to baked gift for the holidays. It's also one of the recipes I'm asked to share the most.

I've given up on tinkering with this basic recipe. Attempts to swap in white whole wheat flour or applesauce have just made a mess of a good thing. Sometimes I scale back the staggering amount of sugar, but only by a mere half cup. I don't fully understand why there's both baking soda and baking powder, but I've never dared experiment to find out if that's truly necessary. I don't question this recipe, I just bake it. A lot.

It is what it is, and it's delicious.

This makes two beautiful loaves. The bread freezes well, so you can bake ahead of Thanksgiving or gift-giving season. I usually slice one as soon as it cools, because it's irresistible, and stash the second loaf in the freezer before we inhale both loaves.

Last week I recruited my sons to help bake pumpkin bread to share. It's so simple, they're ready to begin committing this recipe to memory.

Thanks, Grandma.

Grandma's Pumpkin Bread


Grandma's Pumpkin Bread

You can substitute fresh pumpkin purée for canned — I stick with canned because of fairly consistent moisture content and reliable flavor. You also could stir in chopped nuts or chocolate chips, but be careful with added chocolate, as this is already very sweet.

3 cups sugar
1 cup canola oil
3 eggs
2 cups pumpkin purée
3 cups flour
1 teaspoon baking soda
1/2 teaspoon baking powder
1 teaspoon cloves
1 teaspoon cinnamon
1 teaspoon nutmeg

Preheat oven to 350 degrees. Blend oil and sugar in a large bowl, then whip in eggs. In a separate bowl, sift together flour, baking soda, baking powder, and spices. Stir pumpkin into the creamed mix, then stir in the dry ingredients. Pour batter into two greased loaf pans and bake one hour, or until a toothpick inserted into the middle of a loaf comes out clean.

Wednesday, October 23, 2013

Pumpkin sourdough monster rolls


We had so much fun making these monstrous dinner rolls with friends! This is a choose-your-own adventure project: You can just set out store-bought dough with a handful of raisins for embellishment, or bread bakers could add pumpkin purée to homemade dough, or those of you with sourdough starter on hand could go all in and make pumpkin sourdough dinner rolls.


Pumpkin sourdough is delicious, but the real treat here is making the rolls together. It's a terrific after-school or rainy day activity. Enjoy some giggly, creative time together in the kitchen, fill your home with the smell of freshly baked bread, and savor your not-so-hard work with dinner.

I'll break this down according to degree of ambition: First, how to make rolls, then how to add pumpkin to homemade dough, and finally how to make your own pumpkin sourdough rolls from scratch.


Shaping monster rolls

Use whatever dough you'd like: store-bought, homemade, the sourdough below. Just tear off hunks of dough and make whatever you wish. I set out some past-their-prime spices for decorations — star anise, cinnamon sticks, whole allspice, and cloves — along with raisins, nuts and seeds, and rosemary sprigs. Dust hands and dough with flour to make it easier to handle, and work right on the baking sheet.

The shaped rolls need to rise a second time before going into the oven. They'll double in size, and as they puff up they'll push out whatever raisins or nuts you've poked into the dough. So push them way in there: The raisins, for example, were almost buried in the dough but came out perfect. Dip a finger in a bowl of water and "paint" the dough to help stick down things like rosemary leaves.

Kids can also use scissors to shape the dough — they're a great tool to makes scales or spikes, for example. But wait until after the second rise, right before the rolls go into the oven. That's how I did the bat: I shaped long triangular wings, and just before baking I snipped the bottom of the wings and stretched the pieces apart.

Bake the rolls according to your recipe or the package instructions.


Adding pumpkin to bread dough

You can pumpkin-ify homemade bread dough easily: Just add a cup or so of pumpkin purée to your favorite recipe. You'll probably need to add flour to compensate for the extra moisture. Fresh or canned pumpkin work equally well, though you're likely to get more color out of canned (be sure to used plain pumpkin, not pumpkin pie purée!).

To make fresh pumpkin purée, cut a sugar pie pumpkin in half, scoop out the strings and seeds, and pierce the shell a few times with a fork. Set the pumpkin halves cut side down on a baking sheet and bake at 350 degrees for 45 to 90 minutes, until the center is easily pierced with a fork. Let cool, then purée flesh in a food processor or blender. If it's really wet, line a strainer with a kitchen towel or cheesecloth and strain the pumpkin before using it.


Pumpkin sourdough rolls

Weight measurements are provided in parentheses, in case you prefer to weigh ingredients. You might need more or less flour, depending on how wet your pumpkin purée is. You can substitute wheat flour for some of the AP flour — I used equal portions of white flour, white whole wheat, and whole wheat. (Note that wheat flour weighs less: 4 ounces per cup, versus 4 1/4 ounces per cup of white flour.) This yields a sticky dough, so have plenty of flour on hand for shaping the rolls.

1 cup (8 ounces) "fed" sourdough starter
1 1/2 cups (12 ounces) lukewarm water
2 teaspoons instant yeast
2 tablespoons (1 ounce) sugar
1 1/2 teaspoons salt
2 tablespoons olive oil
1 cup (9 1/2 ounces) pumpkin purée
5 to 6 cups (21 1/4 to 25 1/2 ounces) unbleached all-purpose flour
melted butter, optional

Combine all the ingredients except butter. Knead by hand or in a mixer with the dough attachment until smooth. Let rise in an oiled, covered bowl until doubled in size, about 90 minutes.

Shape rolls on baking trays lined with parchment paper or silicone mats. Cover with a towel and let rise again until doubled, about half and hour.

Bake rolls for about 20 minutes at 375 degrees, checking frequently after 15 minutes. Brush the tops with melted butter, if you'd like, for softness and rich color.


Thursday, September 19, 2013

Easy roasted tomatoes for instant meal upgrades


Easy oven-roasted tomatoes to fix any meal

I have fallen head over heels for roasted tomatoes. Roasting tomatoes slowly in the oven is an easy, hands-off technique to coax the deepest flavor from even out-of-season tomatoes. And having a stash on hand means you can upgrade almost any meal at a moment's notice.

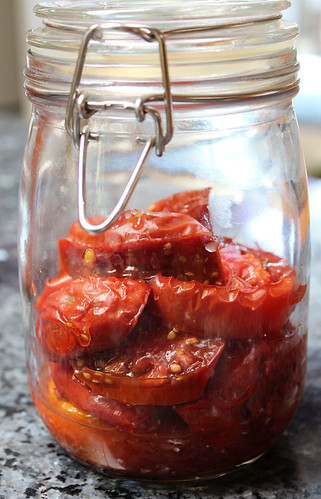
A jar of roasted tomatoes keeps for nearly a week and is amazingly versatile. They're the magic elixir for fixing bland dishes. These are just a few of the ways I've used them:

    Easy oven-roasted tomatoes to fix any meal
  • omelets and frittatas
  • spooned over simply baked salmon, chicken, and steak
  • bean salad
  • pasta
  • salsa
  • cold and warm soups
  • grains
  • mixed with other roasted vegetables
  • plain, just as they are!
Sometimes I spoon just the juicy good stuff from the tomato jar. My boys don't care much for tomatoes, but they don't notice when I use the tomato juice to boost the flavor of their plain pasta or a vinaigrette.

We're enjoying the late tomato season here, but as fall settles in I'll rely heavily on roasted plum and cherry tomatoes to see me through to next summer. Those wintertime tomatoes are just ... sad. Roasting gives them such a boost.

Roasted peak-season tomatoes, however, are divine. If you're blessed with an abundance of late-season tomatoes — cherry tomatoes never want to quit! — try roasting and freezing some.

Easy oven-roasted tomatoes to fix any meal

Oven-Roasted Tomatoes

This takes time, but not much work. If time is short, crank up the temperature by 25 or 50 degrees and shorten the roasting time.

tomatoes
garlic cloves (optional)
fresh herb sprigs, such as oregano, thyme, rosemary (optional)
olive oil
salt and pepper

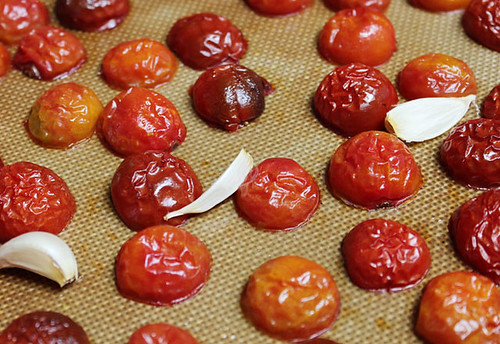
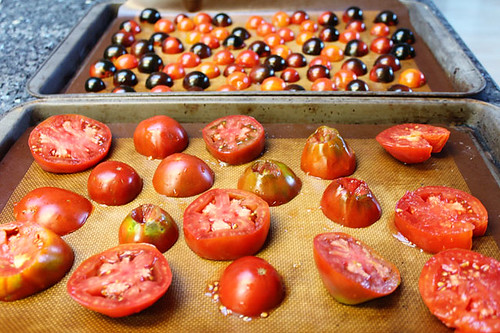
Easy oven-roasted tomatoes to fix any mealHeat oven to 250 degrees. Line a baking tray with foil or a silicone mat. Core and slice large tomatoes and set on pan. Remove stems from cherry tomatoes and slice in half, and set on pan with cut-side down. Add garlic cloves and herbs, if using. Drizzle or mist with a little olive oil and sprinkle with salt and pepper to taste.

Bake tomatoes for two and a half to three hours. The skins will be shriveled and darkened. Taste as you go and take them out when you love them. They'll get drier the longer they're in the oven.

Enjoy immediately, store in the refrigerator for up to a week, or freeze. 

LinkWithin

Related Posts Plugin for WordPress, Blogger...