Showing posts with label Gifts. Show all posts

Wednesday, July 2, 2014

How to make souvenir sea salt


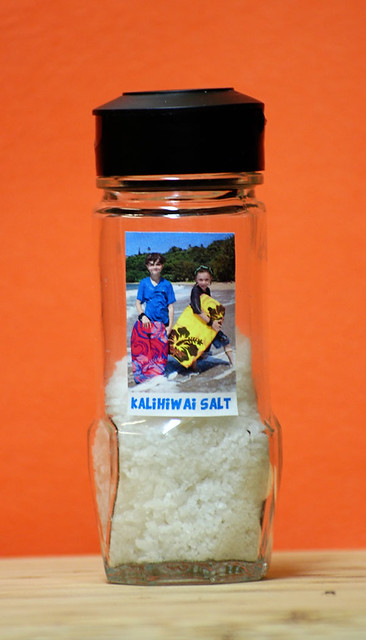
1407_CPE-salt-6 We brought home a special souvenir from our recent vacation: sea salt collected at our newest favorite beach.

The north shore of Kauai is one of our happiest places. We visit Hanalei Bay every year or two, swimming and snorkeling and waking up early to the sound of roosters.

This year, we tried something new. One of my fantastic editors insisted we get boogie boards and head to Kalihiwai Beach, a beautiful little crescent of sand with a river running to the sea.

So we did. And it was all that she promised and more. My boys — often timid in the waves — took to the water like dolphins and rode the surf for days. My husband and I loved it too. I can't believe we waited this long to try it!

1407_CPE-salt-2

1407_CPE-salt-3
It was the perfect place to experiment with making sea salt. My 10-year-old son enthusiastically helped make two batches. He was so happy with the results he's added "making salt" to his grand plan for some sort of hybrid invention/manufacturing commune he expects to launch with his friends.

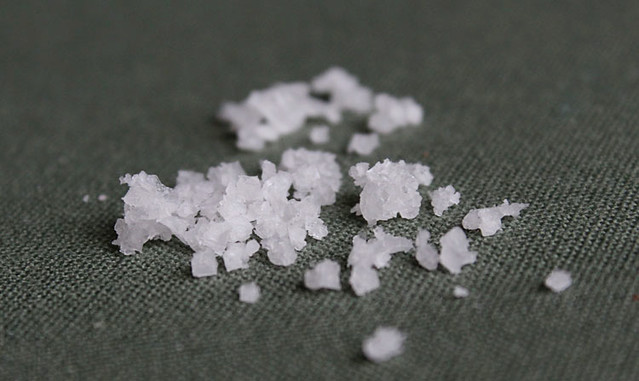
We ended up with large crystals of salt with a pleasantly briny bite. They'll make excellent finishing salt.

1407_CPE-salt-5

Harvesting salt is a simple process, provided you have a few resources: a container to carry salt water, something to filter the water, and a stove (or several weeks to let the water naturally evaporate).

A common sense warning up front: Only use sea water you think is reasonably clean. I'm no expert, but my feeling is that anywhere you're OK letting your kids swim and swallow a bit of water is probably OK for harvesting salt. And since flavors are unique to each location, be aware that your final product might be good, amazing, meh, or blech.

With that out of the way, here’s how we did it:

We filled empty bottles with ocean water. (From what I've read elsewhere, it's generally advisable to do this on a good-weather day.) Back at our room, we first poured the water through a paper towel-lined strainer and then through a coffee filter to remove sand, bits of seaweed, and other tiny debris. After the second straining, the water looked perfectly clear.

Next, we put the filtered water into a small pot and began boiling it on the stove top. Boiling of course speeds up evaporation, but it also kills any nasty things in the water. Since the Kalihiwai River flows into the bay where we gathered our batch, I wanted to be sure to eliminate any potential leptospirosis contamination.

Once the water was reduced by about half, I lowered the temperature and let it simmer until it was reduced by half again. Be careful not to burn the salt! Better to let it go too slow than too fast.
1407_CPE-salt-4

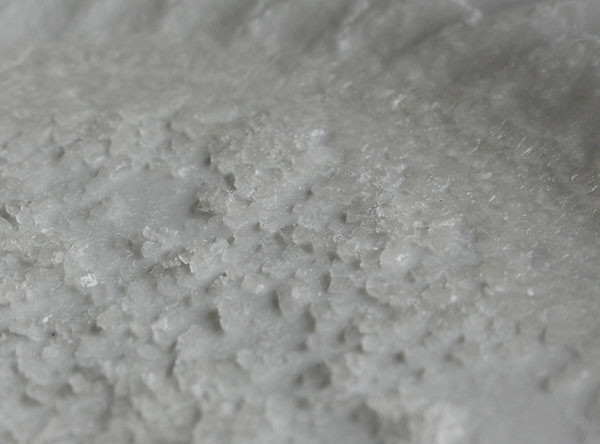
I poured out what was left into a shallow plate and put it in the oven on the lowest setting — for us, that was 170 degrees. I have no idea how long it took for the water to fully evaporate. It was at least a few hours. There's no need to baby-sit the salt. I simply turned the oven on when we were around, then turned it off when we went out for an adventure or turned in for the night.

Eventually the crystals were completely dry. We carefully scraped them loose from the plate, stirred them with a fork, and packaged them to take home.

Alternatively, you could set the salt water in the sun to dry, which can take weeks, or try a dehydrator. Make do with whatever you have.

We ended up with fairly large crystals, like kosher salt. And they're delicious. About five cups of sea water yielded about a third of a cup of salt.We sent some home with my mother, and took an itty-bitty amount home with us. But it's OK: We know how to make more.

1407_CPE-salt-1

Tuesday, May 6, 2014

Homemade sugar cubes — a sweet gift


My kids lead a sheltered life. My 10-year-old encountered sugar cubes for the first time just last month, at a cafĂ© in Paris. His chocolat chaud was served with a small bowl of perfect little sugar cubes — he thought they were the best part of the drink. I let him believe it was an only-in-Europe kind of thing ... until I was inspired to make sugar cubes with the boys for Mother's Day and Teacher Appreciation Week.

Sugar cubes are such fun to make with kids! Minimal effort, big payoff — and you can make them at the last minute or ages ahead of time. The hardest part is keeping the kids from licking their fingers over and over and over.

Here's how you do it: Add a tiny bit of liquid — flavored extract, juice, water, coffee, even liqueur — into sugar. Then firmly press the mixture into small molds, or shape into a flat brick and cut into cubes or with shaped cutters. Let the cubes dry a few hours until they're rock solid.


Packaged in a little jar, they make a beautiful gift all on their own. They're even better presented with a mug and tea (or sparkling wine!).

The flavor possibilities are limitless. The boys decided to make heart-shaped vanilla cubes using a scraped vanilla bean and vanilla extract. I threw together a few more varieties: rose-scented hearts and stars, bright pink cubes made with grenadine, and hearts using lemon verbena-infused simple syrup I had made for lemonade and iced tea.

I added a dab of food coloring to the lemon verbena cubes. They came out VERY BRIGHT.


A few tips:
  • Don't add too much liquid. The mixture should be grainy. Think wet sand for castle building, or a good snowball. If you use food coloring, add just a teeny tiny dab so you don't end up with, say, Day-Glo yellow.

  • Keep them small. If you have tiny candy molds or cute little cookie cutters, use them. Big, thick pieces take longer to dry — and are a lot of sugar per bite. Mine are a little bigger than ideal, but the kids aren't complaining.

  • Pack firmly. Too loose, and they'll be crumbly.

  • Leave them alone to dry. Just let them sit on the counter, in the mold if you're using one, and resist the urge to poke them. After a few hours, check them carefully. When they're hard enough to handle, gently remove them from the mold and turn all of them upside-down. Ours were done within 3 to 5 hours, except for the grenadine batch. I put those in the oven at 200 degrees for half an hour to finish drying them. 
The colorful grenadine ones ended up being the kids' favorites — they ate them straight, and popped them in ginger ale for an instant Shirley Temple. But they took a full 24 hours to dry thoroughly. We kept poking them impatiently and mashed quite a few.


The small cutters were my favorite tool for crisply edged shapes, but the molds were easiest for the kids. I love our rough-cut cubes, but if you want something dainty and perfect, this silicone mini cube tray would be perfect. I'm loving the idea of using this tiny leaf mold for minty sugar cubes to serve with tea.


Homemade sugar cubes

To fancy things up, try rose water, orange blossom water, or extracts such as almond, mint, or lemon. Or you can make simple syrup infused with whole spices or herbs (follow this technique for lavender syrup). You can even add vanilla bean, edible flowers, or a bit of spice.

1 cup sugar
2 to 4 teaspoons water, infused syrup, extract, or a combination
optional: food coloring
molding equipment suggestions: candy molds, cookie cutters, spatula, dough scraper

Add 2 teaspoons of liquid to the sugar (and a tiny bit of food coloring, if using) and stir with a fork until well blended. Stir in more liquid, just a few drops at a time, until the texture is like wet sand. It should be almost slushy, but not so wet that the sugar dissolves.

For molded cubes, press sugar firmly into molds and smooth away loose sugar.

To make cubes or use cookie cutter shapes, pour sugar into a straight-sided square or rectangular container and press down to pack it in firmly. It doesn't need to cover the whole bottom — use a dough scraper, spatula, or even an old credit card to press it down and square off the edge (see photo at right).

For cubes, use a sharp knife to cut cubes. Leave them in place for an hour or so, until they're pretty firm, then gently separate them a little bit.

To use cookie cutters, press cookie cutter into sugar, then carefully lift up the cutter and drop the shaped sugar on a piece of parchment paper. If it doesn't slide out easily, use your finger to gently push it down.

Leave the sugar cubes in the mold or on the paper to dry completely. Once they're hard enough to handle, gently remove cubes from the molds and turn them over to finish drying completely. You can put them in a 180 degree oven for 30 to 60 minutes to speed things up.

Store cubes in an airtight container.


Friday, June 7, 2013

Last-minute gifts to make for teachers


Some of our young friends are already out of school, but we have a few more days to go. This weekend we'll be making gifts for our teachers. My kids like to make treats for the real teacher's pets — one will get a jar of Good Dog, Bad Dog Biscuits, and the other a jar of tuna-catnip cat treats. As for our hardworking teachers, here are a few of our favorite gifts to give:

IMG_6015


  • Meyer Lemon and Poppy Seed Mini Cakes: Muffins meet cake in these perfumed little treats.

  • Brigadeiros: Another slightly messy one, but messy stuff is usually the most fun. These delectable little candies disappear at parties — give a tray in little paper cups.

20101209_spiced nuts_1

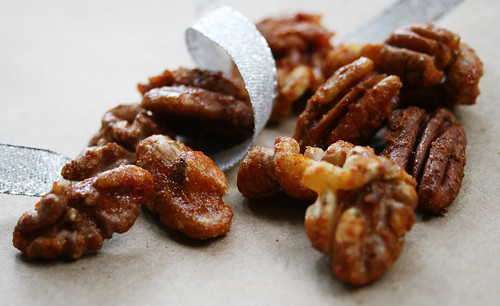
  • Best Spiced Nuts: Garam masala and Sriracha give these irresistible nibbles a nice kick.

  • Citrus Salt: Put lemon, lime, and orange rinds to good use in a terrific finishing salt.

IMG_4812_2

Monday, December 3, 2012

13 easy DIY gifts from the kitchen kids can make

121204_CPE_DIY gifts
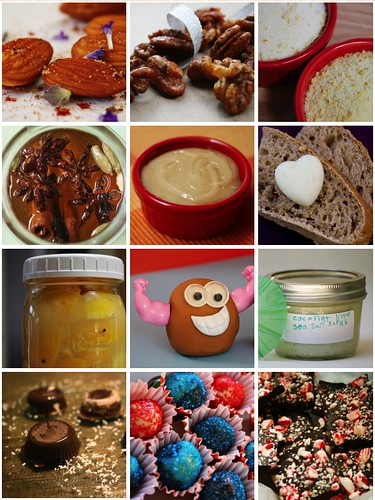
1. Smoked Paprika Almonds, 2. Spiced Nuts, 3. Citrus Salt, 4. Infused Honey, 5. Creamed Honey, 6. Butter, 7. Preserved Lemons, 8. Play Dough, 9. Coconut Lime Scrub, 10. Fleur de Sel Bon Bons, 11. Brigadeiros, 12. Peppermint Bark


We have a baker's dozen simple kitchen gifts that are kid-friendly and fun to make. Most require few ingredients and have a shelf life of at least a few weeks.

1. Roasted Almonds with Smoked Paprika and Lavender: A seductive snack for people who like a little spice in their lives.

2. Best Spiced Nuts: Make a double batch. Or triple. Trust us. Garam masala and Sriracha make these addicting.

3. Citrus Salt: Put lemon, lime, and orange rinds to good use in a terrific finishing salt.

4. Infused Honey: We haven't featured this before, but it's an easy one. Add spices or very dry herbs to a jar of honey. Let it sit for a week or two, then strain and enjoy. In years past we've made vanilla, sage, lavender, lemon, and more. Pictured above is this year's batch: star anise, cinnamon, cardamom, cinnamon, and vanilla.

5. Creamed Honey: Liquid honey plus a dollop of creamed honey yields a big batch of homemade creamed honey. This takes a few minutes on the stove top and then two weeks' waiting time. Next year I want to try making creamed honey from infused honey...

6. Butter, Straight Up and Flavored: Start with cream, or skip ahead and blend herbs, spices, and other seasonings into softened butter. Pack into molds or roll up into a log for a creative gift.

7. Preserved Lemons: This takes a few weeks, but it's mostly waiting-around-time. Be sure to include some tips on how to use this tasty condiment.

8. Perfect Play Dough: What better gift to give young friends? Make any color you fancy, mix in a little sparkly glitter, add scents — a wonderful gift to personalize.

9. Coconut Lime Sea Salt Scrub: A fun sensory project to make, and a big hit with our teachers last year.

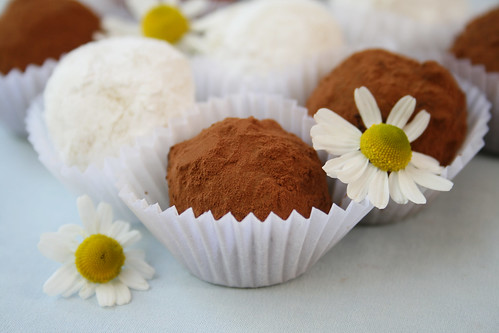
10. Fleur de Sel Bon Bons: This is a little messier than the other projects, but if you're up for it you and the kids will have a blast playing chocolatier in your kitchen.

11. Brigadeiros: Another slightly messy one, but messy stuff is usually the most fun. These delectable little candies disappear at parties — give a tray in little paper cups.

12. Peppermint Bark: A holiday classic, simple and delightful. Easy to make huge batches.

13. Vanilla Sugar: A super-simple bonus! Stick a vanilla bean in a jar of sugar. Done. It takes a few weeks for the flavor to infuse, but it lasts forever. It's a great way to extend the life of scraped pods too. (I get a pound of vanilla beans each year — that's about 100 — for $20 to $30 from this site.)

What are you making for gifts this year? We'd love to hear!

Thursday, April 26, 2012

Coconut Lime Sea Salt Scrub and More Kitchen Gifts for Teachers & Moms


Every parent I know is running around like a chicken with its head cut off this time of year. Spring sports schedules, a rush of field trips to chaperone, a string of special programs to attend at school... And don't forget about gifts for Teacher Appreciation Week and the grandmas for Mothers Day — both of which take me by surprise every single May.

The best gifts for teachers, grandmas, and other special people in your child's life of course are ones your child can help make. Extra credit goes to homemade gifts that are fast, simple, and fun.

I'm guessing that at this time of year, many teachers dream — as I am — of chilling on a tropical beach with something frosty in hand. I'd love to give my son's teacher a margarita, but this Coconut Lime Sea Salt Scrub probably is more appropriate. It gently exfoliates and moisturizes to get your skin beach-ready, and the scent transports you to the tropics. A little jar of this will help your hardworking teacher cope with the crazy final days of school.

Enlist your little one to help mix this glorious goop. It's technically edible, but I wouldn't recommend nibbling any. For better-tasting gifts kids can help make, a few of our go-to recipes:


Coconut Lime Sea Salt Scrub

Given the high salt content, this should last for at least a few months. I store homemade scrubs in the refrigerator to be on the safe side. This recipe makes about 3 cups. If you prefer a sugar scrub, swap brown or raw sugar for the salt and use equal amounts of oil and sugar. 

1 cup coconut oil
1/3 cup grapeseed, almond, or olive oil
2 2/3 cups sea salt
finely grated zest from 2-3 limes
squeeze of lemon juice

Gently heat the coconut oil in a saucepan or the microwave until it's just softened—you should be able to stir it easily. Stir in the grapeseed oil.

In a medium bowl, combine salt and lime zest. Stir in the oil and a squeeze of lime juice. (Because it's coconut oil, it will become much firmer when it's cool.) Package in cute jars and let your child decorate them.

To use, scoop up a bit of the scrub and rub on your fingers, feet, or body to exfoliate and refresh. Rinse thoroughly, especially if you use it on your feet!

LinkWithin

Related Posts Plugin for WordPress, Blogger...