Sunday, January 15, 2017

Butter Beer Our Way


Double Vanilla Butter Beer

We finally made it! D's 10th birthday was celebrated with a Hogwarts style dinner with a 3-course menu that made 16 kids really happy. But the highlight of the feast was not the food, or even the fantastic cake and jell-o extravaganza inspired on Aunt Petunia Pudding, but our interpretation of butter beer.

The mix was really easy to make and combined four delicious ingredients. The literal butter was "covered" by adding the whipped cream, looking like beer foam. To add mystery to the drink I added creamed honey as yet another mystery butter, which worked really fine, because the guests had to guess what was the "pretend" butter that was added to the mix in front of them. To celebrate a birthday or a grown-up cocktail party (just add 2 oz vanilla vodka to it), here's the recipe:

1/2 cup French Vanilla Ice Cream (TJ's)
4 oz Dry Sparkling Vanilla Bean
1/2 teaspoonTrader Joe's Creamed Honey
Dairy Whipping Topping (Berkeley Farms)

Add ice-cream to the bottom of a transparent cup, top with vanilla soda, add honey (the wannabe butter), stir with a spoon, and top with cream. Serve immediately. Enjoy!


Thursday, October 9, 2014

Jewel Yam Walnut Bread (and The Need to Bake)


It's already fall and I haven't posted for more than a season! Things got a little bit out of hand here with all summer activities, travels, volunteering, designing a new blog, and beginning of school. So I had to take a forced break - but not at all of cooking or developing recipes.

Darienne was the brave one who managed to post a wonderful thing in the middle of summer, a souvenir from Hawaii. And then, that was it. But then, faster than I thought, October arrived. Silently and not even the deciduous trees know it yet. Here in the San Francisco South Bay Area the weather is still on dog-hot days. And I needed to bake.

Yes, because above all, Autumn is, for me, is the baking season. I like to test new recipes, create my own, bake with the seasonal ingredients and... have a quiet baking morning while surfing the web sipping nice Italian coffee. So, in total disregard of the outside temperature, I wen there and baked my first seasonal bread: this time, with Jewel Yams.

The result of my experiment - based in one recipes from the web and one from my library- was moist, flavorful and silk-textured bread, perfect to eat for breakfast and to perfume the home wit its spices. I shared slices with friends, and kids suggested that I should cover it with dark chocolate. Which I will do soon for Halloween treats. It looks like it will be a wonderful combination.

Jewel Yam Bread
It's a very free adaption of Epicurious recently published Sweet Potato Bread with Caramel and Aleppo-Spiced Pecans and a Brazilian traditional recipe. 

1 medium jewel yam, baked and puréed (to make about 1 cup purée)
1/2 cup apple juice (I think orange juice would work as well)
2 large eggs
3/4 cup vegetable oil
1/2 cup coconut palm sugar
1/2 cup light brown sugar
1 teaspoon vanilla extract
1 teaspoon Korintje cinnamon (my favorite, but any good cinnamon will do)
1/4 teaspoon cloves
1/4 teaspoon nutmeg
1 1/2 cup all purpose non bleached flour
1 teaspoon baking powder
1/2 teaspoon baking soda
1 cup chopped walnuts (save a few to top the loaf)


Line a loaf pan with parchment paper (or grease it and flour it). Preheat oven to 325 F. In a bowl whisk jewel yam purée, apple juice, eggs, oil, sugars, vanilla and spices up to a very creamy and well blended mix. Add flour and baking powders on top and whisk again lightly on the surface to mix. With a spatula integrate the flour to the wet mix on the bottom. When mixed let it rest for about 5 minutes. Then add walnuts and finish mixing with spatula.  Top with some whole walnuts if you like, sprinkled with sugars. Transfer batter to pan and bake it for about 50 to 75 minutes or up to when it is golden on the top and a knife comes out of it clean.  

Wednesday, July 2, 2014

How to make souvenir sea salt


1407_CPE-salt-6 We brought home a special souvenir from our recent vacation: sea salt collected at our newest favorite beach.

The north shore of Kauai is one of our happiest places. We visit Hanalei Bay every year or two, swimming and snorkeling and waking up early to the sound of roosters.

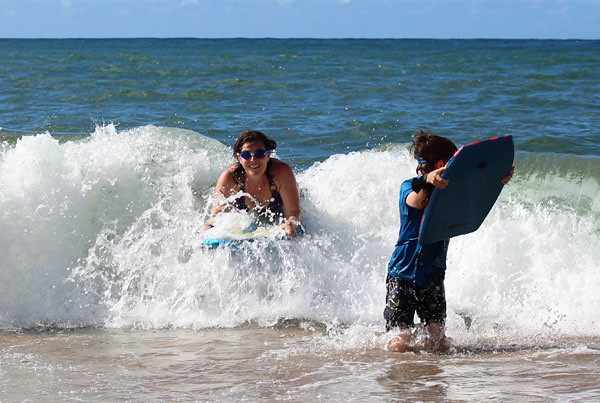
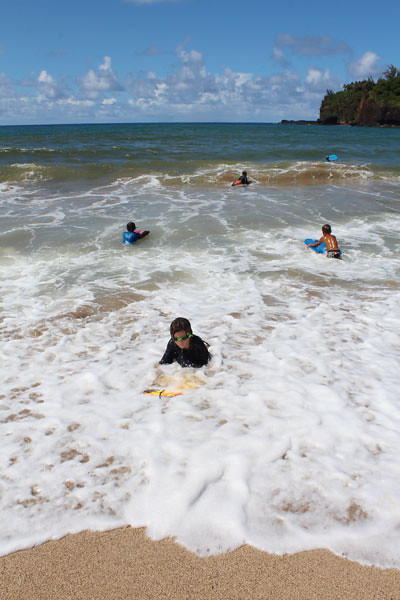
This year, we tried something new. One of my fantastic editors insisted we get boogie boards and head to Kalihiwai Beach, a beautiful little crescent of sand with a river running to the sea.

So we did. And it was all that she promised and more. My boys — often timid in the waves — took to the water like dolphins and rode the surf for days. My husband and I loved it too. I can't believe we waited this long to try it!

1407_CPE-salt-2

1407_CPE-salt-3
It was the perfect place to experiment with making sea salt. My 10-year-old son enthusiastically helped make two batches. He was so happy with the results he's added "making salt" to his grand plan for some sort of hybrid invention/manufacturing commune he expects to launch with his friends.

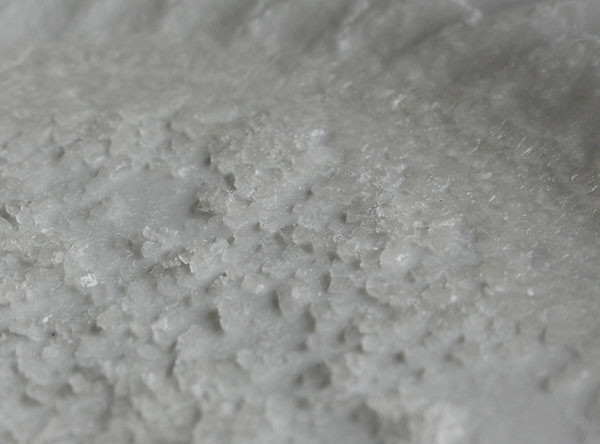
We ended up with large crystals of salt with a pleasantly briny bite. They'll make excellent finishing salt.

1407_CPE-salt-5

Harvesting salt is a simple process, provided you have a few resources: a container to carry salt water, something to filter the water, and a stove (or several weeks to let the water naturally evaporate).

A common sense warning up front: Only use sea water you think is reasonably clean. I'm no expert, but my feeling is that anywhere you're OK letting your kids swim and swallow a bit of water is probably OK for harvesting salt. And since flavors are unique to each location, be aware that your final product might be good, amazing, meh, or blech.

With that out of the way, here’s how we did it:

We filled empty bottles with ocean water. (From what I've read elsewhere, it's generally advisable to do this on a good-weather day.) Back at our room, we first poured the water through a paper towel-lined strainer and then through a coffee filter to remove sand, bits of seaweed, and other tiny debris. After the second straining, the water looked perfectly clear.

Next, we put the filtered water into a small pot and began boiling it on the stove top. Boiling of course speeds up evaporation, but it also kills any nasty things in the water. Since the Kalihiwai River flows into the bay where we gathered our batch, I wanted to be sure to eliminate any potential leptospirosis contamination.

Once the water was reduced by about half, I lowered the temperature and let it simmer until it was reduced by half again. Be careful not to burn the salt! Better to let it go too slow than too fast.
1407_CPE-salt-4

I poured out what was left into a shallow plate and put it in the oven on the lowest setting — for us, that was 170 degrees. I have no idea how long it took for the water to fully evaporate. It was at least a few hours. There's no need to baby-sit the salt. I simply turned the oven on when we were around, then turned it off when we went out for an adventure or turned in for the night.

Eventually the crystals were completely dry. We carefully scraped them loose from the plate, stirred them with a fork, and packaged them to take home.

Alternatively, you could set the salt water in the sun to dry, which can take weeks, or try a dehydrator. Make do with whatever you have.

We ended up with fairly large crystals, like kosher salt. And they're delicious. About five cups of sea water yielded about a third of a cup of salt.We sent some home with my mother, and took an itty-bitty amount home with us. But it's OK: We know how to make more.

1407_CPE-salt-1

LinkWithin

Related Posts Plugin for WordPress, Blogger...