Friday, April 30, 2010

Make It With Milk: Butter, Straight Up and Flavored

100429_CPE_butteronToastRedo

You've probably made butter before, perhaps in elementary school or at camp: Put some heavy cream in a jar and shake, shake, shake. And then you never made it again.

Time to revisit butter. This time, use the stand mixer. Whip up some butter, customize it with your favorite flavors, and stash the flavored, or compound, butter in the freezer. Slice off a bit to instantly perk up steamed vegetables, pastries fish, steak, great bread ... Minimal effort with elegant, great-tasting results. It's addictive. You can cheat and make compound butter by mixing your extras into store-bought butter, but how cool is it to present your own butter when having friends over for brunch?

My 6-year-old was cool to the idea of making butter -- been there, done that -- so my 3-year-old helped with this batch. We taste-tested the cream as it transformed into butter, and he helped mix in our extras. We made about 7 ounces of butter and split it into two logs: one with honey, cinnamon, and vanilla, and the other with garlic and basil. The 6-year-old was no more excited about the butter when his brother and I served up toasted homemade wheat bread with honey butter for an after-school snack... until he tasted it. "More! More!" Success.

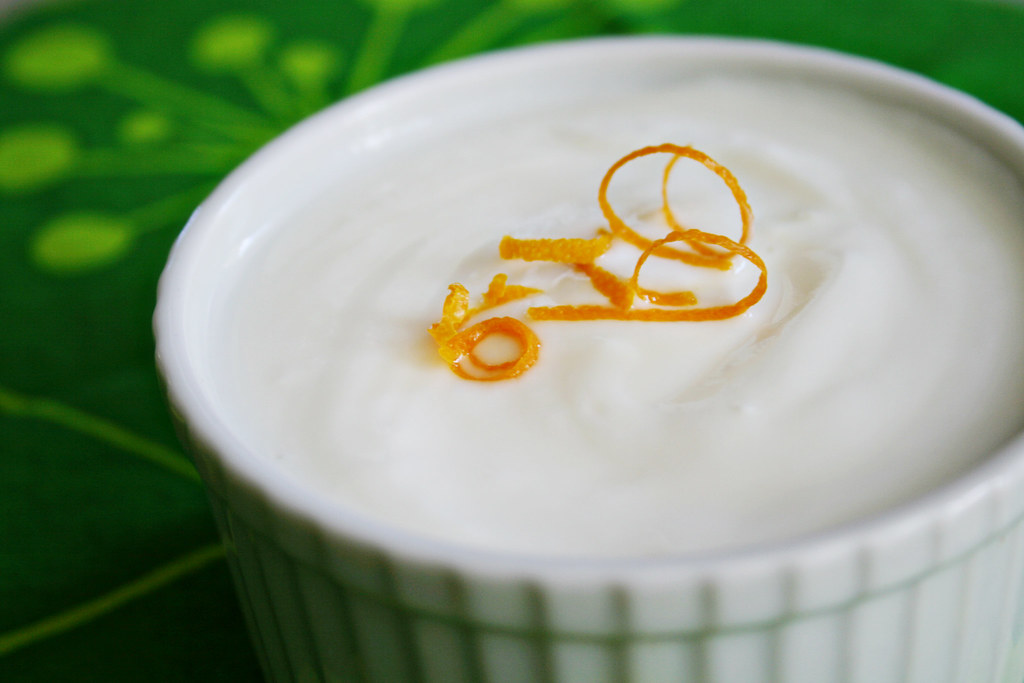
Last summer I added lemon verbena to the garden, and my summer obsession was a log of butter with verbena and lemon zest. I just got my hands on a full pound of wonderfully fragrant vanilla beans, and I suspect my next obsession may be butter with vanilla bean and rum. Or cardamom. Or both. Spooned into a steamy hot fresh popover. Mmmm.

Butter, Straight Up and Flavored

This is a small batch, yielding a little less than 7 ounces of butter, but you can double the recipe. A bit of salt greatly enriches the flavor -- I prefer unsalted butter generally, but homemade tastes better with a pinch. You can also make butter by shaking the cream in a jar, but I found that to be enjoyable exactly once. Your kids may feel otherwise.

1 pint heavy cream
pinch of sea salt

Pour cream into mixer bowl. Add a pinch of salt, or more to taste. Begin whipping the cream, at high speed. Stop occasionally to scrape the bowl and taste how the cream is changing, because it's fun.


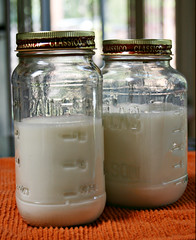
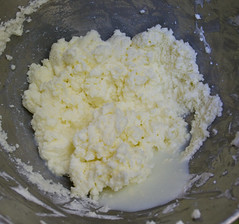
Once you have whipped cream, you're almost there: Keep going. The airy cream will collapse and condense, growing crumbly-looking and slightly yellow. When you see a bit of liquid separating in your bowl, you're there.

Pack the butter into a ball. Knead it and wash in cold water to rinse away the so-called buttermilk. (This is not the buttermilk you cook with!) Keep washing until the water runs clear. Your butter is ready!

If you're flavoring your butter, mix in your goodies now. (See variations below.)

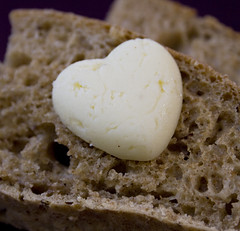
Spoon the butter into a strip along the a sheet of parchment and then roll it up, much like rolling sushi. A sushi mat would work wonderfully with this, but I make my rolls nice and tight by folding it over and pressing the opposite edge tight with a dough scraper. Twist the ends to close, and store for a week or so in the refrigerator or a few months in the freezer. Just slice off coins when you need them. Alternatively, you can pack the butter into ramekins, small dishes, or candy molds.

For flavored butter:
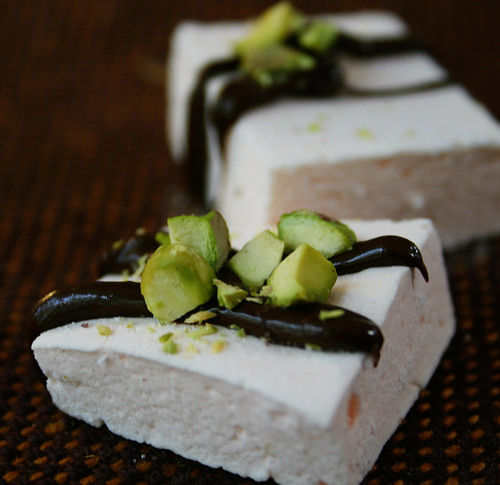
Options include herbs (I use fresh herbs, but make sure they're dried well), garlic, pepper, vanilla bean, flavor extracts, honey, spices, citrus zest, rum, blue cheese, caramelized onion, sun-dried tomato, chipotle chile, vinegar, and much more. Add to softened butter, mix it in, and wrap and store your butter. If you have a favorite mix-in to share, I'd love to hear it. I'm turning into a butter junkie.

Wednesday, April 21, 2010

Playdate Special: Black Eyed Peas for Picnic

I had this vision of a beautiful early Spring picnic table with some vivid  colorful touches: two salads, a well seasoned ceviche - and a winner dessert to comfort the kids, after so many novelties.
Perhaps I was too ambitious. On the day before the picnic I printed all consumer guides from Monterey Aquarium just to find out that my local stores and chain supermarkets didn't have any of the recommended fish suitable to my unusual menu.
So, I thought about two alternatives: Portuguese sardines or a good brand salami to go on the side and accompany the Latin American style black eye pea salad. And some simple pasta salad to make sure the kids would eat. Something.
The final result was somehow predictable. While pasta salad made of mini-farfalle Piccolini, asiago cheese infused in olive oil and rosemary,  and fire-roasted tomatoes was easily accepted by most of the kids, beans were abandoned on the side of the plates.
But as I love black eyed peas and think someday they will be as popular with my kids as the  homonym music group, I will share the recipe. I understand that some people just think salads don't deserve a recipe, but trust me on this one: Sometimes the combination of flavors and textures is what makes a side dish to shine.
The dessert was, as I said, a winner. Who would not go for a chocolate shell filled with goodies on a sunny day? 

Black Eyed Peas Salad

I used freshly cooked black eyed peas, prepared in my beloved pressure-cooker. I believe that canned beans will work too, as far as they marinade one night before in the spices to loose that odd salty water taste.

6 cups cooked black eyed peas, drained
1 medium sweet tomato chopped, with seeds
1/4 cup red pepper, chopped
1/4 cup yellow bell pepper, chopped
1/4 cup orange bell pepper, chopped
3 tablespoons extra virgin olive oil
1/4 cup red onion, chopped
2 tablespoons lime juice or vinegar
1 tablespoon cilantro, chopped
1 teaspoon sweet basil (Mexican Albahaca, Ocimum Basilicum)
Ground Black Pepper to taste
Kosher salt to taste

Mix all ingredients well in a bowl and let it stand in the fridge overnight. If wanted, serve it with sardines in olive oil or salami on the side.


Vanilla Ricotta Cream for Chocolate Dessert Shells

I bought those wonderful Dobla dark chocolate Belgium dessert shells from World Market. It took me some days to figure out what to fill them with. The recipe that follows is a simple pudding that can be useful to go with fruit salads or pies.

1/2 cup heavy cream
1/ tablespoon brown sugar
1/4 cup ricotta cheese
1 teaspoon vanilla


Whisk cream well with sugar up to a creamy texture and than integrate  ingredients ans refrigerate for about 2 hours up to the time to serve.

Monday, April 19, 2010

Make It With Milk: Homemade Yogurt

100419_CPE_yogurt

Stay with me here: I'm trying to convince you to make yogurt. And cheese. And butter. Trust me, I'm no Martha. I don't need to make more work for myself. But this little series on cool things you can make -- easily -- from milk is a fun way to try some kitchen science with your kids, and make a few discoveries yourself.

First up is yogurt. It's versatile, it's delicious, and it's ridiculously easy. You need only two or three common ingredients, and the only special equipment required is a thermometer. Hands-on time is minimal, and kids can help. Basically, you heat up milk, add a bit of yogurt as a starter and perhaps some powdered milk, then incubate it -- keeping it warm for several hours.

The trickiest part is rigging an incubator to keep the yogurt warm. Some people keep it at room temperature, but that hasn't worked for me. I use recycled jam or sauce jars, swaddled in towels and set atop a heated mat (it doubles as a seedling warmer). To keep curious kids from shaking the jars and keep in the heat, I invert a stock pot over them. Other options:
  • Keep the yogurt warm in a crock pot;
  • Swaddle your jars with towels;
  • Set the jars in the oven with the pilot light on;
  • Put the jars in a cooler filled with hot water;
  • Buy a yogurt maker, if you really like buying unnecessary gadgets.
The only other challenge is figuring out how long to incubate your yogurt. It might be ready in three hours or 10. Trial and error is the best way to find what you like. Keep in mind that your yogurt will grow increasingly tart the longer it incubates, and that it will firm up further once it's chilled for a few hours. For your first batch, you might want to use several small jars, removing them from your incubation setup at different times to compare taste and consistency.

Have a favorite way to enjoy yogurt? I love it added to oatmeal, used in pancakes or muffins, and with fruit. If you need fresh ideas, check out this inspired in-progress compilation of 101 ways to dress up plain, unsweetened yogurt.

Homemade Yogurt

Whole milk and whole-milk yogurt yield a thicker, creamier finished yogurt. If you use skim or low-fat milk, you can thicken it by adding powdered milk or straining the finished yogurt for a few hours. I've done both, and am happy with the results.

4 cups milk (whole, low-fat, or skim -- see note)
2 to 4 tablespoons plain yogurt with live cultures (I've used Trader Joe's and Nancy's organic nonfat yogurt)
2 tablespoons nonfat dry milk powder (optional)

Heat milk in small, thick-bottomed saucepan, keeping a thermometer clipped to the side. If you're using powdered milk, stir it in. (I prefer not to stir the milk as it warms, which means a little more work later scrubbing the pan but less time standing over the stove.) Heat the milk to 185 degrees, then turn off the burner. Leave the pot on the stove until it cools to 110-120 degrees, about 45 minutes.

Meanwhile, put your jars and lids into a large stock pot, cover with water, and bring to a boil. Cover, turn off heat, and let sit until ready to use.

Spoon a cup or so of warm milk into a small bowl and gently whisk in the yogurt. Add this mix to the milk in the pot and stir. Pour mixture into jars, secure lids, and set up your jars for incubation. Then leave them alone! Shaking and stirring will disrupt the process.

Begin checking your yogurt at three hours, but you might want to let it sit for as long as 10. Stir your finished yogurt and chill in the refrigerator for two hours to overnight. It's good for at least a week in the refrigerator. Save a few tablespoons to start a new batch (you can save it in the freezer).

Friday, April 16, 2010

Tips and Gadgets: Under Pressure

It might be a bit noisy, sometimes even intimidating. Little black cat Juju goes crazy when it starts whistling. But this is one of my favorites tools in the kitchen: A pressure cooker.
From the everyday black beans to the occasional brisket, I use a ten year old  Italian pressure cooker for virtually all soups, stews and complex casseroles. It reduces any cooking process by a third of the normal time on a common pot, and maintains all vitamins and minerals inside, and straight to our plate. Not to mention the low energy consumption.
Throughout the years - I got one as a wedding gift from my mother in law-, I learned how not to to be scared by its music. Mine doesn't have the pressure clock and the rubber, like my grandmother's outdated one, and it is pretty safe.  I read that the current models are very silent, and even more efficient than the one I have. This evolution is a ongoing process since 1679,  when a creative French man created the first model of pressure cooker.
One small piece of advice: to make sure it will work well and safely always read the manual. But some good old tips to facilitate its use: always let it stop releasing pressure before considering opening it, and if in a hurry, take its pressure under running water on a heat-proof kitchen sink.

Everyday Black Beans Brazilian Style


4 cups overnight soaked black beans (with no water left from the soak)
1 tablespoon olive oil
4 stripes smoked uncured bacon or chopped smoked kielbasa (optional)
1 teaspoon bay leaves
1 teaspoon chopped garlic
Fresh water, enough to cover the beans plus 3 more inches

Heat olive oil. Add bacon or kielbasa (if chosen), garlic, bay leaves and let all fry for some minutes. Add black beans, stir and top with water, filling up to 3 inches up the beans. Cook on medium heat and when whistle begins lower heat for 30 minutes. Enjoy the most simple everyday black beans Brazilian style over California white long rice. 

Tuesday, April 13, 2010

Second Helping: Artichoke with Dark Dressing

Gone were the days when finding a good artichoke was a very rare treat. Here, in California, the exquisite flowers abound at this time of the year, and the best part of this happy climatic and geographic situation is that they can be found easily. Before being so lucky to be so close to Castroville, where most of the produce comes from,  I tried the delicious artichoke with many dips, such as mayonnaise sauce or French style vinaigrette.
My mother serves it, during the winter, with melted butter. What a delicious memory. Sometimes she will prepare a rosé dressing, combining mayonnaise, ketchup, cognac and mustard. She pairs it with cold dry white wine, a combination that I will always relate to my mom's fine taste for delicate flavors.
On Sunday, miles away from my parents home, I wanted to try something different, and made this special dressing. It is the kind of multicultural fusion that pleases and provokes my palate. And the kids were also interested on trying that beautiful combination and the chocolatey color of the dressing and the sensation of eating petals of a beautiful and unusual Mediterranean flower.


Artichoke with Dark Dressing

Prepare the artichoke as you prefer, or using these simple tips here from Simply Recipes. This time I  tried a different method. I first roasted them upside down in a Le Creuset pot with kosher salt and olive oil on the top and water in the bottom. It took more time than I thought - the usual 25 minutes  when using the pressure cooker - and I had to finished the process on the stove top up to when the leaves were soft enough.

1 tablespoon Japanese reduced sodium soy sauce
1/2 to 1 tablespoon Italian balsamic vinegar (Modena), depending on your taste for acidity
1 tablespoon Italian or Greek extra virgin olive oil
2 tablespoons water at room temperature
1/4 teaspoon California garlic powder (or 1 teaspoon fresh grated garlic)
1/4 teaspoon fresh ground black pepper
1/4 teaspoon dried tarragon

Mix all in a small bowl at least about one hour before serving for the flavors to infuse. Use it as a dip for the petals fleshy parts and as a perfect companion for the artichoke heart.

Wednesday, April 7, 2010

Orange, Chocolate & Pistachio Marshmallows

IMG_4813_2

Yesterday, I featured cake towers topped with homemade marshmallows. Today, I have an elegant treat that updates marshmallows for more grownup tastes (though you won't be able to keep the kids away from them either.) Orange-flavored marshmallows topped with ribbons of chocolate and chopped pistachio are a perfect mix of sweet and salty, smooth and crunchy.

Unlike yesterday's recipe, these marshmallows -- adapted from Alton Brown -- don't have egg whites. I prefer the taste of these: They're more dense, but the texture is silky smooth and less gooey. They also held up better after a few days of storage. That said, yesterday's recipe is plenty tasty, fluffy, and easy to spread smoothly, better suited to the sculptural quality of the cakes. If you want a smooth, even layer of marshmallow, go for the egg white version. But if you don't mind idiosyncratic marshmallows, try these. (Fair warning: These are also much stickier to make, and to clean up after.)

One of the pleasures of homemade marshmallows is flavoring them to suit your own taste. Basic recipes call for adding vanilla extract near the end: Substitute anything you like. Here, I use orange.

IMG_4812_2

Orange, Chocolate & Pistachio Marshmallows

The basic marshmallow recipe is adapted from Alton Brown. It's a sticky process, but great fun!

3 packages unflavored gelatin (such as Knox)
1 cup cold water, divided
1 1/2 cups sugar
3/4 cup light corn syrup
1/4 teaspoon kosher salt
1 teaspoon orange extract
1/4 cup confectioners sugar
1/4 cup cornstarch
1/2 cup chocolate (semisweet or dark)
1/4 cup pistachio nuts, shelled and chopped

Lightly oil the bottom and sides of a 9x13 pan. Combine the confectioners sugar and cornstarch and dust pan with mixture. In the bowl for your mixer, pour in 1/2 cup of cold water and sprinkle gelatin on top. Let it sit so the gelatin softens and blooms, about 15 minutes.

In a small saucepan, combine remaining 1/2 cup of water, sugar, corn syrup, and salt. Cover and set over medium high heat and cook for 3 to 4 minutes. Uncover, clip candy thermometer to the side, and continue cooking until it reaches 240°F (this can take 8-10 minutes). Take the pan off the heat.

Start the mixer on low speed and carefully pour the sugar mixture over the gelatin. Beat on high speed until the mixture is white, thick, and about tripled in volume (about 10-15 minutes). Add the orange extract during the last minute of mixing.

Pour marshmallow mixture into the pan, spreading it as evenly as possible. Dust the top with remaining sugar and cornstarch mixture. Let marshmallows sit for four hours to overnight. Once the marshmallow has set, you can remove it from the pan by loosening the edges with a thin knife and peeling the marshmallow block out, or inverting the pan.

Dip a pizza cutter in remaining sugar and cornstarch mixture, and use it to slice marshmallows into 1-inch pieces. Dip cut sides of marshmallows in sugar and cornstarch and set on wire rack over waxed paper.

Melt chocolate using either a double boiler (melt chocolate in glass of metal bowl set over saucepan of boiling water) or the microwave (1 minute at half power, stir, and repeat until melted). Drizzle melted chocolate over marshmallow squares and sprinkle with chopped pistachios.

Tuesday, April 6, 2010

Playdate Special: Marshmallow Cake Towers

Homemade marshmallows are wonderful to make with kids. They probably have no idea what marshmallows are made of -- most grownups don't either. (The answer: gelatin, sugar syrup, and flavoring. The bags at the store also have artificial color, flavor, and other stuff.)

Spring vacation week is a great time for some kitchen science with the kids. I have one recipe for you here, made with egg whites, and an egg-free version coming tomorrow. Whip up a batch or two, and have a family taste test -- how do homemade marshmallows stack up against store-bought sweets? (Here's our review.)

Homemade marshmallows are divine enjoyed alone, but they are easy to turn into deceptively elegant treats. Today we have towering cakes that will thrill your kids (and you!), and tomorrow I have a dessert that will give the most skeptical grownups a new appreciation for this simple confection.

Don't be intimidated by the length of the instructions. Once you try it, you'll realize just how easy it is. You need only two pieces of special equipment: a candy thermometer and a standing mixer. Don't attempt this by hand. You can try using a handheld mixer, but it might not be up the task.

IMG_4733_2

Marshmallow Cake Towers

This marshmallow recipe is adapted from Smitten Kitchen. The marshmallows need to be made at least a few hours ahead; leftover marshmallow can be stored in an airtight container for a few days.

For marshmallows:
canola oil
1/2 cup confectioners sugar, divided
3 1/2 envelopes unflavored gelatin (such as Knox)
1 cup cold water, divided in half
2 cups sugar
1/2 cup light corn syrup
1/4 teaspoon salt
2 egg whites
1 tablespoon vanilla extract
1/4 cup cornstarch

For cakes:
9x13 yellow cake, baked and cooled (use your favorite recipe, from scratch or a box)
1/2 cup fruit preserves (any flavor -- I used cherry)
fresh fruit, chopped, for garnish (I used mango, strawberry, and kumquat)

To make marshmallows:
Lightly oil the bottom and sides of a 9x13 pan and dust with 1/4 cup confectioners sugar, shaking out excess. In the bowl for your mixer, pour in 1/2 cup of cold water and sprinkle gelatin on top. Let it sit so the gelatin softens and blooms, about 15 minutes.

In a small saucepan, combine remaining 1/2 cup of water, sugar, corn syrup, and salt. Clip a candy thermometer to the side. Stir over low heat until the sugar is dissolved. Increase the heat to medium heat and bring to a boil, without stirring, until it reaches 240°F (this can take 10-15 minutes). Take the pan off the heat. Carefully pour the sugar mixture over the gelatin in the mixer bowl and stir to dissolve the gelatin. Using the mixer, beat on high speed until the mixture is white, thick, and about tripled in volume (about 6-8 minutes).

In a separate bowl, with clean beaters, beat egg whites until they hold stiff peals. Beat whites and vanilla extract into the sugar mixture until combined. Pour the mixture into the prepared pan. Combine remaining 1/4 cup confectioners sugar and cornstarch and sift over the top. Set it in the refrigerator, uncovered, for at least three hours and up to one day. Once the marshmallow has set, you can remove it from the pan by loosening the edges with a thin knife and peeling the marshmallow block out, or inverting the pan.

To assemble cakes:
Level the cake. Use a cookie cutter (round, square, or diamond work well) to cut out cake pieces. Clean and dry the cookie cutter, dip it into confectioners sugar, and use it to cut out identical marshmallow pieces. Spread fruit preserves on top of each piece of cake. Place marshmallow cutouts on top of preserves, then top with fruit.

Friday, April 2, 2010

Small Bites Week : Pixie Chocolate Tartelettes

Those pieces of temptation are really tiny. But their taste is just huge. The inspiration to make those came when my dear cousin Andrea sent me this recipe of a Chocolate Torte that is considered by the family a favorite.

I could not wait to test and taste it, and even though I was very busy, I baked some for our potluck last Friday, mainly to try the filling. And now I can't wait to prepare the famous "Torta Luis Alberto" comme il faut  for the next big party here.

So, to cut a long story short,  I used ready frozen pie crust, the best in the market that includes nothing but flour, palm oil, butter and salt. And shaped them into mini-muffin trays, adding the filling later. The testers were all happy: Kids wanted more, while parents were happy to check out the wonderful combination of chocolate and whiskey. Tempted now?

Pixie Chocolate Tartelettes (Auntie's Regina Filling)

You probably can choose any good recipe of home made pie crust, or appeal for a emergency plan: The frozen solution. I used frozen Trader Joe's Pie Crust, amazing. My choice for chocolate were Ghirardelli baking chips. Also, I divided the recipe into two batches: one with whiskey for people over 21 years old and one without, of course, for the kids.

1 pie crust
3. 2 ounces bittersweet chocolate, melted in double boiler
3.2 ounces milk chocolate, melted in double boiler
2 cups heavy cream
1 tablespoon Scotch whiskey (optional)
2 egg's yolks
2 eggs whites, beat into soft peaks
1/3 envelope unflavored gelatine (Knox), diluted in 1/2 cup hot water

Cover mini-muffin cups with a fine layer of pie crust. Bake as directed by packet or when golden. Set aside. In a double boiler melt both chocolates. Pour into a bowl and mix at low speed with cream and yolks. Add whiskey and water with diluted gelatin. Beat egg whites to soft peaks and fold in chocolate mix at the very end of the process. Fill mini-muffin cups with pastry with enough chocolate mix to reach close the to the edges. Bring to the fridge and cool for about 4 to 5 hours.

LinkWithin

Related Posts Plugin for WordPress, Blogger...