Monday, December 27, 2010

The Kids Cook Monday: Their Favorite Salad

This post is a mix of a "few of our favorite" recipes and one that can symbolize what the campaign for the Kids Cook Monday aims for: A healthier diet and making a contribution for our kids to be able to like and even make foods that are (unfortunately) excluded from the average kid's menus.
Here's a toast for one of the simplest, yet successful, recipe I shared in this blog in 2010. Later after I made it with our playgroup friends, this recipe and step to step guide was shared with about 60 kindergarteners and first graders of my son's school. It was my first project for their Wednesday Cooking Club, where I currently teach hands-on recipes once a week with two enthusiastic volunteers and one amazing school teacher.
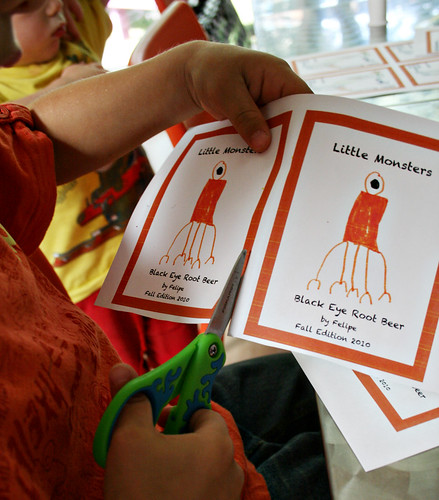
During three weeks we witnessed how kids minds are so opened to try out something new - and how their participation on the prep can make a difference. The result was amazing: few leaves of Romaine lettuce were abandoned on the plates. The resemblance with a classic "grown up" Caesar Salad, the happiness to find out that they could use scissors to cut, the wonderful aroma of the croutons coming from the oven - all made the kids curious to try the salad. And some were so proud that they wanted to bring the recipe home to share with their family.
Scissors Salad


Croutons:
4 slices wheat bread
Garlic powder, to sprinkle
Grated Parmesan cheese, to sprinkle
Olive Oil Spray

Salad
5 large leaves of Romaine (or 10 hearts) of Romaine lettuce
Cherry tomatoes, if in season, (to taste)

Dressing:

1 tbsp olive oil
2 tbsp apple juice
1/2 tsp garlic powder
1/4 tsp dried basil or other herb
1 tsp mustard
1/4 tsp salt
1/4 tsp fresh ground pepper (optional)

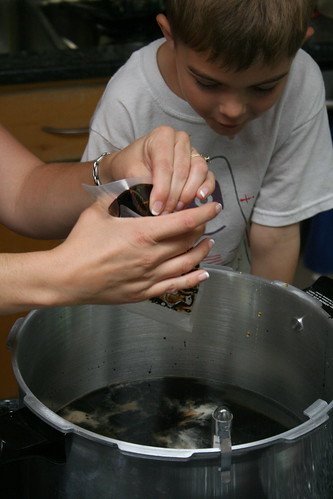
Invite the kids use their very well washed craft scissors to cut the bread to small squares. Show to them how to spray olive oil on the bread pieces, and ask them to sprinkle it with garlic powder and Parmesan cheese. The scissors will be used to chop the Romaine leaf and will leave it on the side in a bowl. In the meantime toast the croutons in a 350 F pre-heated oven for about 7 minutes. In a small bowl let them measure and mix the ingredients for the dressing. They can now prepare their final salad, dressing it up, adding the homemade croutons Have fun! And a Happy and healthy new year!

Wednesday, December 22, 2010

A Few of Our Favorite Things: Persimmon and Fennel Salad

091204_persimmon salad_3

I'm already looking ahead to detox after the holidays. This refreshing salad has great crunch and just the right touch of sweetness -- a welcome break from the hearty meals and sweets we indulge in this time of year.

The original recipe calls for preserved lemons, but fresh lemons can be readily substituted. If you like this, though, I recommend starting a batch of preserved lemons for the future. They're fantastic in salads!

Be sure to use Fuyu persimmons, which are round and best enjoyed on the firm side. The heart-shaped hachiya persimmons need to be very ripe and soft, and won't work here. Fennel is also known as sweet anise. You'll need the bulb and fronds for the salad; save the leftover stalks to serve with dip, like celery.

Persimmon and Fennel Salad

You probably won't need to add salt if you use preserved lemons (recipe below).

1/2 preserved lemon, rinsed well and diced, or grated zest from 1/2 a lemon
juice of half a lemon (Meyer, if you have one)
1 tablespoon olive oil
1 fennel bulb
3 Fuyu persimmons
salt and pepper to taste
2 ounces baby spinach

Combine preserved lemon or zest, lemon juice, and olive oil in a large bowl. Whisk to combine.
Wash fennel bulb and remove any tough outer layers. Cut the stalks and fronds just above the bulb and set aside. Cut bulb into quarters and remove the tough core. Thinly slice fennel and put in a large bowl.
Peel persimmons and cut into eighths; add to bowl.
Stir gently, taste, and add salt and pepper to taste.
Serve on top of baby spinach leaves and sprinkle with chopped fennel fronds.


Preserved Lemons

Use organic lemons -- you eat these peel and all, and it's worth the trouble to find ones that haven't been sprayed.


organic lemons (Meyer are especially good, but any kind will work)
kosher salt or coarse sea salt
large jar with tight-fitting lid
optional spices: cinnamon stick, cloves, cardamom pods, bay leaves, coriander seeds, fennel seeds, peppercorns

Be sure to have enough lemons to fill your jar, plus extras for juice.
Sterilize your jar and lid by boiling in water for 10 minutes.
Scrub lemons well. Cut away any stems. Slice the lemons almost completely in half, but not all the way through. Make another cut, perpendicular to the first, so you've cut the lemons nearly into quarters. Pack the cuts with salt and put lemons in the jar. Pack firmly! Add any spices, if you wish, and add enough lemon juice to completely cover the lemons.

Shake the jar every day or two to evenly distribute juice and salt. As lemons soften, add a few more.

After a month, your lemons are ready! They're very salty: Rinse before using, and taste before adding more salt to a dish.

I've been assured the jar never needs refrigeration, but I stick it in the fridge after opening it. The pickling juice can be reused over the course of the year.

Monday, December 20, 2010

Kids Cook Monday: The Best Spiced Nuts

20101209_spiced nuts_1


These might have too much sugar to qualify as a purely healthy contribution for The Kids Cook Monday campaign, but they sure beat all the other holiday sweets lying around.

I first made these nuts a few years ago as a Christmas gift for my mother. They're now the only kind of seasoned nuts I make because, as the recipe's genius creator notes, they are the best spiced nuts.
How good?
  • The kids can't stop eating them.
  • One dad says he wants two things when he retires, and one of them is to have these nuts every day. (I didn't find out what the other thing is, because he was too distracted by the nuts.)
  • I lost the original recipe, but when I saw it re-posted at The Hungry Tiger, I did a little dance and ran to share the news with my husband.
That's how good they are.

The flavor is nuanced and addictive. The secret is the Thai hot sauce Sriracha and garam masala, a seductive Indian spice blend. (Think cumin, cinnamon, cardamom...) If you can't find it in a store near you, you can easily mix your own. There are lots of recipes for it, but this one relies on readily available spices you may have on hand. If you're looking for more of a project, there are countless recipes online for toasting your own seeds.

The two kids I recruited to help loved running the stand mixer and smelling the vibrant, colorful seasonings. Kids can help with every step except sliding the nuts off the hot cookie sheets. This comes together quickly and makes a great holiday gift -- I'm bringing another jar home for the holiday. Here's the recipe, courtesy of The Hungry Tiger.

Best Spiced Nuts

I decrease the sugar by just a few teaspoons because I can't help trying to de-sugar the kids. This makes about 6 cups.

Raw, unsalted walnuts, pecans, and/or almonds
2 egg whites
1 tablespoon olive oil
3/4 cup of white sugar
2 teaspoons salt
2 teaspoons garam masala
1 tablespoon paprika
1 teaspoon Sriracha or other hot sauce
1 teaspoon soy sauce

Preheat the oven to 325 degrees. Line two cookie sheets with parchment paper (don't skip this; this mixture can make a mess of a baking pan).

Beat the egg whites until they're foamy but don't hold a peak. Add everything else except the nuts, and mix together. Now start piling in the nuts, and stir to coat them well. Kids who like getting messy might enjoy using their clean hands to do this part.

Spread the nuts on the parchment-lined baking pan in a single layer. If you have leftover coating in the bowl, toss in more nuts to coat and add them to the pan.

Bake the nuts for about 30 to 40 minutes — start checking them at 25 minutes or so. When you take them out of the oven, slide the parchment and nuts right onto the counter or a rack. Wait a few minutes so that they aren't painfully hot and steal a little nibble. Leave the rest alone until they cool completely, then break them up into pieces.

Store in an airtight container so they stay crisp. I left some sitting out a little too long and they got gooey; 20 minutes in a 200 degree oven crisped them up again.

Friday, December 17, 2010

A Few of Our Favorite Things: Chestnut Sage Soup

IMG_6494This is a surprisingly delicate, complex soup, sweet and savory, with nice texture. It can easily be the star of a holiday meal.

How much work it is depends on the chestnuts: Vacuum-packed chestnuts from a jar are a perfectly acceptable shortcut, one I recommend. Fresh chestnuts are lovely, but peeling them is quite a project. You can peel them ahead of time and freeze them until it's time to make the soup.

Chestnut Sage Soup

Adapted from Jerry Traunfeld, The Herbal Kitchen

This is a lot of work if done all at once. If you don’t buy peeled chestnuts, I heartily recommend peeling them in advance and freezing them until you need them. The diced bacon also can be cooked ahead of time, to save on-the-spot prep.

Serve with a simple, straightforward main dish, such as roast chicken.

1 pound chestnuts, fresh in their shells, or 1/2 pound dried chestnuts, or two 7-ounce jars vacuum-packed peeled chestnuts
1 medium onion, chopped
1 ½ cups celery, sliced
1 tablespoon unsalted butter
4 cups vegetable broth
¾ cup apple cider or apple juice
¼ cup sage leaves, fresh, coarsely chopped
1 bunch thyme sprigs, tied with string
2 bay leaves
¼ teaspoon vanilla extract
½ cup half & half
¼ cup sherry, dry or medium-dry
dash kosher salt
dash ground pepper
2 ounces bacon or pancetta, diced
1 tablespoon sage leaves, chopped
½ apple, unpeeled, cored and diced

If using fresh chestnuts, bring a saucepan of water to a boil. Carefully cut the chestnuts in half with a sharp knife and put them in the freezer for 10 minutes. Add the chestnuts to the boiling water; boil for 8 minutes, then drain. Squeeze each half to pop out the meat, along with the dark brown pellicle surrounding it. This is much easier to do while the chestnuts are hot; you might want to do this in batches. If using dried chestnuts, bring a large pot of water to a boil. Add the chestnuts and simmer 10 minutes, then remove from heat and let soak for an hour. Vacuum-packed chestnuts can be used straight from the jar.

Cook the onion, celery and 1/4 cup coarsely chopped sage in a large saucepan over medium heat, stirring frequently, until onion and celery are soft, about 5 minutes. Stir in all but 1/2 cup of the chestnuts along with the broth, cider, thyme, and bay leaves. Cover and simmer over very low heat for 45 minutes. Remove and discard the thyme and bay leaves; stir in vanilla.

Puree the soup in batches in a blender (be careful not to overfill) until very smooth. Pour back into saucepan, stir in cream and sherry, and reheat to simmering. Add salt and pepper as needed.

Cook the bacon in a medium skillet — don’t let it get crisp. Drain excess fat, then add in the reserved chestnuts and cook another minute. Stir in apple and cook until warmed through.

Spoon soup into bowls, topping each with the apple-chestnut garnish.

Thursday, December 16, 2010

A Few Of Our Favorite Things: Chicken Cordon Bleu with Sundried Tomatoes and Shallots

Irresistible, crunchy, smokey, and with some cheese melted in its core. This is an easy and delicious way to have a break from the holiday staples, yet a classic way to enjoy chicken at its best. It's a kid-friendly dish and it might be a chance for introducing other flavors to a good-looking plate.

I will prepare it again this week - and probably will add a nice seasonal touch to it. It might be some cranberry goat cheese to substitute for the dried tomatoes and Swiss cheese. Either way, just the thought of it makes me feel like preparing and enjoying it soon.

Chicken Cordon Bleu with Shallots and Sun-dried Tomatoes

I used julienned sun-dried Roma tomatoes conserve and fresh shallots for the main personalities of this stuffing.

4 skinless and boneless breasts of chicken, butterflied
4 slices mesquite turkey
4 slices Swiss Gruyere cheese
1 medium shallot, thinly chopped
4 tablespoons sun-dried tomatoes in olive oil, thinly chopped
Kosher salt to taste
Freshly ground pepper
1 egg, beaten
1/2 cup water, added to the egg
1 cup flour
1 cup panko (or normal breadcrumbs), to coat rolls

After butterflying each chicken breast, sprinkle both sides with salt and pepper and cover both sides with plastic food wrap. Pound each side with the flat part of a pounder until the chicken is about 1/4 inch thick. Remove plastic from one side. Cover chicken with one slice of Gruyere cheese and one of smoked turkey. Spread mix of sun-dried tomatoes and shallots over turkey. Firmly roll the chicken breast with the help of the remaining wrapping plastic. Tuck in the edges and keep it held together tightly with the plastic. Repeat for each breast. Refrigerate rolls for at least 1 hour.

Preheat oven to 400 F. Beat egg with water. Remove plastic wrap from chicken, and coat rolls with the egg mix, a layer of flour, and then panko (or regular breadcrumbs). Roast for about 30 minutes on the middle rack of oven. Make sure the core is cooked, and slice the rolls. Enjoy with your favorite veggie as a side.

Tuesday, December 14, 2010

Second Helping: Fast, Easy, Fantastic Peppermint Bark

20101210_CPE bark_1

This is the point in the holiday season when I cull my list of good intentions and, for the sake of sanity, toss aside any plans that would cause more stress than joy.

Cutting out and decorating sugar cookies didn't make the final list. Practicality demanded quick, easy sweets, like peppermint bark.

If you've only had peppermint bark out of a box, you might be embarrassed to find out you paid way too much. You need only two ingredients: peppermint candy and chocolate.  I'm starting you off here with the simplest preparation, and then layering on the fancy for those of you who aim high.

Peppermint Bark

This simple, addictive treat is fun to make with kids and is a great gift for neighbors or lunch box treat. A few tips: To crush the candies, pulse them in a food processor or put them in a heavy, sealed plastic bag on the counter, cover with a towel, and crush with a mallet or rolling pin. I usually sift out the resulting powder and stir it into the melted chocolate. Freezing the candy canes for an hour makes it a little easier. The amounts given are just guidelines; adjust proportions to suit your taste. Finally, be sure to use baking chocolate rather than chips, which don't melt as smoothly.

8 oz. semisweet or dark chocolate
6 candy canes

Cover a baking sheet with parchment or waxed paper. Melt the chocolate in a double boiler or the microwave (cook at 50% power for 1 minute at a time, stirring in between, until melted). Pour the chocolate onto the prepared baking pan, spreading it evenly. Sprinkle crushed candy on top and refrigerate until firm. Break up bark and keep refrigerated in an air-tight container.

Fancied-up variations

Glossy: Stir a teaspoon or so of vegetable oil into the chocolate for added shine.

White Chocolate: Substitute white baking chocolate for the semisweet or dark chocolate.

Extra Minty: Add a dash of peppermint extract to the melted chocolate.

Two-Tone: Melt 8 ounces semisweet or dark chocolate and pour into baking pan; refrigerate 30 minutes. Prepare rest of recipe as described above, using white chocolate and pouring it on top of the now solid chocolate layer.

Thursday, December 9, 2010

Second Helping: Home-Brewed Root Beer

100918_CPE_rootbeer_3

I fondly remember the days when I regarded soda as a special treat. My favorites were birch beer, cream, and the crazy fruit flavors of Squeeze soda. I loved visiting the small Squeeze plant nearby and picking among the lollipop-colored sodas. My dad relished Moxie, which I found horribly bitter. But we did find common ground with root beer, which we occasionally brewed ourselves.

My boys love "root berry," a rare treat reserved for the handful of baseball games we attend each summer. And Anna's boys savored a souvenir pack of Route 66 root beer from a vacation on the fabled highway.

So we opened the Little Monsters Root Beer Brewing Co. for an afternoon to learn how soda is made -- kitchen science! The kids were thrilled, and intrigued by the element of danger: a large, bubbling cauldron, and a small chance of exploding bottles.

100917_rootbeer_03Anna turned scanned copies of the kids' drawings into custom labels. The kids cut them out while we prepared the ingredients.

You can buy a modest brewing kit online for $15 to $30. In retrospect, I should have gone this route. I thought I'd do better  at a local brewing supply shop. I hadn't done my research, and had no idea it was OK -- in fact, even preferable -- to make root beer in recycled plastic bottles. Instead, I spent more than I should have on things like a $15 gadget to secure metal caps onto our recycled glass bottles.

100917_rootbeer_14


We used a Gnome soda recipe that called for yeast, honey, cane sugar, water, and root beer extract.

It's easy to make: You need to use a thermometer to monitor the temperature of the mixture, but there's nothing tricky about the process. The kids took turns dumping ingredients into the giant canning pot, marveling at the amount of sugar. We talked about how yeast works, in foods like bread and in root beer.

100917_rootbeer_27
While mixing up the soda was easy, bottling and storing it was more problematic. Because of that yeast.

Yeast basically eats sugar, creating the carbonation. Chilling the bottles gets the yeast to quiet down. If the carbonation process continues unchecked, pressure builds up and bottles can explode.

So the bottles need to stay warm long enough for the yeast to do its thing, but not so long that the bottles burst. What I read and was told recommended letting the bottles to sit out for 24 to 48 hours. That seems a long window when you risk an explosion.

Exploding bottles are no fun. As Anna could tell you.

Which brings me back to plastic. If you use plastic bottles, there's no risk of shattered glass in your kitchen or refrigerator. And you'll know it's time to chill your soda and quiet down the yeast when the plastic bottle becomes firm.

We chilled ours after 24 hours, and waited a few days to open the first bottle. The kids were giddy ... and then they picked up on the aftertaste. Strong, dark, a little medicinal. It didn't stop them from enjoying their custom soda, but they didn't gulp it down like they do at the ballpark. But they didn't mind at all: The soda was OK, but the grand experiment was "awesome!"

Two months out, and I find the flavor in the few remaining bottles has mellowed some and is more enjoyable from start to finish. We might experiment with another brand of extract, a smaller batch, and plastic bottles in the future.

Monday, December 6, 2010

Kids Cook Monday: Savory Wheat Pancakes


A brand-new flour sifter and a ball whisk made the magic. They were so fancy that the kids asked to cook with me this Monday afternoon. Attracted by the new gadgets, the boys were pleased to know about what they were to prepare: Parmesan cheese pancakes. A nice and nutrition-loaded light dinner to celebrate one more post related to the campaign The Kids Cook Monday.

This very versatile variation of the Brazilian staple is a healthier interpretation: whole wheat flour, omega-3 eggs, and canola oil add more nutrition to the dish. The kids were happy to eat it plain with a generous dash of my favorite spread. But if you are willing, they can be rolled as traditional Italian manicotti and filled with spinach and ricotta cheese or even minced beef with veggies. Next time I will try to make them with spelt flour, adding some sunflower seeds to the dish -- I will let you know how that comes out.

Wheat Pancakes

If you don't have wheat flour available, don't worry: any good all-purpose, unbleached flour will bring nice results.


1 cup 100% whole wheat flour
1 egg
1 tablespoon canola oil
1 cup 2% milk
1 teaspoon salt
1/2 cup Parmesan cheese, shredded
ground nutmeg, to taste

Sift flour and reserve in a bowl. Whisk egg, oil, and milk together in another bowl. Add sifted flour to the mix, whisking constantly. Whisk in cheese, salt, and nutmeg. Let the mix stand for 15 minutes.

Heat skillet or griddle. Pour pancake mix onto the hot surface. With the help of a heatproof spatula, spread the pancake in the desired shape. When it starts to detach from the edges of the skillet or griddle, turn it over and cook until it is golden and looks ready to be devoured.

Thursday, December 2, 2010

Playdate Special: Pear and Cranberry Sauce Skillet Pie


Little I knew about the sisters Tatin when I chose to prepare this pie, inspired by the classic French dessert, with my leftover homemade cranberry sauce. So, after reading the many stories about it and learning some basics about its preparation, I waited for Darienne to arrive to talk about and prepare it. My plan was to invite the kids to cut the beautiful and soft ripe Williams pear and make the design of the pie on the bottom of the skillet. But I also had other plans for Darienne: a package of marshmallow and another of powdered sugar were over the counter with my hopes that she would teach me how to prepare marshmallow fondant.

Of course, she did. And I think the result was so good that I will dare try preparing another batch by myself soon.

Anyway, back to the Tatin's pie -- made originally with apples, nothing else than apples: Its preparation is charming, the ingredients are elegant, and the result can be amazing if you have the courage to flip the pie at the right time. To prepare the top of a pie on the bottom of a oven-proof skillet is the beginning of the reverse process. The boys were too busy to come to the kitchen and help, so we let them play soccer in the backyard. After 30 minutes we were devouring the pie with our eyes. And we loved its taste and texture. One of my boys had a big slice for dessert and asked for more. I must admit that we moms loved it so much that even if the kids are not interested on trying it, the beautiful creation of the French sisters will be inspiration over and over again in our kitchens.

Pear and Cranberry Sauce Skillet Pie


I used frozen pie dough from Trader Joe's, thawed, but you can use your own recipe. Also, my cranberry sauce was made with apple juice, Concord grape kosher wine, and juniper berries. Darienne chose cardamom to be the seasoning for the pears.

1 tablespoon butter
1 tablespoon brown turbinado raw sugar
1 large ripe pear, cored and sliced
1 cup cranberry sauce (homemade with the fruit -- see recipe below) *
1 round pie crust (good one here for paté brisée)

* For the cranberry sauce:
1 package cranberries
2 cups unfiltered apple juice
4 tablespoons raw brown cane sugar
10 juniper berries
2 tablespoons sweet Concord grape wine (or any brandy)


To make the cranberry sauce: Cook all ingredients over medium heat for about 15 minutes. Let cool before serving.

To make pie: Thaw pie crust to use it at room temperature. Preheat oven to the temperature recommended by the package, or the one you use normally. Now, on the stove top, melt butter in a shallow, ovenproof skillet. Before it gets brown, add sugar. Arrange slices of pear in the skillet, over the melted butter and sugar, to cover the entire surface. Cook on medium heat until pear slices are almost translucent. Distribute cranberry sauce evenly over the pear slices.

In the meantime, stretch pie dough to the circumference to fit the top of the skillet. When all is bubbling and smells good, lower the heat and cover the fruit with the pie dough, forming a lid for the skillet. With the help of a wooden spoon or spatula, push the dough down against the edges of the skillet.

Remove skillet from stove top and put in the hot oven for about 12 minutes or until the crust is golden brown. Remove from the oven and let it cool down for few minutes. When the edges pull back from the edges of the skillet, cover with the skillet with a serving plate and flip it. Shake a little bit to help all fruit to come together to the plate. Good luck and bon appetit!

LinkWithin

Related Posts Plugin for WordPress, Blogger...