Showing posts with label Back to School Lunches. Show all posts

Wednesday, August 28, 2013

Super Omega Cookies

 This is the kind of fully packed snack that is perfect for a fast bite at school break. It's MKA (my kids approved) although they usually don't care so much for raisins, flax seed or oats. But in this case  they are all inside a wonderful crunchy and chocolate-chip cookie, and so,  it is another story...

When I bake a batch, the smell of wonderful cinnamon embraces the whole house and that's enough for them to ask for the super cookies. On the next morning, cookies travel to school in the lunch boxes  as a sweet reminder that delicious can meet nutritious. And then I feel good. Mission accomplished and appreciated.


Super Omega Cookies
Omega-3 is one of those wonders of nature that might help on the kids brain development, and that's why I love it. In this recipe it comes form many sources, but animal sources. Canola oil, flax seed, oat meal, walnuts. I prefer to use all organic ingredients and the organic Saigon cinnamon is something special that I've found to boost the flavor of the cookie with a special zest. Oh, and by the way decrease the amount of sugar to a half if you want. It won't interfere on the texture.


1/2 cup canola or another vegetable oil
2 tablespoons finely ground flax seed mixed with 1/2 cup water (or two Omega-3 eggs)
1/2 cup sugar
1/2 cup brown sugar
1 teaspoon vanilla extract
1 cup flour
1 teaspoon baking soda
1 teaspoon Saigon cinnamon
1/2 cup ground almonds
1/2 cup ground walnuts
1/2 cup oat bran
2 cups quick oats
1/2 cup mini dark chocolate chips
1/2 cup raisins

Preheat oven to 350 F. Whisk oil, flax seed mix (or eggs), sugar, vanilla and cinnamon in a big bowl. Add flour, baking soda oat bran and whisk again the surface. With a spatula, mix all the ingredients and let it rest for 5 minutes. Then add all the other ingredients and mix well to guarantee that the chocolate chip will go to all cookies. With the help of two spoons, or an ice cream scooper, distribute dots on baking sheet and bake for about 20 minutes on the middle rack of the oven. 

Friday, May 10, 2013

Skillet Cookies

Something to celebrate with your mom this weekend? These cookies are the perfect fit for a surprise breakfast, brunch or tea, and so easy to make. Ask your dad or older brother or sister to help you, if that's the case. If you're mom, please read this to your kid(s) for inspiration. If you are not a mom, not a child, but still want to make something different for the weekend — and are not concerned about carbs — that's a cute and delicious project.

This recipe was adapted from many griddle cookies from the web, with the added benefit that it's suitable for vegans and those who are gluten intolerant or allergic, as it was tested many times at the Cooking Club at school.

The beauty of all these is that it can be mess-free, using a freezer plastic bag (like ziplock)  to prepare, so that the dough is kneaded inside the bag, avoiding spills.

And, please, don't forget to wash and reuse the bag after, or to recycle it. It would be great to save our big mother, Earth, from more trash.


Skillet Cookies

Use a electric griddle, like we did at school, or a large skillet. 

1 cup unbleached flour (or 1 1/2 of gluten-free flour, like the one from Trader Joe's)
1/3 cup granulated sugar
1/2 teaspoon baking powder
1/2 teaspoon salt
1/2 teaspoon cinnamon ( I love Organic Saigon Cinnamon)
1/3 cup vegetable spread (I use Earth's Best, vegan)
1 tablespoon oat bran mixed with 1/3 cup soy or almond milk
1/3 cup raisins (or any other dry fruit, or none)
Vegetable oil to spray or brush on the griddle or skillet surface

Mix all dry ingredients in a gallon-size plastic bag like the ones used for freezing. Close it and shake it many times. Cut the vegetable spread into tiny cubes and add to the bag. Close the bag and squeeze it until the mix looks like crumbles. Moisten the dough with the milk and oat bran mixture until the dough forms a ball.

Roll out dough on a floured surface (you can use parchment paper to cover the surface) until it's 1/4 inch thick. Cut into shapes. Heat the skillet to medium-low heat or 320 F if using an electric griddle. Spray or brush oil on the skillet or griddle surface and carefully transfer the cookies to it. Flip them when they are golden on one side (about 3 minutes each side), and grill for another 3 minutes. Wait for cookies to cool before tasting. Enjoy!

Monday, March 18, 2013

Natural Colors for Easter


We made these last year and we are planning on making them again, trying even more colors!
It's part of my war against artificial colors in food. And yes, I know that  (hopefully) nobody will eat the egg shells, but it's another opportunity to back to basis and find natural colors from vegetables.

I was originally  inspired to make those with the help of this awesome post, by The Boulder Locavore. Then As we started experimenting, lots of teas and spices came out of the cupboard and were tried. Here are our favorites:

Naturally Colored Boiled Eggs

Because I plan on doing a big egg salad with those eggs I really chose my favorite brand, from Trader Joe's, eggs that are made by  free-range chickens.

Eggs
Water enough to cover them
2 tablespoons Paprika
2 cups spinach
1 tablespoon sage
1/4 red cabbage
2 medium  beets


Use your favorite recipe for boiling the eggs. I love Julia Child's one. It always works and I never have that grayish rind on the yolks. Let the eggs cool. Here's a guideline of our favorite dyes:

Orange _ Boil paprika in 2 cups of water, when cold enough to the touch add 2 tablespoons white vinegar. To achieve a deep color you can soak the egg overnight. We found that 20 minutes is a good timing for a smooth orange.

Blue _ Ours were not that deep blue. Cooked red cabbage for 40 minutes in two cups of water. It cooled down and I added 2 spoons of vinegar, which changed the color of water from blue to purple. Yet, the egg still came in a very soft shade of blue, soaked overnight, in the fridge.

Pink _ Beetroot works on the egg faster than cabbage. It may take from 1 hour to overnight to achieve the desired shade. Beets were simmered for about 30 minutes. The same was followed: one tablespoon of vinegar for each cup of the colored water.

Yellow - A very light shade of yellow can be achieved by dipping the egg in infused in 1 tablespoon dry sage. I didn't use the vinegar for this one and the color stayed. The other shade came from infused dill. I will test with saffron soon.

Purple/Lilac - The egg was left in grape juice for 2 hours. I will test it again soon. One of the boys could not wait and immersed the egg on the paprika color.


Saturday, February 16, 2013

Snack attack


Here's something I realized recently: My two boys, who are portrayed by the youngest in this little design above, are apparently genetically programmed to be skinny. They are always complaining that there's very little time to eat their snack at school. By midmorning they are very hungry, and it looks that they need extra fuel. It's also a time when they would be rather playing than eating.

As I tried to use every opportunity to give them something healthy to eat, other than empty nutrition calories, I decided to go with the idea of packing lots of nutrition into one small snack.

And it's working. Their level of energy is increasing and I don't have to be concerned about them not eating well. By lunch time they are not so furiously hungry, and are able to enjoy some fruit and a very healthy sandwich packed with protein and vegetables.

Here are some nutrition-packed recipes and ideas I've been working with, with some success:

Little Monsters Granola Bars
Make a batch and pack them for one day of the week. Boys developed a label for them. Sweet brothers : )

Flax Seed Banana Bread
I use this recipe and I top the bread with pecans or walnuts, and sometimes homemade granola.

Reindeer Cookies
You can always add more to it. It will even hold some bananas and even more nuts or dry fruits.

Homemade Hummus
Besides what the original recipe suggest, I also add some pine nuts for extra nutrition.

Spring Pea Spread
Darienne's recipe is good-looking and it goes well with toasted whole grain bread.

Banana Bon Bons
This recipe is foolproof and kids always give ravewww.cook reviews about it when we use it to the Cooking Club.

Whole Wheat Ginger Scones
Some kids love the ginger in it. A great recipe by Darienne.


Sunday, January 13, 2013

Pizzwich and the Simple Changes


The idea of change is always stimulating for me, but sometimes it is just overwhelming when applied to real life. When New Year's decisions come to my mind, they might sound like just what we need. But at the end of the first month of the year they might be too drastic, heavy and just ... boring. This is always what I think about food-diet-healthier-related New Year's decisions: Oh yes, they may sound wonderful. Really?

Somehow the documentary Hungry for Change got my attention last Monday, while zapping to find something to relax me. And that's how it turned my next day upside down: I went to sleep. Far from being relaxed.

Enticed by the renewed argument about sugar-addictive foods — along with already adopted Food Rules ideas, and how we are hungry while being poorly and overly fed with over-processed foods — I shared my anxiety with my 8- and 6-year-old boys in the morning. I read the labels of their cereal at 7 a.m., and ignored the rule to think-before-you-say-something to the kids. I just plainly said:
_ That's it: We are all eating the wrong way. This is all empty food. Lots of refined sugar, syrup, etc. etc.

They were puzzled. I told them that I'd watched a documentary the night before. They wanted to watch it. I was a bit doubtful. I would not like to convert them to green juice gurus. Instead I just told them:

_ Let's just eat things that come from the garden, from nature, not from the factory.

And they listened.

But changes, to be profound, have to be made slowly and consistently. After three days running happily on fresh vegetables, fruits, grains, vegetable soups, grass-fed meat, and wild-caught fish, they were suddenly craving a classic pizza slice from one of their favorite pizza restaurants, made with very white flour and sugary tomato sauce.

I remembered someone in the movie suggesting substitute ingredients for a healthier version of it.  And that's how the boys happily prepared their own Pizz-wiches.

Pizz-wich

The success of the recipe depends on the quality of the ingredients. Look for preservative-free ingredients and no unnecessary sugar in the tomato sauce and bread. 

4 slices highly nutritious whole-wheat bread slices with less than 1g sugar per serving
4 slices partly skim vegetarian mozzarella slices (5g fat, maximum)
4 tablespoons tomato sauce (homemade or prepared with less than 1g sugar per serving)
2 teaspoons organic oregano

Cover each slice of bread with one tablespoon of red sauce. Add the slice of cheese and sprinkle oregano on top. Broil on high for 3 minutes or until the cheese melts. Enjoy!

Wednesday, October 24, 2012

1 1/2 Apples Pancakes


While it's all about the omnipresent pumpkin, this month and beyond, we were also thinking about one precious gift from the season: Apples.
We tested this recipe with kindergartners of our first session of the Cooking Club at school, and it was a hit. Not just because they were having fun chopping apples and mixing ingredients, but also because they just loved the book that went along with the recipe: Amelia Bedelia's First Apple Pie, by Herman Parish, illustrated by Lynne Avril. The cute story also brings a recipe, but we had to decide for something simpler and faster, something almost like a pancake. Like this book suggests, it's always important to be flexible, and kids were happy enough to try something different, but also something they made. Just like the hilarious and sweet Amelia Bedelia!


Apple Quick Cakes
This recipe was adapted from the New York Times recipe, Apple Griddle Cakes. I mostly substituted some ingredients to make it possible for all kids to taste it. It became vegan, and also safe for kids allergic to eggs and dairy.

1 cup white whole wheat flour
3 tablespoons brown sugar
2 teaspoons baking powder
3/4 cups vanilla soy milk
2 tablespoons canola oil
1 tablespoon flax seed meal mixed with 3 tablespoons water
1 granny smith apple, diced in small pieces
1/2 Gala,  Fuji or Gravenstein apple, also cut in to small pieces
Cinnamon (optional)
Powdered sugar, for dusting

Heat a electric griddle, or skillet, to medium heat (350 F). In a large bowl mix dry ingredients, and whisk to mix them all. Add pieces of apple to coat them with mix. In another bowl mix wet ingredients and whisk. Pour the wet mix on the dry ingredients bowl.  Stir with a wooden spatula up to when is mixed. Batter should be thick, enough to be scooped to the griddle. Brush or spray vegetable oil to the hot surface and scoop batter. Flip after about 3 minutes or when surface is already showing signs of becoming golden. Allow other 3 minutes for the other side. Enjoy with powdered sugar, maple syrup or vanilla ice cream on top. 

Thursday, August 30, 2012

4 tips for fun and easy packed lunches

My third-grader says he's unhappy with the president. This took us by surprise, especially since he'd written to the White House in the spring and was delighted to get a small package in return.

So what happened?

School lunch, of all things. My son is unhappy that he has to choose fruit and a vegetable with every meal, and that chocolate milk is off the menu — thanks to major improvements in the federal program.

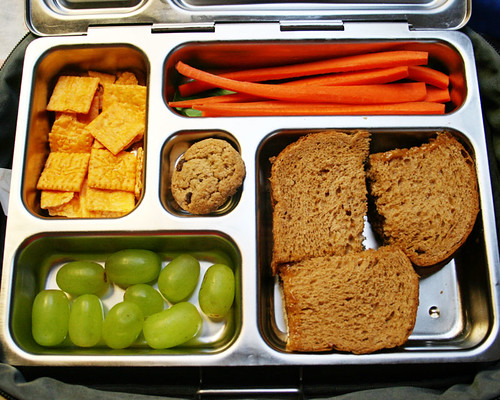
The funny part is that the new school menu — packed with fruits, veggies, and whole grains — isn't much different from what I pack most days. Here's his lunch box today, for example:

120830_CPE_lunchbox

Peanut butter on whole wheat bread, carrots, grapes, Cheez-Its, and a cookie. Not too bad. The Cheez-Its are the dregs of a box purchased as a summer treat, and the rest is typical lunch fare.

The boy wants a packed lunch every day. Awesome. Except I can count all the entrees he's willing to eat on one hand —with fingers left over. Today's lunch is OK, but boring. For me, and soon for him if we don't get creative.

Here are four tips to help make school lunches a little easier for you, and more fun for your kids.

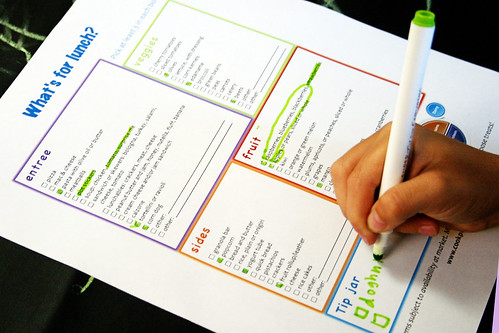
120830_CPE_lunch-menu


Make a lunch menu


Our "What's for lunch?" checklist gives my son a chance to design his own menu. It lists healthful offerings in each food group, plus room to add his own. The "tip jar" is another spot where he can make suggestions.

You can use this free menu weekly, monthly, or as often as you wish. Download the Word document and change it as needed to reflect your own family's tastes. (You also can download the pdf version.)

Anna has offered a picture-based menu to empower her children to choose — even the option to be surprised.

Play with nutrition


The MyPlate program offers free printables including coloring pages and posters to help you talk about healthful eating with your family.

School-age kids can play the online game Blast Off, fueling a rocket ship by choosing a balanced plate of healthy foods.

If you have a toddler or preschooler, check out the special section with tips on getting kids involved in the kitchen — a topic near and dear to our hearts!

Put kids to work


With my younger son now in kindergarten, I'm appreciating more than ever the benefits of helping my kids be more independent.

Keep some easy-to-pack good food choices on a shelf in the pantry and in the refrigerator, and put your children in charge of choosing something for their snack or lunch each day. If they're willing and able to do more, encourage them! This is going to be a priority for me — one week into school, and I've already sent the wrong snack with the wrong kid.

Enjoy yourself!


Browse our collection of back-to-school lunch recipes and tips, and find something new to enjoy. For a quick list of inspirational ideas, check out this post full of great ideas for filling lunch boxes with fresh, fun food. And please share your own tips here and on our Facebook page!


Saturday, March 3, 2012

Patrick-crepes with (or without) Wild Arugula and Balsamic Reduction


If you are enjoying the luck brought by leprechauns this March, this recipe will help you bring more greens to the table. This good-looking crepe (with no artificial colors)  is a delicious way to wrap up even more greens inside it.  It is also a chance for your kids to get acquainted with different tastes. Another possibility is to fill it up with cream cheese or ricotta seasoned with pesto or simply cheese and turkey ham.

My boys gave mixed reviews about it: With arugula and balsamic reduction it was a 10 out of 10. Without the pretend "shamrocks" these crepes were a 100 out of 10, if you know what I mean ... They rolled the crepe-pancakes and just ate them.

This is the first of a mini-series with some green food  that we will post up to March 17. As you know by now, Darienne and I can't resist celebrating holidays with food.  This is a great and inspiring one: If food has to be green, that's the most beautiful occasion to take advantage of!


Patrick-Crepes With (or Without) Arugula and Balsamic Vinegar Reduction

1 cup milk
1 cup cooked or 2 cups raw baby spinach (if cooked simmer with olive oil and a tablespoon of water)
1 cup flour
1 egg
1 to 3 tablespoon Parmesan cheese, grated
1/2 teaspoon dried savory or garlic powder
1/2 teaspoon baking powder
Kosher salt to taste
Balsamic vinegar reduction, to taste (optional, see note below)
Arugula (optional)


Mix ingredients with an electric hand blender. Let the mix stand for 10 minutes at room temperature and then blend it again.

Preheat griddle to 300 F (or use a skillet over medium heat), and coat it with a thin layer of olive or canola oil. Ladle the equivalent of 1/2 cup of crepe mix onto the griddle, and cook each side for about three minutes.

Pile cooked crepes on a plate to retain moisture and temperature. After about five minutes, plate them with arugula, a drizzle of balsamic vinegar reduction, or your favorite filling.

Note: To make balsamic vinegar reduction, simply bring vinegar to a boil over medium heat. Continue to cook over low heat until vinegar is reduced by at least half.

Thursday, September 22, 2011

Fresh and Fast Homemade Tortillas


Fair warning: Once you try making tortillas from scratch, those store-bought ones will taste like cardboard. You'll never go back. Good thing these are so easy to make.

This recipe was not taught to me by my abuelita, nor anyone else's abuelita, for that matter, and it makes no claim to authenticity. A fresh tortilla made with silky-soft white flour and lard is incomparably delicious ... but I can't bring myself to make it that way. In this version, white whole-wheat flour and a small amount of oil make for a soft, flavorful tortilla with a little more nutritive value. I made it as healthfully as I could—pushing it any further, I found, ruins all the pillowy gorgeousness of a homemade tortilla.

Once you've made these once or twice, you should be able to crank out a batch within 20 minutes. It's all hands-on work, which can be tough to manage with young ones underfoot. The best way to pull it off is to have them join in: Let them mix up the dough by hand, and watch and giggle as the tortillas puff up on the skillet. 

Yep, that's funny-looking.
A few tips:
  • More hands = more fun. Enlist little ones to blend the dough. If you have more skilled help available, have one person roll out tortillas while the other mans the skillet.
  • Preheat your skillet. Make sure it's hot before you throw your first tortilla on there. But not too hot—you want gentle browning, not smoky blackening.
  • Keep 'em soft. When you take the tortillas off the heat, wrap them in a kitchen towel. To store for later, pack them in a zip-top bag or airtight container while they're still warm.
  • Make extra. These are irresistible fresh off the skillet, but they store well. Make a larger batch and save some for easy snacks and lunches later in the week. 
  • Add flavor. Try incorporating pumpkin, tomato paste, spinach, or red peppers. To see how to do it, check out this recipe for Pumpkin Tortillas.
Leftover stir-fry wrapped in fresh tortillas—yum!

Homemade Tortillas

This goes very light on the oil—if you wish, you can add a little more; I rub a few drops of olive oil on my hands when I knead the dough. Makes 8 to 10 tortillas.

1 cup all-purpose flour
1 cup white whole-wheat flour (or substitute all-purpose)
1 teaspoon baking powder
½ teaspoon salt
1 tablespoon olive or canola oil
¾ cup warm water

Stir together flour, baking powder, and salt with your fingers or a fork. Drizzle the oil over the dry ingredients and blend well. Add a spoonful or two of water, mix in, and repeat until the dough starts to come together in a shaggy ball. You might need a little more or a little less water.

Turn the dough out onto a lightly floured surface and knead for a few minutes until it’s smooth and elastic. Divide into 8 to 10 pieces and roll into balls—about the size of ping-pong balls.

Heat a skillet over medium heat. Roll a ball of dough out into a very thin circle, about 7 to 8 inches. If the dough is resisting, cover and let it rest for 10 to 20 minutes.

Put the rolled-out dough onto the heated skillet and cook for about 15 seconds; you should see some puffy spots and browning. Shake the skillet a little to slide the tortilla around if it gets too puffy. Flip every 15 to 20 seconds—it shouldn't take more than a minute or so.


Wrap cooked tortillas in a kitchen towel to keep them warm and soft, or store in a tortilla warmer while you cook the remaining tortillas. If you have leftovers, store them for up to a week in the refrigerator in a zip-top bag or airtight container, or in the freezer.

Wednesday, September 14, 2011

Lunchbox Tricks with Pizza Treats


We've been back to school for a few weeks now, but we're only just beginning to get back in rhythm. A new year inspires a renewed commitment to sending our kids to school with healthy, fun, and tasty lunches to fuel them through these busy days.
Darienne and I  found out lately that pizza dough is great and versatile way for lunch boxes. They make a good alternative to sandwiches and the kids like to eat them cold, which is a good advantage. Here are some links of how creative you can go with them: 

Pizza Lollipops: These are a favorite for Darienne's kids! If you have a small lunch box or just don't want to bother with lollipop sticks, they're equally entertaining as little wheels.
Ham and Broccoli Calzones: These calcium-rich pocket sandwiches are fun—and fast to make if you have pizza dough ready to go.
Beef and Spinach Pockets: Loaded with lots of higher nutrition ingredients, these are easy to eat and freeze well. Do a whole batch and warp individually so that you can send to lunch when running out of ideas. 
Mini Hot Dogs  aka Pigs in a Blanket - Sounds like a party? Maybe good for one special day of the week. This is fair competition with the cafeteria, does well eaten cold, and you choose the best type of frank, tomato sauce, and even one or two green ingredients to be wrapped in it. 

The magic about playing with pizza dough is that by making them different shapes you can be creative with the fillings. From chicken to grass-fed ground beef, using chopped vegetables and including all sort of seasonings and some good cheese, the pockets, calzones, and lollipops can be a complete meal, guaranteed to vanish from the box. 


For a very delicious homemade dough recipe, you can use this one by Darienne: 

Pizza Dough
1 1/2 cups all-purpose flour
1 1/2 cups white whole wheat flour
2 1/4 teaspoons yeast (one package)
1 1/2 teaspoons sea salt
1 1/4 cups lukewarm water
1 tablespoon olive oil, plus extra for baking sheet
optional: fresh or dried herbs, ground flax seed

In a food processor fitted with a metal blade, combine the flour, yeast, and salt, along with herbs or flax seed, if using. Process the dry ingredients briefly, then pour in 1 cup of lukewarm water and the olive oil. Add more water, just a tiny bit at a time (you might not use the entire amount) and continue to process until the dough forms a ball. Turn out the dough onto a floured surface and knead for a minute or so to form a ball. Set dough in a lightly oiled bowl, cover with plastic wrap or a towel, and let rise for 1 to 1 1/2 hours.

Divide dough into as many pieces as you plan to turn into pizzas, pizzas, calzones, lollipops or blankets. Shape each piece into a ball and set on a floured surface. Cover with plastic wrap or a towel and let rest for 15 to 20 minutes. Use the dough as desired, following the recipes above. 

Wednesday, September 7, 2011

Food blues


“I don’t want to be hot lunch!”

I should be thrilled: My second-grader actually wants me to pack his lunch every day. Really? After all the whining last year about having to bring his lunch three days out of five?

Instead, I feel desperate. I have no idea what to send to school with him.

I should be full of ideas. That’s my job here—to have good ideas about feeding our kids. This blog boasts more than three dozen creative ideas for stuffing a lunch sack, and that's in addition to traditional sandwiches, meat-and-cheese skewers, and the usual fare.

But my kid isn’t eating much of anything these days. His list of acceptable foods has grown pitifully short. The only chicken he’ll eat is in nugget form (only fast food, not frozen and certainly not homemade). He balks at beef except in tacos, satay, and sometimes Trader Joe’s Bool Kogi. Beans, pork, and fish are out. So are vegetables except romaine lettuce. Cheese pizza is OK hot, but not packed cold. Pasta must be hot, plain, and only in certain shapes.

Peanut butter, Nutella, and fluff sandwiches are good, except when they aren’t. Quesadillas, hot dogs, macaroni and cheese, pot stickers, eggs, yogurt that isn’t in a tube, cheese, nuts, and most fruits—fresh and dried—are all on the reject list.

I’m burned out. Fed up. Seriously annoyed.

It was a relief and surprise when he recently asked to make sourdough bread, using a starter recipe from a cooking class he took two years ago. He didn't need to ask me twice. That afternoon, we got our starter going. Five days later, we baked two huge, gorgeous loaves of bread. A few days after that, he sold homemade sourdough baguettes at a lemonade stand to benefit his school. An extra cup of starter yielded the tastiest, laziest waffles I've ever enjoyed in my kitchen.

His starter, nicknamed "Cutie," is now almost a month old. He's feeding it regularly and cheers to see it bubble and rise.

It's just white bread—plain, simple, bad carbs and all. But it's nourishing, in so many ways.

What do you do when you have the lunch box blues? If you have any ideas, please share in the comments!

Monday, December 6, 2010

Kids Cook Monday: Savory Wheat Pancakes


A brand-new flour sifter and a ball whisk made the magic. They were so fancy that the kids asked to cook with me this Monday afternoon. Attracted by the new gadgets, the boys were pleased to know about what they were to prepare: Parmesan cheese pancakes. A nice and nutrition-loaded light dinner to celebrate one more post related to the campaign The Kids Cook Monday.

This very versatile variation of the Brazilian staple is a healthier interpretation: whole wheat flour, omega-3 eggs, and canola oil add more nutrition to the dish. The kids were happy to eat it plain with a generous dash of my favorite spread. But if you are willing, they can be rolled as traditional Italian manicotti and filled with spinach and ricotta cheese or even minced beef with veggies. Next time I will try to make them with spelt flour, adding some sunflower seeds to the dish -- I will let you know how that comes out.

Wheat Pancakes

If you don't have wheat flour available, don't worry: any good all-purpose, unbleached flour will bring nice results.


1 cup 100% whole wheat flour
1 egg
1 tablespoon canola oil
1 cup 2% milk
1 teaspoon salt
1/2 cup Parmesan cheese, shredded
ground nutmeg, to taste

Sift flour and reserve in a bowl. Whisk egg, oil, and milk together in another bowl. Add sifted flour to the mix, whisking constantly. Whisk in cheese, salt, and nutmeg. Let the mix stand for 15 minutes.

Heat skillet or griddle. Pour pancake mix onto the hot surface. With the help of a heatproof spatula, spread the pancake in the desired shape. When it starts to detach from the edges of the skillet or griddle, turn it over and cook until it is golden and looks ready to be devoured.

Friday, October 15, 2010

Playdate Special: Little Monsters Homemade Granola Bars

The boys measured all irresistible and delicious ingredients. They grated nuts and dried fruits, chose the granola mix,  and blended it all. Finally they ate the final result in the same playdate! Weeks before  they also designed the labels of their "Little Monsters" brand and could share the bars during a awesome camping trip with friends to Portola Redwoods Park.
Hooray - one day those delicious home made bars will be my treat to kids at Halloween.
But before I get to excited about this idea - and delirious-, about this possibility - let me share something else with you. This is the first recipe to celebrate the beginning of our second year online.
If you didn't have time yet to celebrate with us, don't forget to leave a comment at our anniversary post- you can be the lucky winner of a U$ 25 Amazon Card. Also, as a "goodie-bag" we are sharing a free e-booklet Spook Play Explore on the upper right of the screen. You just download it and have a collection of healthy soups and yummylicious treats.


Little Monsters Granola Bars

Adapted from Mark Bitman's Apricot Almond Granola Bars

1/2 cup almond butter
1/2 cup honey
1 teaspoon vanilla extract
1 cup crispy brown rice cereal
1 cup your favorite granola mix
1 cup your favorite nuts and dried fruits mix (we used macadamia, cranberries, pineapple, almonds and cashew)
1/4 teaspoon salt
Canola oil for greasing
½ tsp cinnamon
2 tablespoons fine unsweetened dried coconut 

Invite the kids to measure and mix the dry portion of the bars: crispy rice cereal, granola, mix of fruits and nuts, salt, cinnamon and coconut. In our playdate,  we used a Progress nut chopper to grind nuts and fruits, which was a great challenge for them. Brush a baking dish or cookie sheet with oil and line it with plastic wrap. Melt almond butter, honey and vanilla in a saucer over medium heat for long enough to have all ingredients mixed into a paste, stirring it all with the help of a wood spoon or whisker. Add the wet paste to the dried ingredients and stir. Spread the granola mix evenly with the help of a spatula, and cover it. Refrigerate for at least one hour or more to achieve the ideal texture. Once ready, the bars will look like the ones from the packages. Remove the plastic film and cut the bars into any length and shape you like.

Thursday, September 9, 2010

Back to School Lunches: Spanish Omega-3 Omelette


As Darienne pointed out in her post last Monday, it is very important that the kids get some fun when opening their lunchbox, and are somehow proud and surprised about the goodies they may find in their box (bento or thermos) to avoid comparisons and boredom.

I love the idea of including stickers or a treat, and also love the small plates idea. After dedicating some time to sit and talk with my son about the options, I remembered an old favorite in our home that might work well with our best intentions: tapas.

So here follows an interpretation of one of my favorite tapas I had in Spain and find to be a good option, as it can be served hot or cold. My plan is always to send it in the box with toothpicks so that my kindergartner  will find it irresistible.


Spanish Omega-3 Omelette

I mainly like to use Omega-3 cage-free eggs, which I find to be really a good choice. Also, I added just a touch of smokiness in the recipe, but it is really not needed, with micro-bits of bacon or salmon.
Also, to make the process really easy, I bake the potato in the microwave the night before, so that it is all ready to be prepared in the morning rush. I use organic red potatoes, as they have a better texture for the omelette and can be fried with the peel on, keeping their fiber and vitamins.

1 tablespoon extra-virgin olive oil
1 tablespoon smoked bacon or salmon, micro diced (optional)
1 tablespoon white onions, micro diced
1/2 baked potato, cut in thin slices
2 eggs, beaten

Heat olive oil in a medium skillet. Add bacon (or smoked salmon) and onions and fry them over low-medium heat. Add potatoes and make them crisp, frying each side for about 3 minutes. Add beaten eggs and close the skillet with a loose lid, plate or even another skillet over low heat for about 4 minutes.

Open pan, making sure that the all eggs are cooked. Now you can turn the omelette with the help of the other skillet or with a spatula to make sure both sides have the same texture.

Wait a few minutes so the omelette doesn't deflate, and when it's almost cold cut it in squares or your kid's favorite shape with a pizza cutter.

Tuesday, September 7, 2010

Back to School Lunches: What to Pack?

As parents who are passionate about food, we want our kids to eat at school as well as they do at home, and making that happen is not always a piece of ... ahem ... birthday cake.

Below, we offer some food for thought and an abundance of ideas to help inspire creative, fun lunches.
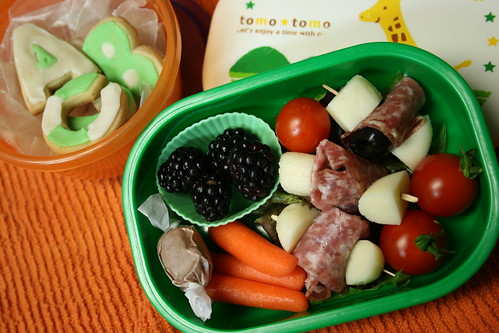
100907_CPE_lunches_1
First day of school lunch: ABC cookies, blackberries, cherry tomatoes, carrots, a piece of taffy, and skewers with salami, cheese, and olives.

Understand that we are in a competition

Packing your child's lunch isn't just about providing nutritious food to fuel him for a full day of school. It's a strategic, competitive process. Give some thought to what principles you'll fall on your sword for, and what you're willing to concede.

Darienne's concession: I always include something my son will see as a treat, something school doesn't sell and the other kids don't have. It could be a piece of salt-water taffy or a tiny container of balsamic vinegar and olive oil for dipping bread.

Anna's idea: My older boy starts to have lunch just in November, so we are working on a monthly menu with pictures and options. The idea behind it is to give the almost-6-year-old the power to choose. One day of the week he can choose "Mystery Lunch" to be surprised.

Ask questions

Ask your child about her lunch after school. What did you like? What didn't you like? Why didn't you eat the pickle? I thought you loved pickles! What did other kids have?

Many kids complain they don't have enough time to eat. Make sure everything is easy to get to -- clementines are peeled, for example, and extra packaging is minimal. Perhaps use a small reusable container for milk or water. When Darienne sends juice, she packs a box because her son can't always find an adult to help with the trickier juice pouch.

Anna also plans to send juice boxes. Because her family is reducing juice to once a day, he knows the box is to be enjoyed with his lunch -- taking advantage of that fact that he is very hungry at school and a box of juice won't ruin his appetite.

When your child gushes about someone else's lunch, steal some good ideas or have a conversation about food. Avoid disparaging a classmate's junk food, but do have a positive conversation about how the food in your child's lunch bag helps her grow and become strong.
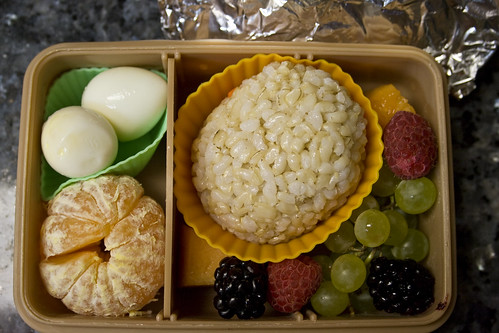
100907_CPE_lunches_2
Tiny food: Quail eggs, a clementine, onigiri, blackberries, melon, raspberries and champagne grapes.

Think small

Small bits of food are quick to eat, and they allow more room for variety. When Darienne packs a full-size sandwich and an apple, she typically sees both come back home nearly untouched. If she packs several tiny things, nearly everything gets devoured, or at least sampled.

Asian markets and stores are great resources for small, packaged foods and containers to put it all in. 
One idea is to study some small plates dishes and finds which ones are your kid's favorite flavors and textures.

Allow some fun

Buying lunch at school is a Very Big Deal for a young child. Letting kids buy lunch -- maybe once or twice a week -- might make them more agreeable to home-packed meals the rest of the week.

Give them something to smile about. Darienne's first-grader was excited to show off polka-dot fruit roll-ups, which he is proud to have inspired over at Fix Me A Snack. Make all the food the same color, draw a funny face on a marshmallow with a food coloring marker, or tuck in a sticker. Your kid will love it.

What to pack?

A few ideas to get you started:
  • stir-fried tofu cubes
  • meatballs (Aidell's and Trader Joe's varieties are good choices)
  • mini chicken sausages (again, Aidell's makes some tasty ones)
  • pot stickers
  • onigiri
  • small pasta shapes lightly dressed with olive oil and parmesan cheese or pesto
  • hard-cooked eggs (try quail eggs, available in Asian markets)
  • beans dressed with a little vinaigrette or lemon juice
  • small salad with a lemon wedge 
  • food easy to serve with toothpicks, such as slices of sausages, veggies and cheese cubes (use round-tip toothpicks for reusable blunt skewers, available at Asian markets, if you're worried about pointy objects)
  • small plates favorites
  • savory muffins
  • bread with a bit of tapenade, bean spread, or jam
  • mini meatloaf
  • mini pita bread sandwiches
  • grown-up food, such as olives and gherkins
  • pretzels
  • crudités: carrots, jicama, snap peas, edamame, celery, cherry tomatoes, sweet pepper
  • coleslaw or grated carrot salad
  • small, whole fruit: apples, berries, plums, clementine, grapes (champagne grapes are fun), baby bananas
  • melon wedges
  • applesauce
  • dried fruit, including raisins, apricots, mango, prunes, roll-ups and strips, etc. For variety, look for less-common options, like banana chips and dried hibiscus flowers.
  • a marshmallow
  • a fortune cookie
  • a graham cracker spread with jam or Nutella
  • a "raw" s'more 
What are some of your favorite foods to pack?

Monday, September 6, 2010

Back to School Lunches: Brown Rice Onigiri
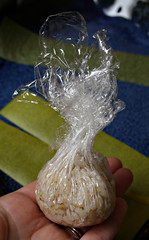
CPE_Sept10_onigiri soy wrapper2

We're kicking off a week of Back to School Lunches with the start of another new feature: The Kids Cook Monday!

We've been invited to help Healthy Monday with its Kids Cook Monday campaign by posting great meals and snacks families can make together. Of course, we said yes! Quite a few family-oriented food blogs have signed on, and we're delighted to participate. We encourage you to check out the website for Healthy Monday, a 5-year-old public health project in association with Johns Hopkins University, Columbia University and Syracuse University. And check back here on Mondays for our ideas.

And all this week, we'll share recipes and tips for packing your child's lunch bag. We have three preschoolers, two kindergartners, and one first-grader among us -- and lots of ideas for packing meals kids will enjoy.

CPE_Sept10_onigiri soy wrapper1Onigiri is a favorite lunch bag treat for my boys, and something they can help make. Onigiri are essentially Japanese rice balls. You can make them with just rice, or tuck inside bits of diced meats, vegetables, pickles, eggs, whatever. It's a handy way to use up leftover bits from dinner.

Kids can help make onigiri a day or two ahead. You can freeze them for longer storage, but be sure to zap them in the microwave in the morning. They don't taste as good if you leave them alone to thaw.

CPE_Sept10_F makes onigiri

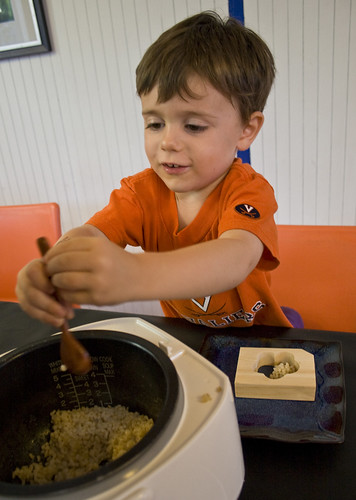
Short-grain rice is easiest to work with. These are impossible to make with long-grain rice -- don't even try! I have a hard time getting brown rice to work with onigiri molds (my 3-year-old loves the wooden flower one in the photo above), but I've had no trouble shaping the rice with the plastic wrap technique described below.

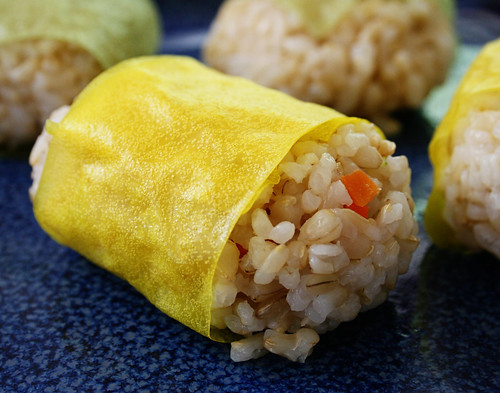
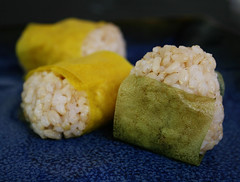
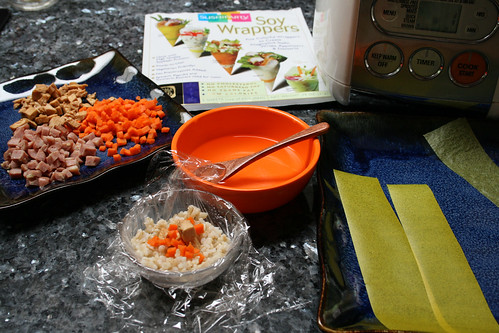
Traditionally, onigiri are wrapped with nori, but my kids don't care for the roasted seaweed sheets. I leave them unwrapped or use colorful SushiParty Soy Wrappers (I find them at Asian markets; go to their website to order online). The variety pack -- including turmeric yellow, paprika orange, and spinach green -- really brightens up a plate.

Finally, you can carefully toast onigiri on the stove top, to make yaki onigiri. One of my boys loves his yaki onigiri brushed with a bit of low-sodium soy sauce. Yum!

Brown Rice Onigiri

Be sure to use short- or medium-grain brown rice (you can substitute white rice). Long-grain, basmati, jasmine rice and the like won't work! This looks like an involved project, but it really takes just minutes once you get the hang of it.

2 cups short-grain brown rice, freshly cooked and hot
salt
water
optional fillings, diced
nori or soy wrappers, optional
small bowl or cup
plastic wrap

CPE_Sept10_onigiri layout

Get everything ready for assembling the onigiri. Have fresh, hot rice ready to go with a small spoon for scooping. In a bowl, mix a generous amount of salt with water, which will help keep the rice from sticking to everything. Set out the diced filling options -- you only need a small amount -- on a plate. If you're using wrappers, cut them into wide strips. Keep the roll of plastic wrap close at hand.

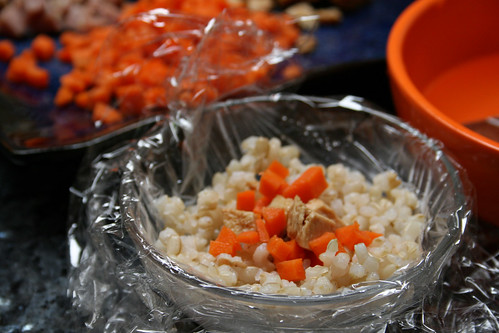
Tear off a small bit of plastic wrap and lay it in a bowl. Have your child dip his hands in the salted water and sprinkle a bit onto the plastic wrap. He can scoop out a small amount of rice into the bowl, then sprinkle a spoonful or so of filling in the middle. Top it off with another spoonful of rice.

CPE_Sept10_onigiri filling

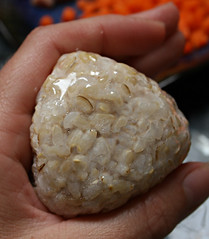
CPE_Sept10_onigiri wrapCPE_Sept10_onigiri shapeThe next step might require a grownup's help: Pull of the sides of the plastic wrap around the rice and twist, packing the rice together. Use your hands to shape your onigiri: You can make a broad oval, a triangle, a square, or a ball.

Remove the plastic wrap. If you're using nori or soy wrappers, you can wrap it around the onigiri now or, if you don't want the wrapper to soften and get a little soggy, when you're ready to eat it. Wrap the finished onigiri neatly in fresh plastic wrap and store in the refrigerator or freezer.

LinkWithin

Related Posts Plugin for WordPress, Blogger...