Showing posts with label Main Dishes. Show all posts

Tuesday, June 25, 2013

Tofu and Asparagus Bowl


Having a vegan husband is a challenge. Our kids are very eager to eat protein of animal origin. They are the type to ask, "Mom, can we have steak tonight?"  I see myself as a flexitarian, eating a bit of everything doesn't harm my body or my foodie soul, although I tend to load my plate with more vegetables than anything else.

So my husband is the one who feeds my alternative creativity in the kitchen. I am happy to do that — he is a happier and healthier man since adopting some changes suggested by Forks Over Knives. And this time his dish was so beautiful that even the kids wanted to try ... and would have eaten more of they could.

They liked it so much that they asked me to post it here. For the 8-year-old, the secret of the food success was the juice of the dish. For the 6-year-old, all was good.

Tofu and Asparagus Bowl

Go for non-GMO extra-firm tofu. For this recipe I used Whole Foods 365 Brand, and the result was quite good. 

1 tablespoon extra-virgin olive oil
1 block extra-firm organic tofu, cut in 1-inch cubes
6 to 10 asparagus stems, cut diagonally
1 ripe tomato, diced
1 spring onion stem, cut diagonally
1 garlic clove, minced
1 tablespoon basil, folded and cut in strips (chiffonade)
1 tablespoon snipped chives
Kosher salt to taste

Heat olive oil in a skillet. Add tofu and increase heat to sear the cubes. Add asparagus, tomato, and spring onion. Stir-fry for 5 minutes.

Lower heat and let it sweat for about 5 minutes. Now add the minced garlic and stir. After about 4 minutes, remove from heat and add basil.

Serve over a bowl of basmati or jasmine rice. 

Tuesday, June 18, 2013

Garbanzo, Zucchini, and Tomato Salad


The kids are savoring freedom from school and schedules, and I am too. I still have work, both professional and the unpaid domestic kind, and I'm a little envious of their lightened responsibilities. So I'm trying to lighten my own. This no-cook vegetarian salad is one way to make life easier for myself.

I often cook my own beans, but for the sake of simplicity I just open up a can of garbanzos for this one. If you're lucky enough to have a garden, you can probably harvest the zucchini, tomatoes, and herbs from your own back yard. I like the crunch of raw zucchini, which picks up just a little bite for marinating in the dressing for anywhere from an hour to a full day.

With just a few minutes of chopping and stirring early in the day, you're free to enjoy a lazy summer afternoon. Come evening, pull this out of the fridge, toss in some herbs, and serve with crusty bread.

Garbanzo, Zucchini, and Tomato Salad

3 tablespoons olive oil
2 tablespoons lemon juice
1 tablespoon balsamic vinegar
zest from 1 lemon
salt and pepper to taste
2 small zucchini
1 15-oz. can garbanzo beans, drained and rinsed (or 1 1/2 cups cooked beans)
1 cup cherry tomatoes, quartered
2 cloves garlic
chopped fresh herbs to taste, such as basil, thyme, mint, or lemon balm

In a medium bowl, combine olive oil, lemon juice, balsamic vinegar, and lemon zest and whisk to blend dressing.

Trim ends from zucchini and quarter lengthwise, then cut into 1/4-inch-thick quarter-moons. Add to bowl with dressing, along with drained beans and quartered cherry tomatoes. Peel garlic cloves and cut in half and add to bowl. Add salt and pepper to taste. Stir salad to distribute dressing and let sit at room temperature for at least an hour, or chill in refrigerator up to one day. Stir in fresh herbs just before serving.

Sunday, November 18, 2012

A Thanksgiving feast

As a food blog, we should be bursting with plans for the Thanksgiving meal. But we've been a little quiet, because we aren't preparing big feasts this year. My family goes out for the holiday meal — and I'm grateful to enjoy the fruits of someone else's labor!

But if I were cooking, this is the meal I would plan:

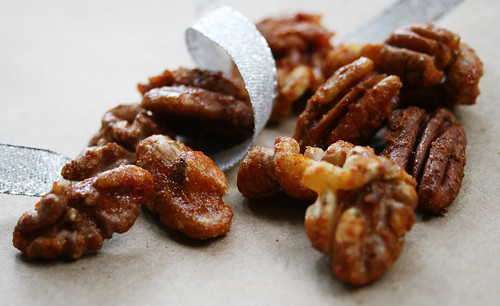
20101209_spiced nuts_1

Best Spiced Nuts: Slightly sweet with a kick from garam masala and Sriracha — irresistible snacking while you wait for the turkey to be done.

Dry-Cured Rosemary Turkey: This is the sole entry here that isn't from this site. This was my go-to holiday recipe for years. The blend of seasonings is just fantastic. Get started on it right away: It cures in the fridge for three days before cooking.

Chestnut Sage Soup: I dream about this soup. Creamy chestnut puree with apples, sage, bacon, and vanilla notes... swoon.


Succotash in Squash: This is a showstopper vegetarian dish, scoring huge points for flavor, presentation, and history — a nod to Native Americans and Thanksgiving tradition.

Yams with Za'atar: Give the candied yams a rest. Instead of burying veggies in sweetness, bring out their deep flavor with za'atar spice. This dish is a cinch to make, which is a blessing on a busy cooking day.

Crunchy Marinated Green Beans: Instead of burying green beans in a casserole, show them off with a touch of Asian flavors.

Black-Eyed Peas Salad: With canned beans, this takes almost no effort. And you can make it the night before, so it's one less thing to tackle on Thanksgiving Day.

Rice of Many Colors: This kid-friendly dish is packed with protein and veggies, and easily adaptable to suit your family's taste.


Minute Bread: Tasty rolls with cheese baked right in — delicious!

Pumpkin Pudding with Cranberry Sauce: An unusual dessert that takes full advantage of fresh cranberries.

Pear and Cranberry Sauce Skillet Pie: This twist on a typical pie blends sweet and tart flavors for a perfect finish to the meal.

Thursday, September 6, 2012

4 tips to cook with kids at school


Classes started and I am planning a handful of recipes to make with kids at school. Sometimes they will be theme-oriented, inspired in some children's book or even about chemistry. But invariably they will involve lots of fun, and, of course, some messy activity to clean up after...
My 7 years old had already two years in a row of Cooking Club, which had been really fun, as some of the recipes were first tested with Darienne and her boys. My now 5 year old under, though, is going to have his first year of cooking classes, and can't wait to start. It looks like Cook Play Explore is going again to be full powered for Fall! We can't wait!

As a good friend of ours suggested, here are some tips if you are willing to volunteer at your kid's school, or maybe just wondering how to have a structured playdate with kids and cooking with them, the easy way:

  • Portable electric equipment is always a good choice to use if you're working in a classroom or even your dining table. Griddle, ice cream machine, pasta machine, crockpot and hand blender are some that I've used for from scratch recipes and worked just perfectly.
  • If baking is the plan, and you have access to a oven-  think always about mini-muffins and mini all things to reduce baking time, and, therefore, anxiety from the kids.
  • Safety is, obviously, a big concern. Practice had taught me that serrated plastic knives from party-ware packages  are very useful and good to cut strawberries, bananas and other types of fruit and vegetables. Very clean children sized scissors are also a good idea. 
  • Always work close to the teachers to find out about any allergy in the classroom. Try to adapt recipes to avoid frustration, but if not possible, have the parents of the kid with allergies to send some alternative ingredients or snack so not for him to be excluded. 

Here's a little list of of many times tested recipes at school and with the Cook Play Explore boys:

Banana Bonbons

Delicious raw candies that took some prep before the activity and was inspired by the awesome I'd like to Eat a Child book.

Be Bim Bop 

Two electric griddles made this possible. Kids had lots of fun cutting vegetables and savoring the wonderful rice.

Scissors Salad 
24 new scissors were donated to make the activity possible and clean. A portable mini oven was used to make the croutons, and peer pressure made some kids to eat lettuce for the first time.

Ben and Jerry's Homemade Vanilla Ice Cream 

This was a delicious treat enjoyed by kids and teachers with fruits on the top. Icre cream machines made it possible!

Stone Soup 

The old revisited folk tale inspired this recipe which had a bit f a different stone in the soup.

Enjoy, and, of course, never forget to invite the little chefs to wash their hands with soap and water before every cooking session. Have fun!

Monday, August 20, 2012

Wild Smoked Salmon Summer Salad


While we were tasting many classic and new flavors of the French cuisine, one scene caught my eyes in awe in the bistros: How salads are so popular and go much beyond the concept of romaine lettuce tossed with some garden vegetables with some predictable dressing on the side.

I tasted many interpretation of the well known Salade Niçoise, and was puzzled by how French ladies would take hours chatting and eating a Parisiénne Salad: something like a beautiful mountain of greens with little mounds of all sort of things to be mixed and seasoned. The slow motion of eating and working the salad to a different level of dish, while ingredients were mixed in each portion brought to the mouth, the long pauses to eat, the elegant way of flavoring it with no pressure from the waiter. Something like a scene from a movie. All of this caught my attention and inspired me to make more salads at home.

This is inspiration for a very nice lunch for the end of summer, but don't forget the French dijon mustard to bring the soul of French flavors to your salad.

Wild Smoked Salmon Salad

This is for two to three portions of salad.

Salad

12 ribbons, about 1/2 inch width, of wild nova smoked salmon
1/2 bulb of fennel, shaved
1 celery stalk, shaved
1 scallion (green onion), chopped
1 teaspoon whole grain dijon mustard
a few drops of fresh lemon juice (enough to season the salmon)
dill, sprinkled over salmon
6 cups spring mix salad

Vinaigrette

2 tablespoons white or red wine vinegar
1/2 cup olive oil
1 teaspoon French dijon mustard
1 teaspoon chopped shallots or white parts of green onions
kosher salt to taste
Fresh chopped chives (optional)

Layer salad greens, fennel, and celery in a big bowl and put the salmon on top. Put half of the mustard in the middle of the plate. For the dressing mix all the ingredients and refrigerate for two hours before serving. Serve the dressing on the side. Enjoy it cold.


Wednesday, May 23, 2012

In season: Cherries

I'm so happy to see piles of cherries at the farmer's market: They're one of my favorite fruits for snacking on. I'm gearing up for an evening of pitting and canning cherries (a jar of cherries with simple syrup and vanilla bean is pure heaven in midwinter), but for now we're just nibbling handfuls and savoring their sweetness.

Fresh cherries take the spotlight in these recipes we've featured on Cook Play Explore: a fruity topping for vanilla-kissed scallops, a simple vinaigrette to dress up roasted beets, the sweet note in chicken salad, and the perfect sauce to drape over coconut-scented pudding. Read on for links and details


This recipe was inspired by a contest at Mango & Tomato — and to our delight, it took top honors! This is simple and elegant, a perfect entrée to share with friends on a gorgeous summer evening.


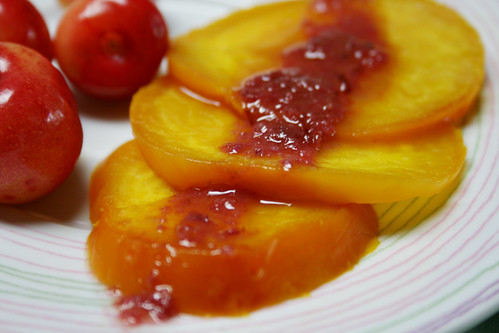
Earthy, earnest beets get all dressed up in a cherries and balsamic vinegar — just the right touch of sweetness to maybe coax the kids to try these delicious vegetables.

100716_CPE_beets


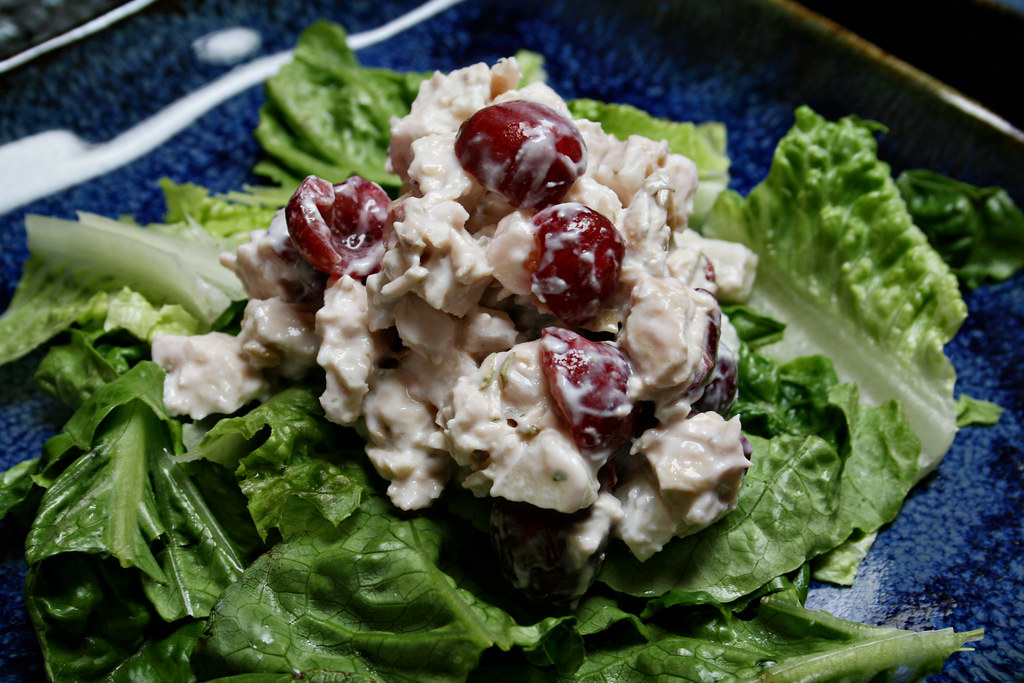
Jicama brings crunch and Greek yogurt supplies the tang in this mayo-free chicken salad. Sweet cherries are the vibrant finishing touch. Delicious in a sandwich, on a bed of greens, or shoveled with a spoon.


Did your mother make molded puddings like these back in the day? Mine did too. But Anna's updated version takes this comforting treat to a whole new level, using coconut milk and an infusion of fruity flavor. Topping it all off, of course: a wonderful cherry sauce.


Friday, April 20, 2012

Linguini All'aglio e Oglio and Happy Earth (and Garlic Day)


I was planning to write about something else, but a nice reminder on Facebook brought the news that Thursday was National Garlic Day. In my mail box, other food bloggers reminded me that Sunday is Earth Day. So, we should celebrate accordingly with earthy food! Right?

I wouldn't care to change my original post if it was Onion Day, because, honestly, I just love garlic so much more than I love onions. And I am a believer that Earth Day, as Garlic Day, could be celebrated every day. Earth is such a great home for us...

Garlic is omnipresent in most of my recipes, and my kids usually go for second servings, even when they are pretending to be on a hunger strike. You can find many recipes here that are garlicky—some of my favorites are:
Cranberry Beans with Brown Garlic Sauce
Lemon Balm Pesto
Broccoli Lemon Zest and Almond Pesto
Crunchy Green Beans 


Pasta with Garlic and Olive Oil

This recipe is always welcome here, and it's  kid-approved. You can always personalize it with a seasonal green (like spring onions or tips of broccoli florets) or a different type of pepper.

1 pound linguine or spaghettini, preferably Italian (whole wheat or Omega 3 added if you want to add more nutrition to the plate)
4 cloves of garlic, minced
4 tablespoons extra-virgin olive oil, divided
1/4 teaspoon freshly ground white pepper
1/2 teaspoon Meyer (or Sicilian) lemon zest (optional)
2 tablespoons pecorino cheese (optional)

Prepare pasta as directed by package instructions, subtracting 2 minutes from the cooking time to guarantee that it will turn out al dente and not mushy.

On another burner heat half the olive oil in a medium skillet. Add garlic, lower the heat, and stir for about 3 minutes or until the garlic starts to brown. Set aside.

When pasta is cooked and drained, heat the skillet again over medium heat.  Immediately add the pasta to the still-hot skillet with the warm oil and garlic (you can also remove the garlic and use just the infused oil). Add the rest of the olive oil, freshly ground pepper, sea salt, and lemon zest.

Carefully turn pasta in the skillet so it's coated with oil and seasonings.  After about two minutes, remove form heat and serve it straight away. If you love more flavor,  top it with pecorino cheese. 

Tuesday, April 10, 2012

Potato Pizza with Lavender, Rosemary, and Lemon


My last trip back east took me to far western Massachusetts — too far west, alas, to grab a few slices from my beloved Antonio's Pizza in Amherst. My sainted younger sister came to the rescue, arriving at our family home with boxes of my favorite slices: chicken parm, tortellini, potato and more.

I fell in love with potato pizza at Antonio's, which conveniently opened my freshman year of college. Antonio's has since expanded to a few locations, but I still live a 30-hour drive from the closest one.

Their potato pizza is so good, I've been reluctant to try to replicate it. Then I  came across Jim Lahey's much-publicized potato pizza and decided it was time to give it a shot.

His version is very simple: potatoes, rosemary, onion. I dressed it up with lavender, lemon zest, and a bit of cheddar-Gruyere cheese, popped it in the oven, and then thoroughly embarrassed myself in front of my dinner guest because I couldn't stop shoveling pieces into my face.


Lahey — who shot to fame spreading the gospel of no-knead bread — is back in food blog headlines with his latest cookbook, My Pizza. I had mixed results with his bread recipe, but this pizza dough... wow. I'm sold. It makes a delightfully crispy crust and it's very easy to work with. (Check out this video for tips on shaping each pie.)

You mix up the ingredients with a spoon, using just a smidgen of yeast, and let it sit for 18 hours. And that's pretty much it.

I mix mine before going to bed early in the week, and the next day after school I divide it into four pieces, wrap each in plastic wrap, and stash them in the refrigerator, ready to go for make-your-own pizza Friday nights.

Potato pizza is delicious straight from the oven or at room temperature. Purple potatoes would make this a jaw-dropping spectacle, but I haven't tried it yet. (I will soon!)

One last tip: If you make this for kids, do not call it a pizza. If you do, they absolutely will not eat it because it does not have red sauce and it isn't covered in oozing cheese. Call it a potato chip tart.


Potato Pizza with Lavender, Rosemary, and Lemon

Adapted from Jim Lahey. Be sure use culinary lavender that hasn't been sprayed with pesticides. If you can't find trustworthy lavender but do live near Trader Joe's, try using their Flower Pepper, with rose, lavender, and calendula in the mix. It's a great finishing touch for simply prepared veggies, too.  I'm including a link to the dough recipe; it's widely published online, but I don't want to lift it entirely from his book without explicit permission. Finally, measurements are loose here: I just grab a few sprigs of herbs, chop, and sprinkle until it smells right. Trust your instincts.

2-3 potatoes (waxy potatoes work well, Lahey calls for Yukon Golds)
1/2 yellow onion, chopped
cheddar and/or Gruyere, crumbled (I use Trader Joe's Cheddar-Gruyere Mélange), to taste
zest from 1 lemon
fresh rosemary, chopped, to taste
fresh lavender, chopped to taste
salt and pepper to taste
half of Jim Lahey's no-knead pizza dough

Slice potatoes thinly, using a mandoline or a knife. Fill a bowl with cold water, stir in a few shakes of salt, and add the potato slices. Let them soak at least half an hour, or up to 12 hours in the refrigerator.

Preheat oven to 475 degrees. If you’re using a pizza stone, be sure to put it in the oven as it warms up.

Drain potatoes and pat dry with kitchen towel. Combine potatoes and onion in a bowl, drizzle with olive oil, add a few grinds of pepper, and stir to combine.

Prep your pizza dough: You can lay it out on a cornmeal-covered pizza peel or a greased cookie sheet. Lay out potato slices atop the dough so that they overlap slightly. Scoop up any leftover onion from the bowl and sprinkle it over the potato slices. Add cheese, then sprinkle rosemary, lavender, and lemon zest. Season the pizza with a bit of salt, if desired, and a light drizzle of olive oil.

Bake on a lower rack in the oven for 25 to 30 minutes, until the crust and potato slices are golden brown and you can’t possibly wait any longer. Give it a minute or two out of the oven, then slice and serve!

Tuesday, March 13, 2012

Stuffed Shamrock Peppers


This greened-up take on stuffed peppers combines brown rice, ground turkey, and pesto for a filling, flavorful dish. Cutting the peppers in half should result in a shamrock shape — you'll have to use your imagination with these particular peppers, however. The ones I bought were too blocky. Pick peppers with more curves and you'll have more convincing shamrocks!

Stuffed Shamrock Peppers

For the meat, I chop up a handful of precooked meatballs. (Lemongrass Chicken Meatballs would go well here.)  You can substitute quinoa or Israeli couscous for the rice; leave out the meat for a vegetarian version. This serves four as a light meal or side dish; double the recipe for a more substantial serving.

2 green peppers
1 cup cooked brown rice
4 ounces cooked ground turkey or beef
3 tablespoons pesto
2 tablespoons tomato sauce
mozzarella cheese

Preheat oven to 350 degrees. Wash peppers, cut in half, and scrape out insides. In a bowl, combine rice, meat, pesto, and tomato sauce. Place peppers, cut side up, in a baking dish. Fill each half with rice mixture. Cover dish with a lid or foil and bake for 45 minutes.

Uncover peppers and sprinkle with cheese. Return to oven and bake until cheese is melted.

Saturday, March 3, 2012

Patrick-crepes with (or without) Wild Arugula and Balsamic Reduction


If you are enjoying the luck brought by leprechauns this March, this recipe will help you bring more greens to the table. This good-looking crepe (with no artificial colors)  is a delicious way to wrap up even more greens inside it.  It is also a chance for your kids to get acquainted with different tastes. Another possibility is to fill it up with cream cheese or ricotta seasoned with pesto or simply cheese and turkey ham.

My boys gave mixed reviews about it: With arugula and balsamic reduction it was a 10 out of 10. Without the pretend "shamrocks" these crepes were a 100 out of 10, if you know what I mean ... They rolled the crepe-pancakes and just ate them.

This is the first of a mini-series with some green food  that we will post up to March 17. As you know by now, Darienne and I can't resist celebrating holidays with food.  This is a great and inspiring one: If food has to be green, that's the most beautiful occasion to take advantage of!


Patrick-Crepes With (or Without) Arugula and Balsamic Vinegar Reduction

1 cup milk
1 cup cooked or 2 cups raw baby spinach (if cooked simmer with olive oil and a tablespoon of water)
1 cup flour
1 egg
1 to 3 tablespoon Parmesan cheese, grated
1/2 teaspoon dried savory or garlic powder
1/2 teaspoon baking powder
Kosher salt to taste
Balsamic vinegar reduction, to taste (optional, see note below)
Arugula (optional)


Mix ingredients with an electric hand blender. Let the mix stand for 10 minutes at room temperature and then blend it again.

Preheat griddle to 300 F (or use a skillet over medium heat), and coat it with a thin layer of olive or canola oil. Ladle the equivalent of 1/2 cup of crepe mix onto the griddle, and cook each side for about three minutes.

Pile cooked crepes on a plate to retain moisture and temperature. After about five minutes, plate them with arugula, a drizzle of balsamic vinegar reduction, or your favorite filling.

Note: To make balsamic vinegar reduction, simply bring vinegar to a boil over medium heat. Continue to cook over low heat until vinegar is reduced by at least half.

Tuesday, February 21, 2012

Faux Carb: Veggie Spaghetti


I love pasta. I would eat it every day — and nearly did, for a long time, until my body realized that middle age was approaching and began to protest. A little nutritional experimentation made it clear: If I didn't cut way back on bread and pasta, I'd have to upsize my jeans annually going forward.

Fewer carbs. No problem. Except my kids — like many — love carbs above all else. And there are so many delicious foods that just beg to be served atop a a pillowy pile of linguine, or poured over a bed of rice to soak up a lovely sauce.

Enter faux carbs, like Zucchini Pasta or this Veggie Spaghetti, which swaps in long strips of zucchini and carrot to replace pasta threads.

The trick to making it satisfying? Don't pretend it's pasta!

Enjoy it for what it is: a tasty vegetable dish, and a delicious delivery vehicle for what you love with your pasta. Stir in tomato sauce and top with grated Parmesan and great meatballs, for example, and you have a lighter take on a family favorite. Mix in a bit of pesto, sun-dried tomatoes, and cooked chicken strips and you have a deliciously comforting — and healthy — meal.


I especially savor a purely vegetarian preparation: It's surprisingly filling. If you can get your hands on good-looking basil this time of year, it will have your heart singing songs of spring.

Eating more faux carbs has my family eating more vegetables, obviously. And when I do sit down to a plate of perfect pasta, I savor every single bite.

Veggie Spaghetti

Vary the vegetables depending on your taste and what's available. I often make a variation of this with just zucchini, which slices up in a flash with a mandoline and is especially satisfying dressed in a simple sauce and served with turkey meatballs or chicken sausage. This is also delicious with pesto or your favorite tomato sauce.

1 1/2 pounds zucchini
1/2 pound carrots
1 cup cherry tomatoes, halved
2 to 3 cloves garlic, minced
olive oil
salt
pepper
freshly chopped herbs such as basil, oregano, or mint
Parmesan cheese
chopped black olives (optional)

Peel carrots and wash zucchini well. Cut into long, thin spaghetti-like threads — a mandoline is easiest, but you can do it with a knife.

In large skillet, heat a bit of olive oil over medium heat. Add halved cherry tomatoes and cook, stirring occasionally, until soft and lightly charred. Remove tomatoes from pan and set aside.

Add a tablespoon of olive oil to the pan and heat, then add minced garlic and cook, stirring, until fragrant, about 30 seconds or so. Stir in carrots, add a spoonful of water, cover, and cook for 2 minutes. Add zucchini, another splash of water if it looks dry, cover, and cook for 3 minutes more.

Uncover skillet and cook, stirring, another 2 to 4 minutes or until vegetables are done to your liking. Stir in tomatoes and season with salt and pepper.

Serve garnished with fresh herbs, Parmesan cheese, and olives, if using.

Kid-friendly tip: Stir in something your child knows and loves — pesto, perhaps — to boost the odds she'll try it. You can set out tomatoes, olives, cheese, chicken strips, and other toppings in small bowls and let her choose what to add to her plate.

Saturday, February 4, 2012

The Mystery Soup Game


It looks like sweet potatoes, carrots, or maybe pumpkin cream. But after tasting it, all were curious about its different flavors and textures and started to try to figure out its ingredients.

That's how our table-dinner-game "Guess what's in the mystery soup" began here, and it's become a successful and fun way to coax kids to eat a second serving — or maybe even a third — of something they usually are not so interested in!

We've played the game every Monday since winter began, and the kids' repertoire of ingredients (and even mine) is growing. After tasting one spoonful of soup, the players can guess one ingredient. If it's correct, we add to the list. The one who makes the most correct guesses can choose a treat for dessert.

Next week, the winner of the most challenges will get to take part in preparing the soup, and I hope it will be lots of fun. The boys also talked about Ratatouille, the movie, and could not stop thinking about watching it again to try to figure what was in the soup cooked by the little chef, the rat.

I believe any soup is good for the game, as long as you process it with a blender before serving. For now, our recipe for a soup that had amazing reviews here:

Mystery Soup Number 1

I cook the soup in a pressure cooker to make sure the vitamins won't fly away. If using a regular stockpot, double the cooking time.

1 tablespoon olive oil
a little flour
1/2 leek, chopped
1 cup yellow split peas
2 cloves garlic
Salt to taste
4 cups water
1 teaspoon dry basil
1 cup your favorite recipe (or jar) of tomato sauce

Heat olive oil and add flour, mixing it to prepare the base of the soup. When almost brown, add leeks and let them cook until transparent. Add minced garlic and then split peas, and mix well with a wooden spoon. Add salt, then water and tomato sauce.

Cook for 35 minutes in a pressure cooker or just over an hour, until all the ingredients are soft. Process with a hand blender and serve with a swirl of Greek yogurt or cream.

Saturday, December 17, 2011

Healthy Holidays: "Gift" Wrapped Fish

Here we are with our suggested third course for a light and elegant holiday dinner. If, like me, you are looking for a very easy going dish - and even impressive-  to entertain your friends and family, this might be it. 
Since we published this recipe we had some good feedback, and, of course, you can easily adapt this to seasonal ingredients or different fish. Last time I prepared something inspired in this recipe, I used fig leaves and halibut, something really like a recipe from one of my favorite Alice Waters's book. 
Enjoy! 
And don't miss it: tomorrow we will have a brand new recipe from our oven to make a surprising fourth course!


Pacific Rockfish en Papillote

Any white meat fish will do well for this recipe, as far as it is one chosen from the list available online from Seafood Watch. I always carry my pocket guide everywhere so not to be doubtful of what to do when shopping.

1 medium zucchini, thinly sliced
4 fingerling potatoes, thinly sliced
4 rockfish fillets
4 slices portabella mushroom
1/4 tomato, cut in halves
Spring onion, cut in long sticks
Kosher or sea salt to taste
Freshly ground black pepper to taste
Olive oil to drizzle over layers or Earth Balance vegetable spread, softened

Preheat oven to 400 F.  Cut parchment paper in 4 equal parts, enough to wrap the fish towers. Layer 6 circles of zucchini on the bottom, topped with 4 slices of potatoes, and then fish. Finish with slice of portabella, tomato half-moon, and spring onion. Season each layer with a bit of salt and pepper and drizzle olive oil. Fold and close parcels loosely. Bake for 15- 20  minutes, depending on how you like your fish done.

Sunday, November 20, 2011

Playdate Special: Be Bim Bop


Have you ever thought  about rice? It's present in almost every cuisine of the world, and is the main ingredient for many delicious meals. That's why it was chosen to represent the sense of unity of most cultures at my kid's school cooking club's classes. So the first dish to be prepared at the Cooking Club this year was a colorful dish from Korea, Bi Bim Bop.

I first fell in love with this idea when I saw a kid's book in my local library, called Bee-Bim Bop!, by Linda Sue Park, illustrated by Ho Baek Lee, few years ago. Later I had the chance of trying some of the original plate in a Korean bowl place in Palo Alto.

The book is amazing — so cute and so full of rhymes that it turns the task of preparing the dish into almost a musical experience. After four rounds of making the dish with kids at school, I finally got to invite our playgroup to make it, this time using beef instead of tofu.

The key element to get the school kids and our playgroup involved was reading the book before cooking, and getting them used to the idea of "chop chop chop," as in the book,  with a  safe (plastic) knife. Then, the process used with the school kids: While kids at one table were prepping the vegetables, kids at another table were cutting tofu and preparing the marinade. The third table's kids were working with the eggs for the egg pancakes.

The final result was amazing and put together the work of every kid: after watching us cook the veggies and tofu on the griddle, they all had a colorful bowl full of rice to be mixed. For many kids it was the first time to try some different vegetables, tofu, and soy sauce. And some of them were just following what the book suggested — mix mix mix — and eat!

Be Bim Bop

Any rice will do a great job here. If choosing beef, put the fresh steak in the freezer for about 15 minutes to help with the slicing. This recipe is adapted from Linda Sue Park's and also has some inspiration from recipes around the Web. If you are really daring to try something else, you can add a recipe of kimchi (as in this good recipe here).  

Cooked rice
1 English cucumber, peeled
2 carrots, sliced
1/2 pound aduki bean sprouts or alfalfa
4 medium shitake mushroom (optional)
4 medium white mushrooms (optional)
2 free-range eggs, lightly beaten
4 cups fresh organic baby spinach, chopped
Extra-firm organic tofu, diced (or 8 oz. sirloin steak, finely sliced)

Marinade for tofu or beef:
6 tablespoons reduced-sodium soy sauce
2 tablespoons sugar
2 tablespoons oil
Sesame seeds (optional)
4 drops sesame oil (optional)
2 stalks spring onions (scallions)

Preheat electric griddle to 370F. (You also can use a large skillet, over medium-high heat.) Chop the vegetables and set aside, each in a different bowl. Mix ingredients for the marinade in another bowl. Add the tofu or beef to the marinade.

Beat the eggs lightly and prepare mini-egg pancakes in the griddle. When done, set them aside on a plate to cool down. Add carrots and tofu (or beef) to the griddle and keep an eye on them, turning periodically.

Cut egg pancakes into half-inch strips and set aside on a plate. Now add mushrooms, bean sprouts, and spinach to the griddle, keeping them separated. At the last minute add cucumber. When the carrots are cooked but still al dente, start removing vegetables, transferring each type to its own bowl. Removed the beef or tofu from the griddle.

Serve all ingredients over a bowl of rice, to be mixed by the person being served. 

Monday, October 31, 2011

Succotash in Squash


The sight of those beautiful acorn and carnival squashes inspired me to think about something beyond sugar and cinnamon treats. It made me think about something good to be served not just for a Halloween dinner, but also good for Thanksgiving menu.

And then everything came to make sense: a Native North American classic inside a deliciously edible seasonal container.

One of my kids was not happy when he saw the "dead" acorn squash, halved and cooked, in front of him — it used to be one of his favorite good-looking squashes in his "pumpkin patch" on the rug. But soon he was convinced that the squash's fate was good, and ate all of his succotash.

As you might know, succotash can be interpreted in many ways as long as corn and white beans are included to the recipe. I mainly played with seasonings to enhance the sweetness of the corn and squash while adding a bit of a European flavor with thyme and shallots.

Succotash in Squash

Bake the squash while preparing the beans. It's a good idea to bake a whole batch of squash and sugar pumpkin to use in other recipes and freeze for later.

1 carnival squash, halved and de-seeded
1 acorn squash, halved and de-seeded
1/2 pound lima or cannellini beans, soaked overnight and cooked al dente in salty water
1/2 pound yellow corn kernels, cooked
2 tablespoons extra virgin olive oil
4 bay leaves
1 medium shallot, diced
4 garlic cloves, smashed
1/2 cup cooked sugar pumpkin
1/2 cup tomato sauce
2 teaspoons thyme
kosher salt to taste
cayenne pepper, to taste
poppy seeds, to sprinkle over the top of each squash

Bake squash halves, face-down in a baking pan with a half-inch of water, at 375 F for about one hour. You want them firm, so check after 45 minutes to see if they're ready — avoid overcooking.

While squashes are in the oven, prepare the filling. Shallow-fry shallots and garlic in olive oil over medium heat. Add thyme and tomato sauce and simmer for 10 minutes. Then add beans and sugar pumpkin and stir. Add salt to taste, and simmer for about 20 minutes. Serve beans inside the baked squash. Happy eating!

Sunday, October 23, 2011

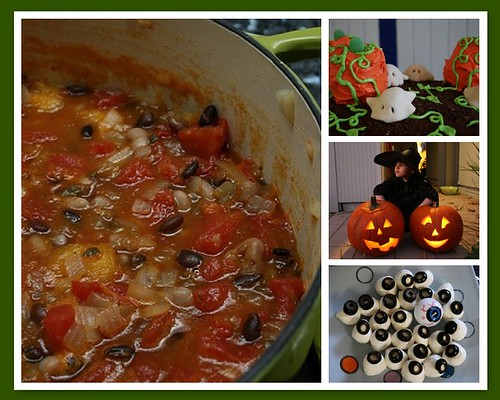
Pumpkin Chipotle Chili

This vegetarian chili has become a perennial fall favorite in my home. It's a great make-ahead dish for parties, and leftovers freeze well for ready-to-go meals later. It's a fun way to get your children to look at pumpkins a new light. If you're feeling ambitious, present it in a hollowed out pumpkin—perhaps with a jack o'lantern face drawn on it with marker. Hearty and filling, this will help fuel your family through a night of Halloween haunting.
Halloween09 mosaic
My favorite chili, with other party classics — spooky pumpkin patch cake
and mozzarella-and-olive eyeballs.

Pumpkin Chipotle Chili

To roast a pumpkin, simply cut the pumpkin in half, scoop out the seeds, and pierce the shell a few times with a fork; set halves on a baking sheet, cut side down, and roast at 350 degrees for 45 to 90 minutes. The pumpkin's ready when you can easily pierce to the center with a fork. To keep this child-friendly, go easy on the chile—but offer chipotle chile powder for those who want to turn up the heat.

2 tablespoons olive oil
1 1/2 onions, chopped
4 garlic cloves, peeled and chopped
cooked flesh from 1 small Sugar Pie pumpkin, chopped (see note)
1 1/2 tablespoons chipotle chile in adobo sauce (more or less according to taste; see note)
1 28-ounce can of tomatoes
2 cups vegetable broth
2 cups cooked black beans
2 cups cooked white beans (cannelini, navy, etc.)
2 tablespoons fresh sage, chopped
salt, to taste
black pepper, to taste
toasted pumpkin seeds, for garnish (optional)

Heat oil in a Dutch oven or stock pot over medium heat. Sauté onion and garlic until softened. Add pumpkin and chile and sauté 2 minutes more. Add tomatoes, vegetable broth, beans, sage, and salt and pepper to taste. Simmer, covered, for 45 minutes. Serve topped with toasted pumpkin seeds, if desired.

Thursday, September 29, 2011

Chicken with Apples and Saffron

Photo by Adi Ziv-Av

This recipe was first made while we were still living in Forest Hills, New York, seven years ago. The thought of celebrating the Jewish New Year was a culinary challenge for me. I wanted to gather apples, saffron, chicken and even some honey and nuts. With some inspiration of Moroccan flavors and Indian marinades, I made a fusion and the result became a tradition in my family.

As I usually do every year, I keep changing  the recipe slightly.  Gravenstein was the choice for apples, no dried fruits were in the marinade, chicken was the best ever from Mary's Free Range, and instead of couscous we had some purple potatoes with capers and cranberry beans.  

Apple Saffron Chicken


The yogurt marinade is the key to success with the chicken texture. I used a low-fat organic natural yogurt from Trader Joe's and that worked perfectly. This year I tested mashed papaya as main marinade ingredient instead of yogurt. The result was equally delicious.
A good saffron also helps. This year I found a very good one by Morton and Basset from Novato, California. 


2 cups apple juice
12- 14 saffron threads
2 cups of your favorite mixed dry fruit
6 tablespoons low-fat natural yogurt
kosher salt to taste
3 tablespoons of extra virgin olive oil
1 medium white onion, cut in cubes
3 pounds chicken breasts, butterflied
1 pound chicken thigh filets, fat removed
2 medium Pink Lady apples, thinly sliced
Your favorite honey to drizzle the apples

Warm apple juice and add saffron (and dried fruit, if used) . Reserve for later. In a big bowl whisk together yogurt (or papaya)  salt, olive oil and onion. Immerse chicken pieces and marinade overnight or a minimum of 2 hours.
Heat large skillet over high heat. Remove chicken from marinade; reserve marinade. Sear each piece of chicken, being careful to just bring the meat to the surface. If not using a ovenproof skillet, transfer the seared meat to a ovenproof dish. Cover with reserved marinade, and use the slices of apple as a top layer on the dish, to work as a lid. Bake in oven for 25 minutes at 375F. Serve hot. Ideal sides are salads, couscous and rice.

Thursday, September 22, 2011

Fresh and Fast Homemade Tortillas


Fair warning: Once you try making tortillas from scratch, those store-bought ones will taste like cardboard. You'll never go back. Good thing these are so easy to make.

This recipe was not taught to me by my abuelita, nor anyone else's abuelita, for that matter, and it makes no claim to authenticity. A fresh tortilla made with silky-soft white flour and lard is incomparably delicious ... but I can't bring myself to make it that way. In this version, white whole-wheat flour and a small amount of oil make for a soft, flavorful tortilla with a little more nutritive value. I made it as healthfully as I could—pushing it any further, I found, ruins all the pillowy gorgeousness of a homemade tortilla.

Once you've made these once or twice, you should be able to crank out a batch within 20 minutes. It's all hands-on work, which can be tough to manage with young ones underfoot. The best way to pull it off is to have them join in: Let them mix up the dough by hand, and watch and giggle as the tortillas puff up on the skillet. 

Yep, that's funny-looking.
A few tips:
  • More hands = more fun. Enlist little ones to blend the dough. If you have more skilled help available, have one person roll out tortillas while the other mans the skillet.
  • Preheat your skillet. Make sure it's hot before you throw your first tortilla on there. But not too hot—you want gentle browning, not smoky blackening.
  • Keep 'em soft. When you take the tortillas off the heat, wrap them in a kitchen towel. To store for later, pack them in a zip-top bag or airtight container while they're still warm.
  • Make extra. These are irresistible fresh off the skillet, but they store well. Make a larger batch and save some for easy snacks and lunches later in the week. 
  • Add flavor. Try incorporating pumpkin, tomato paste, spinach, or red peppers. To see how to do it, check out this recipe for Pumpkin Tortillas.
Leftover stir-fry wrapped in fresh tortillas—yum!

Homemade Tortillas

This goes very light on the oil—if you wish, you can add a little more; I rub a few drops of olive oil on my hands when I knead the dough. Makes 8 to 10 tortillas.

1 cup all-purpose flour
1 cup white whole-wheat flour (or substitute all-purpose)
1 teaspoon baking powder
½ teaspoon salt
1 tablespoon olive or canola oil
¾ cup warm water

Stir together flour, baking powder, and salt with your fingers or a fork. Drizzle the oil over the dry ingredients and blend well. Add a spoonful or two of water, mix in, and repeat until the dough starts to come together in a shaggy ball. You might need a little more or a little less water.

Turn the dough out onto a lightly floured surface and knead for a few minutes until it’s smooth and elastic. Divide into 8 to 10 pieces and roll into balls—about the size of ping-pong balls.

Heat a skillet over medium heat. Roll a ball of dough out into a very thin circle, about 7 to 8 inches. If the dough is resisting, cover and let it rest for 10 to 20 minutes.

Put the rolled-out dough onto the heated skillet and cook for about 15 seconds; you should see some puffy spots and browning. Shake the skillet a little to slide the tortilla around if it gets too puffy. Flip every 15 to 20 seconds—it shouldn't take more than a minute or so.


Wrap cooked tortillas in a kitchen towel to keep them warm and soft, or store in a tortilla warmer while you cook the remaining tortillas. If you have leftovers, store them for up to a week in the refrigerator in a zip-top bag or airtight container, or in the freezer.

Tuesday, August 30, 2011

Fast Black Beans


While I was entertaining myself out and about with the delicious creativity of the Carioca contemporary cuisine, my kids were in love with the daily black beans with rice. Although I've been cooking beans on a frequent basis for more than ten years while not living in Brazil, I thought it was time for me to go and learn a bit more about it.

For that mission, I invited Lu, our family cook, to teach me how to make that delicious stew in no time. Normally I make it with a bit of planning, because up to this last visit, I was a believer that I had to soak the beans overnight.

Black beans with rice is a national favorite, with international projection, and for generations it has been considered the core of kids' nutrition in my home country. My mom was the one who suggested I look further into the science behind the mix: Recently it has been discovered that the combination of black beans and rice is a winner. According to a study by the department of nutrition of Unesp, the combination of two amino acids in both foods optimizes absorption, great for tissue repair and with the perfect glycemic index. Embrapa, the Brazilian agricultural research agency, found that the best ratio to have all benefits from the mix is 2 parts black beans to 1 part rice. Another study found that black beans have a wonderful amount of fluoride, which benefits dental health.

Back to the kitchen: Besides the unique flavor that Lu adds to her black beans "formula," she was happy to reveal to me that 30 minutes in the pressure cook would be enough for the beans to get the right al dente texture and, better than that, the best flavor. If you want to get more familiar with the pressure cooker, you can read more about it here.

I adapted her recipe for an even faster recipe and if you are willing to try it, there's a good chance you, and most importantly, your kids will love it. Use your favorite type of rice to eat with the beans.

Fast Black Beans

To make it even faster, use two cans of black beans. I've read that beans retain a lot of their nutritional properties when canned. Trader Joe's black beans, for example, have 45 percent of the recommended daily amount of iron and 6 grams of protein; the dry beans have 8 grams of protein. I do use canned beans when I have a emergency. Sometimes canned black beans are easier to find than dried beans, which usually are available in the Mexican section of California supermarkets. 

1 lb dried black beans
2 bay leaves
Enough water to cover beans plus two inches
1 tablespoon olive oil (canola is ok)
2 tablespoons chopped onion
1 garlic clove, minced
Salt to taste

Combine dried beans, water, and bay leaves in the pressure cooker and cook for 30 minutes. Discard bay leaves and drain beans, reserving water used for cooking. (If using canned beans, skip ahead to the next step.)

Shallow-fry half of the beans with onion and garlic over medium heat for about 5 minutes. Add some of the cooking water to the beans and your desired amount of salt,  and crush some of the beans with a ladle or wooden spoon to have a creamy sauce.

You can freeze the remaining seasoned beans with some cooking water for the next time, so you'll just need to do the second step.

Serve beans hot over your favorite rice.


Tuesday, May 24, 2011

Lemongrass Chicken Meatballs

1105_CPE_meatballs


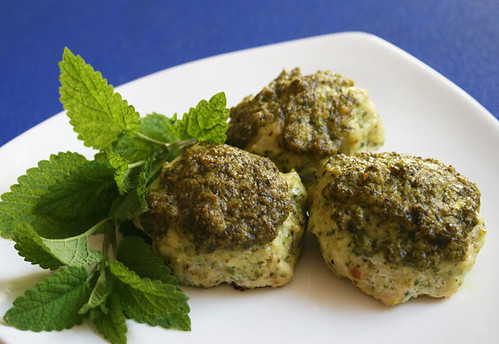
I hate to admit this, but I should declare it up front: The kids didn't care much for these light, lemony meatballs. I'm not sure why, but I didn't put much effort into figuring it out – because the grownups liked them just fine. A bright lemongrass pesto with garlic, ginger, and herbs makes this a nice warm-season appetizer or main dish. If you have leftover pesto, stir it into pasta to serve on the side.
If you love lemongrass, you might want to try growing your own – it's surprisingly easy! Lemongrass is fairly common in markets here, but too often the stalks are dry and ... sad. Find a good-looking stalk at the market (bonus points if there are any bits of roots on the stem end). Plunk it in a jar of water and set it somewhere it can get a fair amount of indirect sunlight. Watch and wait: You should soon see roots growing. When they're two inches long or so, plant your lemongrass in a pot or a sunny patch outside and watch it take off. I coaxed roots out of a particularly humble-looking stalk in the fall and now have a foot-wide plant – and that's after carving out several chunks to share with friends.

Lemongrass Chicken Meatballs

Use fresh lemongrass if you can find it (try well-stocked stores or Asian markets): Cut off the bottom stem and top leaves so you have only 4 or 5 inches of stalk, then peel off and discard the tough outer layers. I use lemon balm in the pesto as well, but you can substitute whatever herbs you like – cilantro or mint would be great variations. Try serving with satay sauce and/or chopped peanuts.

Meatballs:
1 pound chicken, cut into large chunks (or store-bought ground chicken)
1/2 cup bread crumbs
1/2 onion, minced
1 egg, lightly beaten
2 tablespoons lemon juice
salt and pepper to taste
1/2 cup Lemongrass Pesto

Lemongrass Pesto:
2 cloves garlic, chopped
1 tablespoon ginger, minced
2 stalks fresh lemongrass, minced (see note)
zest and juice from 1 lemon
1/2 cup Parmesan cheese
1 cup lemon balm leaves (or mint, cilantro, parsley, or basil)
1 cup parsley leaves
salt and pepper to taste
1/2 cup olive oil

Preheat oven to 400 degrees. Line a baking sheet with parchment paper or a silicone baking mat.

To make pesto, combine all ingredients except olive oil in a food processor and puree. While machine is running, pour in olive oil in a thin stream and continue processing until well combined. (Alternatively, you can make the pesto with a mortar and pestle.) Transfer to a bowl and set aside.

To make meatballs, pulse chicken in the food processor (no need to clean out the pesto bits) until minced – don’t overdo it or you’ll end up with mush. (Skip this step if you're using ground chicken.) Transfer chicken to a large bowl and add remaining ingredients. Stir well until thoroughly combined.

With your hands, form chicken mixture into meatballs about the size of golf balls and set themthe on prepared baking sheet. Spoon remaining pesto over the tops of the meatballs. Bake for 15 minutes or until cooked through, then move baking sheet to broiler position and broil for 3 to 5 minutes or until lightly browned on top.

LinkWithin

Related Posts Plugin for WordPress, Blogger...