Showing posts with label Holiday. Show all posts

Monday, April 21, 2014

Coconut and Raspberry Macaroons


It's the last night of Passover and I've been cooking so much for these holidays that I didn't have time to sit quietly to share my latest recipes here.
Belonging to a interfaith family has its advantages but sometimes is just plainly overwhelming. It's great that Passover lasts for 8 nights, so that we can keep trying new recipes and variations over some staples, like matzo balls soup and gefilte fish.
I made theses sweet treats for the first night of Seder when we had some friends and family over, and despite of the extreme sweetness, it just almost vanished from the table. This photo was taken today, with some hidden in the fridge goodies.
Usually guests bring these as dessert but at this time I just thought it would be nice to make them anyway. For my luck they were the only macaroons on the table, so no competition - and absolutely one of the items that I will incorporate to my family's tradition. They are good on their own or topping a scoop of vanilla ice cream.


Raspberry Coconut Macaroons
This is a variation of Mark Bittman's recipe. I added and substituted some ingredients and needed to adjust some of them, as I added more texture with the dried raspberries. 


3 egg whites, lightly beaten with 1/4 teaspoon salt
1/2 cup light brown sugar
1/3 cup white sugar
2 cups dried shredded unsweetened coconut
1 cup toasted shredded unsweetened coconut (10 minutes in the oven before using)
3/4 cup ground dry raspberries (I used Trader Joe's), measured before grinding
1 teaspoon orange oil

Preheat oven to 350 F. Line a baking sheet with parchment paper. With a wired whisk, beat eggs with salt up to very soft peaks. Slowly fold in sugars and orange oil, and finally coconut and ground raspberries. The mix will look very dry.  Using two teaspoons, lay each macaroon on the baking sheet, and shape them like pyramids with wet hands. Bake for about 40 minutes or up to when peaks are looking slightly charred. Cool down on a wired tray and transfer to the fridge up to when serving.

Thursday, February 6, 2014

Fortune cookies made easy


140206_fortune-cookies-4

Making fortune cookies has been on my list for years. Every time I started to poke around recipes online, I balked because of the reviews. For every person who said such-and-such recipe was easy and perfect, there was another who said it was an utter disaster. I wanted better odds of success before wading into that territory.

But this year, I forgot to get a new bag of fortune cookies on our annual Lunar New Year shopping trip to Chinatown. We usually swing by Golden Gate Fortune Cookie Co. to see the treats being made and bring a bag home. This year we filled up on dim sum, boba tea, and egg tarts, but rushed home without our cookies.

This was it: The Year of the Horse would be the year I tried fortune cookies.

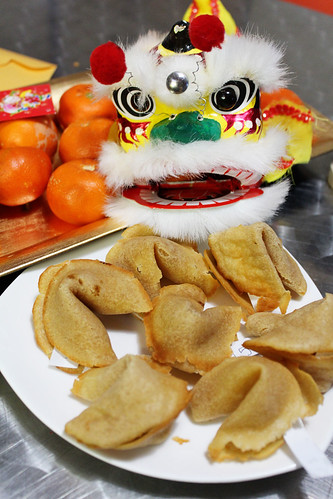
And they were a success! They tasted delicious and the kids loved them. And they weren't too difficult. We'll happily make them again soon. Probably within a few days.

140206_fortune-cookies-1
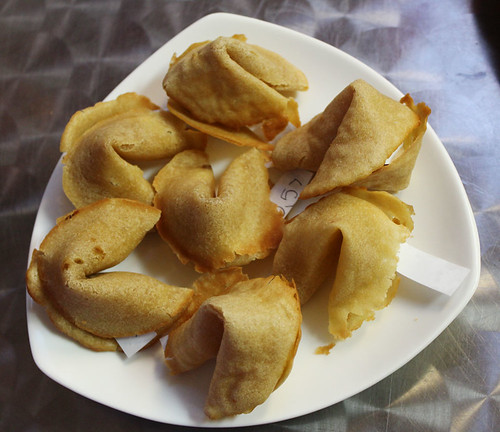
One of these is not like the others... the one on the left is smoother and has more defined edges because we used parchment paper to help shape it.

Anna solved the trickiest challenge: getting each cookie thin and flat. These cookies need to be ridiculously thin — almost translucent. Most recipes say to use a spatula or spoon to spread the dough in a circle on a greased sheet or silicon mat. We did that for most of ours, and they came out OK but were uneven, a little bumpy, and with crumbly edges.

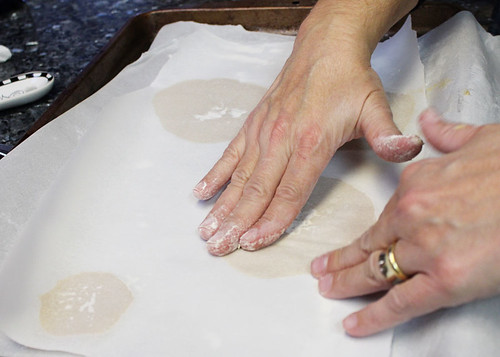
Our trick: Anna spread them on floured parchment paper, then used another sheet of floured parchment paper to press them flat. We popped them in the oven, covered in parchment paper, and they came out beautifully. (That's a little pastry technique she picked up in Paris. Never miss a chance to give credit to things from Paris.) You can see the difference in the photo above: The cookie at the bottom left is from the parchment paper batch. Perfect!

140206_CPE_fortune-cookie-2

Before you try them, you need to know a few hard truths:
  • Your fortunes will have grease spots. You could try making the cookies without butter, but reviewers of butter-free versions often say the cookies needed butter, for taste and to avoid sticking to the pan. (With Anna's parchment paper technique, butter-free might work. I hope to try it soon and report back.)
  • There will be losses. It takes some practice to get the hang of it, and even then there will be casualties.
  • Making fortune cookies is time-consuming. Relax and make an afternoon of it.
  • Crispiness is a high goal. A few of ours crisped evenly and nicely, but most had slightly chewy centers. Practice will help, and some advise returning the shaped cookies to a 250 degree oven for a few minutes to crisp. We ate all ours, and so didn't try it.
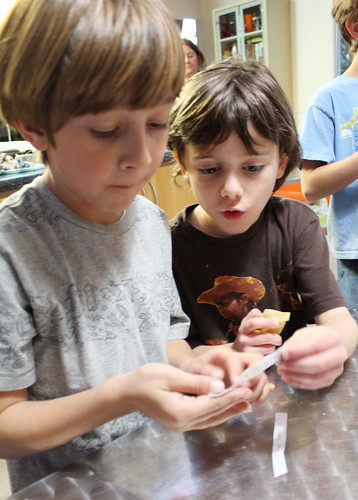
This is a fun one to do with kids. Spreading the batter and shaping the cookies may be difficult for young ones, but kids who can write or draw of course can prepare the fortunes. (Ours, not surprisingly, turned out to be focused on the boys' current obsession: "Your mom will let you play Minecraft" and the like.)

140206_fortune-cookies-3
Hey, look! Another fortune about Minecraft!

Fortune Cookies

This recipe makes 18-20 cookies. Adapted from Allrecipes and Fifteen Spatulas

2 egg whites
1/2 cup sugar
1/4 cup butter, melted
scant 1/4 teaspoon almond extract
scant 1/4 teaspoon vanilla extract
2 tablespoons water
2/3 cup flour

Write your fortunes before you bake the cookies. Cut paper into strips, about 1/2 inch wide and 2 1/2 inches long, and write fortunes. (This is a great job for the kids. We used ballpoint pen, to make sure the ink didn't bleed onto the cookies.)

Preheat the oven to 375 degrees. Line a baking sheet with parchment paper (trace 3" circles onto the paper as a guide, if you wish) and dust lightly with flour. Lightly dust a second sheet of parchment paper with flour and set aside.

In a medium bowl, whisk the egg whites and sugar until they're frothy. Whisk in the melted butter, extracts, and water, then mix in the flour just until it's blended in — don't over-mix. The mixture should be like a light pancake batter, not a doughy cookie batter.

Scoop a generous 1/2 tablespoon of batter onto the prepared baking sheet. Use the measuring spoon to spread it into a very thin circle, about 3 inches across. Do no more than 3 or 4 cookies at a time (and for your first try, I recommend doing only two). Lay the second piece of parchment over the batter, floured side down, and press down to ensure evenly flat, thin cookies. Leave the paper in place.

Bake cookies on the middle rack of the oven for 6 to 7 minutes. They're done when they're just golden around the edges. They need to be soft and pliable for folding.

Be ready to work quickly: Peel off the parchment paper, flip each cookie over, and lay the fortune across the middle. With a spatula or your fingers (gloves might help), fold each cookie in half — don't crease it flat, just pinch the open edges together. Then set the cookie on the edge of a cup, with the folded edge on the rim and the open side on top, and pushing the corners down while you hold the pinched edges together. Tuck each folded cookie into a muffin pan so it will hold its shape as it cools and hardens. (Check out these videos for helping shaping cookies.)

Repeat with the remaining batter.

Monday, January 6, 2014

So bring me a Figgy Cake... And a Happy New Year!!!


It's my first post of the year and yet it's something I baked last year... . But this is not your average end of the year celebration cake! It was so good that I had to stop all my fourth day of the new year activities to post it. Maybe you will want to bake sometime to celebrate something other than Christmas. If you are a grown-up who drinks, it's a perfect pairing for a bubbly. But a warning: it's so delicious that I had to make an effort to freeze a slice to be able to replicate it later, once it was a very improvised recipe.

The project was to bake a original British style figgy pudding so to go with the song, as my sons are always repeating "So bring me a figgy pudding"asking me when I was going to bake one. The problem was that I was crazy busy as most of you guys, and had to improvise the steaming for something like "wet" baking. I will explain myself: Once I came across this recipe that recommended to bake normally adding a water filled pan to pretend it is also steaming. And it worked. Happy 2014!!!

Almond Figgy Cake
This recipe is vaguely based on Simon Rimmer's Figgy Pudding, published in Something for the weekend, and online at BBC.

2 cups chopped california dried figs
1/3 cup cognac ( I used Remi Martin)
3/4 cup hot water
1 cup flour
1.5 cups almond meal (ground almond)
1 teaspoon baking powder
1/2 cup brown sugar
1 teaspoon nutmeg
1/2 cup extra virgin olive oil
1/2 cup concord grape raisins soaked overnight in1 cup of your favorite wine
1 orange, zest and juice
2 eggs


Preheat oven to 350 F, with a large baking pan filled with water on the lower rack of oven. Start soaking figs in cognac and hot water for about 15 minutes, or overnight, if you have time. Mix flour, almond meal, baking powder and nutmeg in a bow and set aside. In another bowl mix brown sugar, eggs, olive oil and whisk up to when you get a creamy texture. Slowly add cognac and water mix from the figs. Add figs and raisins to flours and mix up to when they get fully coated. Add liquid mix to flour mix stirring with a wooden spoon. Let it rest for 5 minutes, mix again and pour batter on a flutted tube pan.  Bake in the oven from 45 to 55 minutes (still with the water filled pan in there, refill if necessary), or up to when crust is golden and core dry. Serve it hot with vanilla ice cream, or cold for brunch with a latte. 

Wednesday, December 4, 2013

Persimmon Cranberry Tea Bread (Vegan)

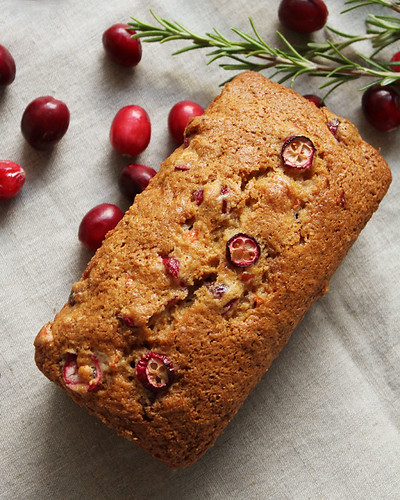
131203_CPE_persimmon-bread-1

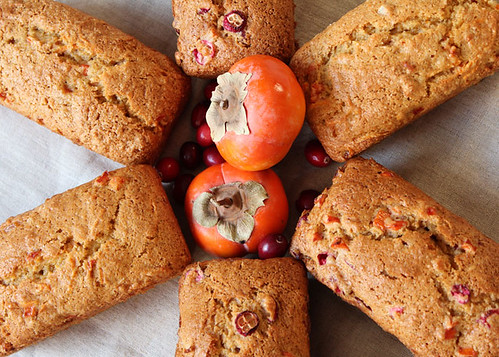
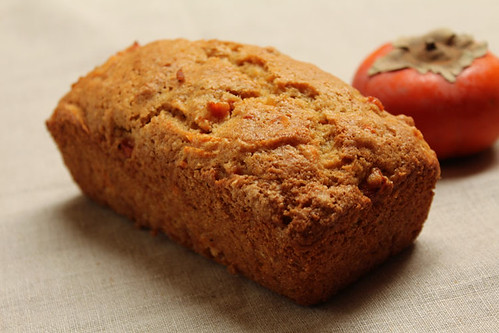
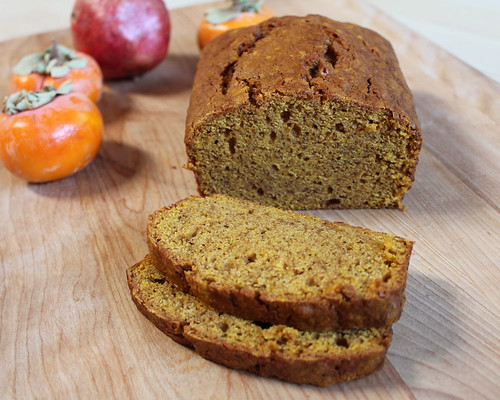
Persimmons and cranberries look like colorful jewels in these golden-colored little loaves. These make lovely gifts for neighbors, hosts, teachers and more during the holiday season. You can freeze them and thaw for gift-giving, or as a treat for your own holiday table.

Persimmons are one of my favorite California fruits and they’re plentiful and inexpensive. If you don’t have them near you, you can substitute apples or pears. I made one batch pairing persimmons with cranberries, with just a bit of candied orange peel, and a second batch with sweet potatoes instead of berries.

131203_CPE_persimmon-bread-3


I’m baking vegan, nut-free loaves to minimize any awkward gift-giving issues. Don’t let the V-word scare you! These treats are perfectly tasty, though I admit they’re a little more crumbly than they would be with egg. You can substitute butter and egg for the vegan alternatives in the recipe if you prefer.

This is riffing off Mark Bittman’s master recipe for quick bread made with almost any fruit or vegetable. It’s a terrifically versatile recipe, much like buttermilk quick bread. You can tinker with fruit, veggies, and mix-ins as you like, and bake a full-size loaf, mini loaves, or muffins to brighten a wintry morning. If cranberries aren't your thing, try the sweet potato variation.

131203_CPE_persimmon-bread-2


Persimmon Cranberry Tea Bread

Based on Mark Bittman’s Fruit-and-Nut or Vegetable-and-Nut Bread. To make the flaxseed egg replacer, blend 1 tablespoon flaxseed meal with 3 tablespoons water, and let sit 5 to 10 minutes until gelled. 

4 tablespoons Earth Balance spread, or butter, chilled
1 cup white whole wheat flour, or all-purpose flour
1 cup all-purpose flour
3/4 to 1 cup sugar
1 1/2 teaspoons baking powder
1/2 teaspoon baking soda
1 teaspoon salt
1/2 teaspoon cardamom or cinnamon
3/4 cup apple or orange juice
1 tablespoon grated orange or lemon zest
flaxseed egg replacer equivalent to 1 egg (see note), or 1 egg
1/2 cup persimmon, peeled and diced
1/2 cup cranberries, chopped
optional extras: ½ cup chopped nuts, raisins, or other dried fruit (crystallized ginger would be tasty too)

Preheat oven to 350°F. Grease three mini loaf pans or a 9x5-inch loaf pan.

Combine dry ingredients — flour through spices — in a bowl, then cut in Earth Balance until the mixture resembles coarse crumbs. (I do this in a food processor, pulsing it a few times. Or you can rub the spread in with your fingers until no large lumps remain.)

In another bowl, blend the juice, zest, and flaxseed egg replacer. Pour the wet mixture into the dry ingredients and stir just until moistened — don’t overmix. Fold in the fruit and any extras.

Pour batter into prepared pans. Bake about 40 minutes for mini loaves or an hour for a full-size loaf, until the bread is golden brown and a toothpick inserted in the middle of the loaf comes out clean. Let cool before removing from the pan.

Persimmon and Sweet Potato Tea Bread: Substitute ½ cup grated, raw, peeled sweet potato for the cranberries, and ½ teaspoon nutmeg or cinnamon for the cardamom.

Muffins: Bake at 400°F for 20 to 30 minutes.

Tuesday, November 12, 2013

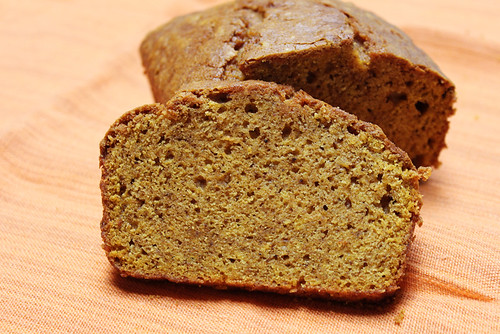
Grandma's pumpkin bread


Grandma's Pumpkin Bread

Going to lunch at Grandma's was often a mixed bag. She served foods way outside my comfort zone — I recall a lot of gravy and canned green beans — but there was a chance she'd make pumpkin bread. Moist and sweet, it was the best thing on earth. It's long been a star at my family's Thanksgiving dinner, and it's my go-to baked gift for the holidays. It's also one of the recipes I'm asked to share the most.

I've given up on tinkering with this basic recipe. Attempts to swap in white whole wheat flour or applesauce have just made a mess of a good thing. Sometimes I scale back the staggering amount of sugar, but only by a mere half cup. I don't fully understand why there's both baking soda and baking powder, but I've never dared experiment to find out if that's truly necessary. I don't question this recipe, I just bake it. A lot.

It is what it is, and it's delicious.

This makes two beautiful loaves. The bread freezes well, so you can bake ahead of Thanksgiving or gift-giving season. I usually slice one as soon as it cools, because it's irresistible, and stash the second loaf in the freezer before we inhale both loaves.

Last week I recruited my sons to help bake pumpkin bread to share. It's so simple, they're ready to begin committing this recipe to memory.

Thanks, Grandma.

Grandma's Pumpkin Bread


Grandma's Pumpkin Bread

You can substitute fresh pumpkin purée for canned — I stick with canned because of fairly consistent moisture content and reliable flavor. You also could stir in chopped nuts or chocolate chips, but be careful with added chocolate, as this is already very sweet.

3 cups sugar
1 cup canola oil
3 eggs
2 cups pumpkin purée
3 cups flour
1 teaspoon baking soda
1/2 teaspoon baking powder
1 teaspoon cloves
1 teaspoon cinnamon
1 teaspoon nutmeg

Preheat oven to 350 degrees. Blend oil and sugar in a large bowl, then whip in eggs. In a separate bowl, sift together flour, baking soda, baking powder, and spices. Stir pumpkin into the creamed mix, then stir in the dry ingredients. Pour batter into two greased loaf pans and bake one hour, or until a toothpick inserted into the middle of a loaf comes out clean.

Wednesday, October 23, 2013

Pumpkin sourdough monster rolls


We had so much fun making these monstrous dinner rolls with friends! This is a choose-your-own adventure project: You can just set out store-bought dough with a handful of raisins for embellishment, or bread bakers could add pumpkin purée to homemade dough, or those of you with sourdough starter on hand could go all in and make pumpkin sourdough dinner rolls.


Pumpkin sourdough is delicious, but the real treat here is making the rolls together. It's a terrific after-school or rainy day activity. Enjoy some giggly, creative time together in the kitchen, fill your home with the smell of freshly baked bread, and savor your not-so-hard work with dinner.

I'll break this down according to degree of ambition: First, how to make rolls, then how to add pumpkin to homemade dough, and finally how to make your own pumpkin sourdough rolls from scratch.


Shaping monster rolls

Use whatever dough you'd like: store-bought, homemade, the sourdough below. Just tear off hunks of dough and make whatever you wish. I set out some past-their-prime spices for decorations — star anise, cinnamon sticks, whole allspice, and cloves — along with raisins, nuts and seeds, and rosemary sprigs. Dust hands and dough with flour to make it easier to handle, and work right on the baking sheet.

The shaped rolls need to rise a second time before going into the oven. They'll double in size, and as they puff up they'll push out whatever raisins or nuts you've poked into the dough. So push them way in there: The raisins, for example, were almost buried in the dough but came out perfect. Dip a finger in a bowl of water and "paint" the dough to help stick down things like rosemary leaves.

Kids can also use scissors to shape the dough — they're a great tool to makes scales or spikes, for example. But wait until after the second rise, right before the rolls go into the oven. That's how I did the bat: I shaped long triangular wings, and just before baking I snipped the bottom of the wings and stretched the pieces apart.

Bake the rolls according to your recipe or the package instructions.


Adding pumpkin to bread dough

You can pumpkin-ify homemade bread dough easily: Just add a cup or so of pumpkin purée to your favorite recipe. You'll probably need to add flour to compensate for the extra moisture. Fresh or canned pumpkin work equally well, though you're likely to get more color out of canned (be sure to used plain pumpkin, not pumpkin pie purée!).

To make fresh pumpkin purée, cut a sugar pie pumpkin in half, scoop out the strings and seeds, and pierce the shell a few times with a fork. Set the pumpkin halves cut side down on a baking sheet and bake at 350 degrees for 45 to 90 minutes, until the center is easily pierced with a fork. Let cool, then purée flesh in a food processor or blender. If it's really wet, line a strainer with a kitchen towel or cheesecloth and strain the pumpkin before using it.


Pumpkin sourdough rolls

Weight measurements are provided in parentheses, in case you prefer to weigh ingredients. You might need more or less flour, depending on how wet your pumpkin purée is. You can substitute wheat flour for some of the AP flour — I used equal portions of white flour, white whole wheat, and whole wheat. (Note that wheat flour weighs less: 4 ounces per cup, versus 4 1/4 ounces per cup of white flour.) This yields a sticky dough, so have plenty of flour on hand for shaping the rolls.

1 cup (8 ounces) "fed" sourdough starter
1 1/2 cups (12 ounces) lukewarm water
2 teaspoons instant yeast
2 tablespoons (1 ounce) sugar
1 1/2 teaspoons salt
2 tablespoons olive oil
1 cup (9 1/2 ounces) pumpkin purée
5 to 6 cups (21 1/4 to 25 1/2 ounces) unbleached all-purpose flour
melted butter, optional

Combine all the ingredients except butter. Knead by hand or in a mixer with the dough attachment until smooth. Let rise in an oiled, covered bowl until doubled in size, about 90 minutes.

Shape rolls on baking trays lined with parchment paper or silicone mats. Cover with a towel and let rise again until doubled, about half and hour.

Bake rolls for about 20 minutes at 375 degrees, checking frequently after 15 minutes. Brush the tops with melted butter, if you'd like, for softness and rich color.


Friday, March 15, 2013

St. Paddy's Potato Patties


If parsley and spring onions could be picked out of the prattie's patties, we'd probably have just awesome reviews from the mini-chefs at the school's cooking club. But to our surprise most of the children ate the patties they prepared with enthusiasm, totally forgetting their dislike for green leaves. Maybe it was just the influence of a leprechaun... or the naturally green eggs brought by mom K, who cooks with me at school and has Easter Egger chickens that lay real green-shelled eggs.

So if you'd like to celebrate St. Patrick's in easygoing style, here is the recipe. It is really easy, and with a little help using a skillet or griddle, kids may have lots of fun making them. At school they shredded parsley, used kid-safe scissors to cut the spring onion, little finger tips to peel the potatoes, forks to mash potatoes, and lots of energy to pat the potato dough and press it flat on the griddle.  

If you want to add some Irish mystique to the cooking, you can — as we did — read Jamie O'Rourke and The Big Potato, by Tomie de Paola. Irish or not, Happy St. Patrick's Day!

St Patrick's Pratties Patties

Ask the little ones to carefully pat the potatoes after you put them on the griddle, which helps the patties stay firm and cook all the way through. This recipe makes about 8 potato patties.

2 russet potatoes, baked with the skin on
1 egg
1 teaspoon garlic powder
Kosher salt to taste
2 tablespoons extra-virgin olive oil
1 tablespoon finely chopped spring onion (just the dark green part)
1 tablespoon parsley leaves (just the leaves), shredded

Preheat griddle to 350 F, or skillet to medium heat. Mash potatoes with the tip of a fork (or potato ricer) and transfer to a bowl.

Beat egg lightly and add to the potatoes, integrating the egg to the mashed potatoes. Sprinkle salt and garlic into the mix. Add parsley and spring onions, and mash a bit more to make sure that the potato mix is even.

Form little balls with a spoon, put on the griddle, and pat each one flat with the back of a wooden spoon. Grill for about three minutes on each side or until golden on both sides. 

Sunday, February 10, 2013

Three Berries Valentines Ice Cream


If you are looking for an awesome-looking dessert for this Valentine's season (yes, I call it season, as we usually start talking about it least two weeks before the day), here's a good one. You can write your valentine's message on top of it and erase it with the bottom of a spoon, so to re-write your love again.

I prepared it with third-graders at school on Friday and the reviews were passionate: "Oh, it was looking yuk and now how beautiful this is," said an animated girl, going for her second serving. Others were puzzled about how easy ice cream making is and how beautiful the color of the mix of three berries was. Some girls were dressed in the same color and so proud about their choice for the day...

We puréed the fruit compote together, and stirred the condensed milk in turns. The ice cream maker did the rest. Our class was mainly about freezing, as I go more with the science of cooking for the older children, while my other son and his friends in first grade are more into the adventures of cooking.

If you are looking for more ideas for a full meal with your Valentines, here are some from our kitchen:

Bella Note Red Sauce
Pasta with Passion Sauce
Strawberry Spinach Salad

Three Berries Valentines Ice Cream

The ideal is to prepare the fruit compote the day before making it in the ice cream maker.

2 cups fresh strawberries, stems removed, halved
1 cup blackberries
1 cup blueberries
1 cup apple juice, unsweetened
1 envelope agar agar or unflavored gelatin
1 can sweetened condensed milk

Combine the fruits and apple juice in a heavy-bottomed pan and bring to a boil. Simmer for about 30 minutes, half-covered with a lid. Sprinkle gelatin on top and let sit a few minutes, then mix it in and let it cool down. Transfer to the freezer. After about 6 hours, remove and blend it (I used a hand blender) with the condensed milk.

Transfer the mixture to an ice cream maker and follow your maker's indicated time for a creamy and firm texture. Mine took about 25 minutes.

Another option is to transfer the mix to fancy cups and freeze it for up to 2 hours, enough to be able to write your message on it!

Friday, February 8, 2013

Valentine inspiration

I always look forward to making valentines with my kids — until we're a quarter of the way done and I remember my kids don't like glitter and glue nearly as much as I do.

We're starting on our collective 50-plus valentines this weekend. If you're looking for some inspiration, I rounded up some of my favorite simple, boy-friendly designs on Pinterest — click on over to check them out.


Two of my favorites:

Lines Across showcases a simple stamp made with craft foam strips for creating cross-hatch designs. It's a brilliant way to quickly decorate a lot of paper real estate. And it's versatile — when you're done with valentines, put it to work on other projects. Love the whale she features in the same post.

And this lovely template at Inchmark is a sweet way to encourage kids to make thoughtful valentines without a lot of work: Use a line-drawing portrait template kids can customize for each friend.

See all my favorites at Pinterest!


Friday, December 21, 2012

Cinnamon Applesauce Ornaments

121221_CPE_cinnamon ornaments


These fragrant decorations are a wonderful sensory project to make with kids. Your home will smell delicious for days, and the finished ornaments carry the warm smell of cinnamon for years. This season, we used them as package decorations for the boys' gifts to family, friends, and teachers.

These can take several days to air-dry, but you can have finished ornaments within a day or two by using the oven or a dehydrator.

This recipe calls for glue to help make solid, long-lasting ornaments. These are not edible: Be sure your children know the dough is not safe to eat. I've tried fully edible versions, which omit the glue, but we all were frustrated with the crumbly results. If you're craving spiced cookies after this project, wash your cookie cutters and make Agave Gingerbread People!

Cinnamon Applesauce Ornaments

2 cups applesauce
2 cups ground cinnamon (feel free to work in other favorites, such as allspice, cloves, or cardamom)
1/4 cup white glue

In a bowl, stir together cinnamon, glue, and 1 1/2 cups applesauce. If dough is dry, gradually add remaining applesauce as needed to get a workable dough. If the dough ends up too wet, add more cinnamon.

Briefly knead dough on a board dusted with cinnamon. Roll out to 1/4-inch thickness. Use cookie cutters to make shapes and set on a baking sheet covered with a silicone mat, waxed paper, or foil. If you want to hang your ornaments, be sure to poke a hole at the top — a straw works nicely.

To dry: Dry in an oven set no higher than 200 degrees for a few hours, turning every so often. Remove to a wire rack and continue to air dry as needed. If you have a dehydrator, use it!

Hang dried decorations as-is, or get out the glue, glitter, and sequins and decorate as you wish. Enjoy!

Tuesday, December 18, 2012

Reindeer's Oat Cookies

 
Maybe Santa is already too full to eat more cookies, but who remembered the reindeer pack?  I bet they will be tired and very very hungry. And... with that little story I convinced the boys to get interested on mixing the ingredients and being happy about eating flax seed and some fruits and nuts they don't usually care for.
    These cookies are good not just for reindeer,  and the left overs are a great way of starting off Christmas day with a bit of something slightly healthier than sugar cookies. It's the perfect pairing for hot chocolate or a cup of nice coffee.
    The recipe is easy and you can bake them on the night before Christmas to have that wonderful smell   to attract the good cheers of the Season. Happy preparations for Santa's landing!

Reindeer Oatmeal Cookies

1/2 cup canola oil
1 cup sugar (brown or turbinado)
2 eggs
2 tablespoons flax seed meal
1 teaspoon vanilla
1 cup all purpose non-bleached flour ( I used organic White whole wheat)
1 teaspoon baking soda
1 teaspoon ground cinammon
1/2 teaspoon allspice
1/2 teaspoon ginger
1/2 cup white or dark chocolate chips or almonds (optional)
1/2 cup raisins
3 cups quick oats (uncooked)
1 - 2 tablespoons water, if needed to moist the dough

Preheat oven to 350 F. Mix oil and sugar with a whisk in a large bowl for about 2 minutes or up to when creamy. Add eggs, whisk more, then bring flax seed meal and then vanilla. In another bowl mix flour, baking soda, spices, raisins and chocolate chips or almond slices. Mix well up to when dough is forming small clutters. If too dry, sprinkle water up to when mix is gooey enough. With the help of an ice cream scooper or spoon, drop 1 tablespoon of dough on a baking sheet covered with parchment paper. Bake for about 12 minutes or up to when cookies are golden in the bottom. Cool them in a wired rack. And make sure to leave some for Santa's transportation guys !

Monday, November 26, 2012

Liquid Pumpkin Pie


If you are still inspired to make pumpkin-based food, here's a little recipe tested many times at school. The reviews were very diverse but surely all children from our Cooking Club enjoyed making a very different version of a pumpkin pie, to celebrate Thanksgiving season.

The whole experience was exciting: First some kids were not very happy to smell both pumpkin and butternut squash, but were very enthusiastic when they saw the other ingredients. It was unanimous that  most of them loved sugar, graham crackers, and condensed milk. Uncertainty was present when asked about coconut milk and coconut flakes. Curiosity, though, was also there, and even if some kids refused to go further after a first spoonful, they at least had tried something different.

Smashing the pumpkins, punching the bags with graham crackers and using the dangerous-looking hand blender were the high points of the class. After the experience, the teacher asked the kids what they thought about the recipe, gathering some adjectives on the board. As you can see, it was a wonderful way of understanding that, after all, it's all a matter of taste.


Liquid Pumpkin Pie

I will soon freeze a batch in an ice cream machine to test the outcome. Probably it will be sweet enough to be in our repertoire for next Thanksgiving!

1 cup mashed sweet pumpkin (can be organic from a can)
1 cup freshly baked or cooked butternut squash
2 cups coconut milk
1 teaspoon pumpkin pie spice
4 tablespoons sugar (preferrably brown, but kids preferred white sugar)
Condensed milk, to garnish
Toasted coconut curls or grated coconut to garnish
3 graham crackers, broken into small pieces in a plastic bag

Place pumpkin and butternut squash chunks on plates and mash with a fork. In a bowl, combine mashed pumpkin and butternut squash with coconut milk and set aside. Punch the bag full of graham cracker to transform them into cookie crumbles.

Mix everything together with a blender until smooth. Serve in bowls topped with graham cracker crumbles, a swirl of condensed milk, and coconut to add texture and interest to the soup. Enjoy cold. 

Sunday, November 18, 2012

A Thanksgiving feast

As a food blog, we should be bursting with plans for the Thanksgiving meal. But we've been a little quiet, because we aren't preparing big feasts this year. My family goes out for the holiday meal — and I'm grateful to enjoy the fruits of someone else's labor!

But if I were cooking, this is the meal I would plan:

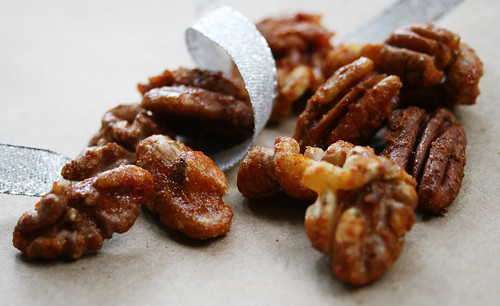
20101209_spiced nuts_1

Best Spiced Nuts: Slightly sweet with a kick from garam masala and Sriracha — irresistible snacking while you wait for the turkey to be done.

Dry-Cured Rosemary Turkey: This is the sole entry here that isn't from this site. This was my go-to holiday recipe for years. The blend of seasonings is just fantastic. Get started on it right away: It cures in the fridge for three days before cooking.

Chestnut Sage Soup: I dream about this soup. Creamy chestnut puree with apples, sage, bacon, and vanilla notes... swoon.


Succotash in Squash: This is a showstopper vegetarian dish, scoring huge points for flavor, presentation, and history — a nod to Native Americans and Thanksgiving tradition.

Yams with Za'atar: Give the candied yams a rest. Instead of burying veggies in sweetness, bring out their deep flavor with za'atar spice. This dish is a cinch to make, which is a blessing on a busy cooking day.

Crunchy Marinated Green Beans: Instead of burying green beans in a casserole, show them off with a touch of Asian flavors.

Black-Eyed Peas Salad: With canned beans, this takes almost no effort. And you can make it the night before, so it's one less thing to tackle on Thanksgiving Day.

Rice of Many Colors: This kid-friendly dish is packed with protein and veggies, and easily adaptable to suit your family's taste.


Minute Bread: Tasty rolls with cheese baked right in — delicious!

Pumpkin Pudding with Cranberry Sauce: An unusual dessert that takes full advantage of fresh cranberries.

Pear and Cranberry Sauce Skillet Pie: This twist on a typical pie blends sweet and tart flavors for a perfect finish to the meal.

Monday, September 17, 2012

New Year Honey Cake


We are sharing this family recipe to celebrate the arrival of the Jewish New Year, thanks to my mother-in-law. She bakes this honey cake not only for the party, but also to renew thoughts and sentiments. Preparing and baking the cake is such a unique time for her, that she once wrote a poem about it called Honey Cake. 

The recipe was published in the late '70s in Aonde Vamos, a magazine edited by her mother-in-law, Mrs. Esther, in Brazil. Since then, Myrna has been improving it, and it has always been a success in the family and a treasured gift to be given to her friends.

Myrna fondly recalls the memories form her grandma, Mme. Schaak, who used to love the cake: "She would keep it in a tin and would eat it even one month after! Grandma used to say that the cake just got better with time," she tells.

Yesterday afternoon I prepared this cake with some help from the kids, and we brought the recipe to life with all its meanings. As I was putting together ingredients and measuring cups and spoons, I thought about the poem. I didn't have enough regular flour, so I ended up using part of whole wheat flour. But I was sure that it was going to work. As part of her poem said, it was time for a cake "flexible, balanced, made in a sensitive way with lots of taste and warm colors."As the poem ends: "I shall fill it with love." And there it was.

What a wonderful way of bringing generations of families together when baking and celebrating. Shanah Tovah!


Honey Cake (Lekach)

I used 2 1/2 cups of whole wheat flour, which gave the cake a bread-like texture. Also kids worked with a nuts chopper and helped to pour the honey. We mixed all wet ingredients separately, integrating them into the dry ingredients with a spatula. Baking time was reduced to 60 minutes, when the crust was already very browned, maybe because of the flour difference.  What a fantastic recipe!

3 1/2 cups flour
1 teaspoon salt
1 1/2 teaspoons baking powder
1 teaspoon baking soda
4 eggs
3/4 cups sugar (preferably brown turbinado sugar)
4 tablespoons oil (canola)
2 cups honey (preferably dark, but it can be any available)
1/2 cup of freshly brewed coffee
1 cup raw walnuts
1 cup raisins


To prepare the walnuts, break them inside a plastic bag, pounding them with a meat mallet. Preheat oven to 350 F. Combine all ingredients in a bowl and mix in a stand mixer up until it's all well mixed. Bake in a two metal or ceramic loaf molds for around 70 minutes. 

Monday, August 6, 2012

5 savory ways to use up all that zucchini

The home gardener's favorite holiday is Sneak Some Zucchini onto Your Neighbor's Porch Day this Wednesday, Aug. 8.

If you should find yourself with a pile of summer squash on your porch, or if you surreptitiously dump your bounty at your neighbors' only to find another dozen squash have grown overnight, here are five ways to make the best of this prolific summer vegetable.


These savory muffins are a healthful treat, packed with flavor. Made with spelt flour and yogurt, they're studded with raisins and pine nuts and topped with Parmesan.


Lighten up dinner with this summery faux-carb take on pasta. It's a quick and easy way to use some of the most reliable vegetables in a home garden: zucchini, cherry tomatoes, and fresh herbs.


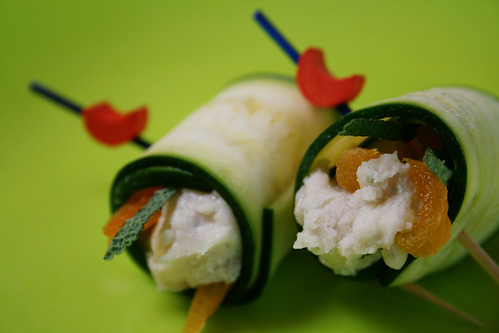
A creamy white bean and blue cheese spread becomes finger food when it's rolled up in zucchini ribbons.

100326_zucchini twirls_5


Dress up a quick meal of mac-n-cheese from a box with a bit of protein and garden-fresh vegetables.


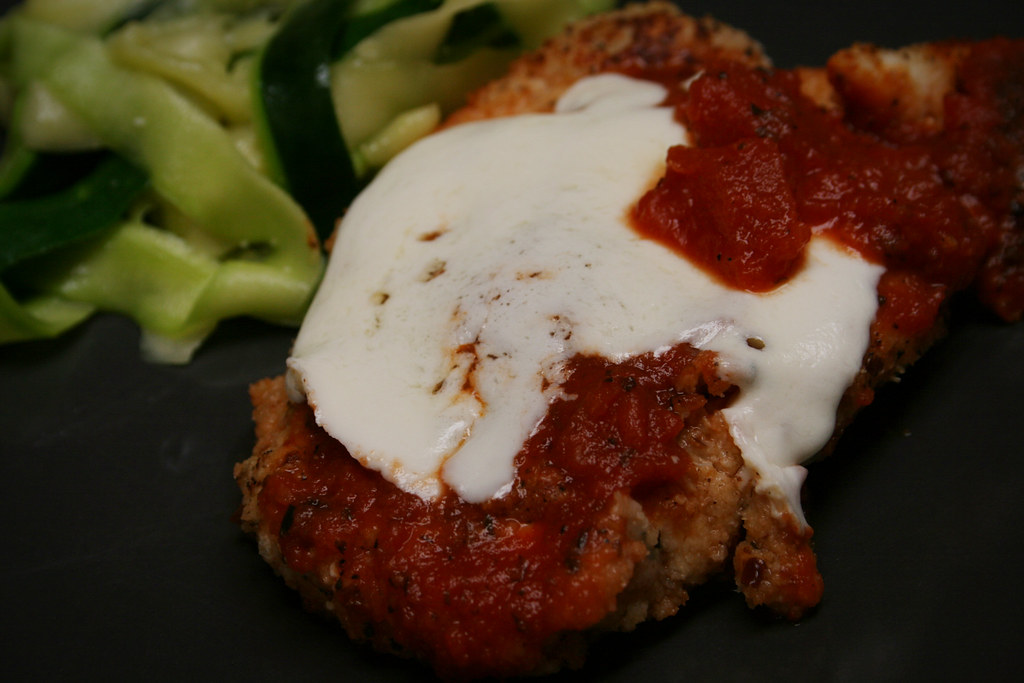
This is another faux-carb pasta — it's melt-in-your-mouth goodness, lovely on its own or paired with heavier fare. Pictured here, the ribbons of squash are a background supporter to chicken parmesan, but they really deserve to be front and center on their own.


Tuesday, May 8, 2012

Mom's Fruit Salad and an Open Letter to my Sons


Dear sons,

I really love to think that you're planning something awesome to surprise me on Mother's Day. Yes, Mother's Day is coming this Sunday!! And please, don't forget to remind Daddy, as he might be a little distracted with the final game of his soccer team in Rio.

But as you know I am a bit picky, and if you are thinking about bringing me breakfast in bed, here's a suggestion: a fruit salad. Yes, forget all the croissants, pies and pastries.

Please  choose some organic sweet strawberries, juicy apples, and that little orange called kumquat and one nice lemon from a neighbor's tree. On the side I really would appreciate if you can serve a little portion of Greek non-fat yogurt. Some coffee would be great. And just a slice of toast with some honey on it would give me happiness.

P.S. Don't forget to take the pajamas off the living room floor, brush your teeth and, if you want, put a flower in a vase, and design some crazy cards, before waking me up at 8 a.m. But if you don't have time, just read this little recipe ...

With my (everyday)  love,

Your Mom

Strawberries, Apples, and Kumquat Zest Fruit Salad

4 strawberries, sliced
1/2 Fuji apple
1 kumquat, sliced
1 tablespoon lemon juice

Cut all fruits with a plastic knife, to avoid cutting your little fingers. In a little bowl squeeze lemon and mix with the kumquat zest. If you don't know how to take the zest, watch this little tutorial. Sprinkle the zest and lemon juice over the other fruits.


LinkWithin

Related Posts Plugin for WordPress, Blogger...