Showing posts with label Appetizers. Show all posts

Saturday, March 15, 2014

Leprechaun Shelter Salad... and Green Pea Dip


Photo by J. Balbi
Maybe they say they don't like greens. But when it comes to building a hiding place for a leprechaun... perhaps the little ones will change their mind.

While looking for ideas of something healthy to make with the kids at school I finally put the project together while browsing the aisles of my favorite grocery store. Lately I've been working a more with food presentation with older children, but thought that the idea of building a hut, a bed or even a boat made of vegetables would be enticing enough to make kindergartners and first graders enticed.  After building,  we were working with the notion that the best place to "hide" the secret leprechaun hideout would be their tummy, not the trash can.

I was lucky enough to have J. working with me at school that day, who was fortunate enough to have a mini figurine of a leprechaun in her bag, and a good eye for taking the photos which are in this post.
Photo by J. Balbi
A big bag of romaine hearts, some micro-greens to imitate little shamrocks, pea stick and lots of imagination made the whole experience a great activity. They all helped to blend the green dip, excited with the mouse from the hand blender. The green pea dip, inspired on this dip recipe by Darienne, was the foundation. For some children, it was a unique chance of eating salad, disguised as something they had built for the little man.

Happy St. Paddy's Day!
Photo by J. Balbi

Leprechaun Shelter Salad with Green Dip
You can always play with the greens around the project, but it's good to have something to make the structure possible, like a big leaf for the shelter, and some cucumber sticks to be the support. 

For the salad

Romaine Heart Leafs as needed
Cucumber, cut in sticks in same length
Green pitted olives
Green pea baked snacks (such as Inner Peas by Trader Joe's
Baby Spinach
Curley Parsley

For the dip

1 bag frozen organic green peas
4 oz whipped cream cheese
2 tablespoons grated Parmesan cheese
2 teaspoons garlic powder
2 teaspoons oregano
Kosher salt to taste


Cook peas as directed by package. Drain and blend with all other ingredients in a food processor or hand blender up to when it reaches a creamy texture. Serve on the side of salad or on the bottom of the late to serve as the foundation for the hut. 

Wednesday, June 12, 2013

Kale Chips


My kids love kale! Yay!!! We'll... the truth is...

I mean, they love kale chips. Loaded with olive oil, garlic, and sometimes a bit of salt, those crunchy leaves are the ideal treat. My 6-year-old kindergartner loves it so much that he asked me to roast three full bags of fresh kale, planted and harvested by the students at school, to share with his friends. I was tired but enthusiastically spent 40 minutes in front of the oven on a hot night preparing their treat.

He told me that they all loved it so much. And I could believe it... See the photo below with the leftovers in the huge bowl?

I've been working with this recipe for years, and possibly every mom I've met in California has her own version. The important part is that kale is a wonderful source of nutrition and is the perfect pairing for black beans (see this classic Brazilian recipe here) and other vegetables. Or enjoy these chips on their own, as a wonderful snack.

Kale Chips

My favorite way is to make these is with green or purple kale. But dinosaur (a.k.a. Lacinato) kale works too. Make sure to get rid of the overly moist stems and leaf ribs and use just the shredded leaves. You also might want to use an olive oil sprayer.


kale leaves, washed and dried
extra-virgin olive oil, enough to spray or coat the whole batch
garlic powder
salt to taste (optional)

Preheat oven to 400 F. Line a baking sheet with aluminum foil. Spread kale leaves evenly on sheet and spray with olive oil (or drizzle olive oil over the leaves and invite little hands to mix the leaves with the oil). Sprinkle kale with garlic powder and, if using, some salt.

Roast for 5 minutes, then open the (HOT!) oven and use long tongs to turn the leaves to make sure they roast evenly. Roast for 5 more minutes and check. If the leaves aren't crunchy enough for your taste, roast just a bit longer. 

Wednesday, February 20, 2013

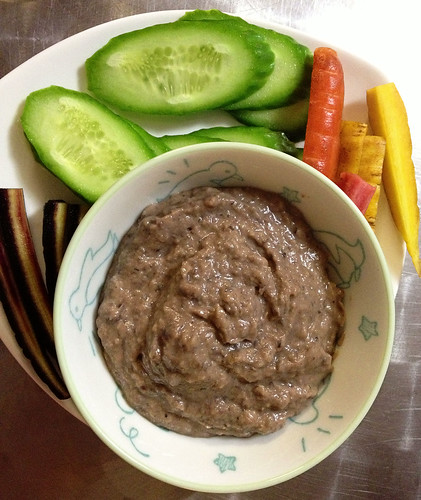
Black bean hummus, two ways

130209_CPE_black-bean-hummus


I love hummus. I love it with raw veggies, I love it spread on sandwiches, I love it with chips, I love it straight off a spoon.

And I love garbanzo beans, which usually provide the creamy base for hummus. But we've been enjoying garbanzos as a meal with increasing frequency (as in this delicious slow cooker dinner, or a version of this easy warm salad for lunch), and I don't want to see them yet again at snack time. Not even puréed.

Black bean hummus, however, is a completely different dip.

After toying with a few variations, I've settled on these two favorites. The first is bright and fresh, infused with oranges. The second is bolder and spicier, and just as delicious.

I prefer my hummus without olive oil. If you find it too thick for your liking, add more water or juice, or a bit of olive oil. If you have citrus salt, use it here.

Orange Citrus Black Bean Hummus

If you have citrus salt, use it here.

1 1/2 cups cooked black beans
2 tablespoons orange juice
grated zest from 1 orange
1 tablespoon tahini
1/2 teaspoon salt
1/2 teaspoon cumin

Combine all ingredients in a food processor and blend until smooth.

Paprika-Lime Black Bean Hummus

1 1/2 cups cooked black beans
2 tablespoons reserved bean liquid
1 1/2 tablespoons lime juice
1-2 cloves garlic
1 tablespoon tahini
1/2 teaspoon salt
1/2 teaspoon cumin
1/4 teaspoon smoked paprika

Combine all ingredients in a food processor and blend until smooth. If you like it spicy, add a few drops of Sriracha.

Monday, August 6, 2012

5 savory ways to use up all that zucchini

The home gardener's favorite holiday is Sneak Some Zucchini onto Your Neighbor's Porch Day this Wednesday, Aug. 8.

If you should find yourself with a pile of summer squash on your porch, or if you surreptitiously dump your bounty at your neighbors' only to find another dozen squash have grown overnight, here are five ways to make the best of this prolific summer vegetable.


These savory muffins are a healthful treat, packed with flavor. Made with spelt flour and yogurt, they're studded with raisins and pine nuts and topped with Parmesan.


Lighten up dinner with this summery faux-carb take on pasta. It's a quick and easy way to use some of the most reliable vegetables in a home garden: zucchini, cherry tomatoes, and fresh herbs.


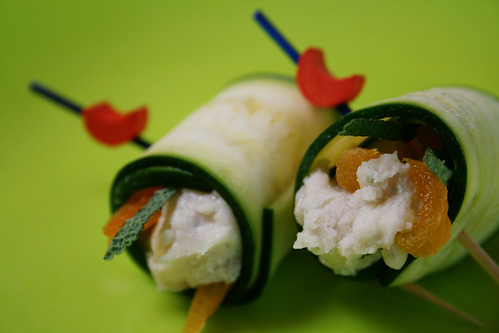
A creamy white bean and blue cheese spread becomes finger food when it's rolled up in zucchini ribbons.

100326_zucchini twirls_5


Dress up a quick meal of mac-n-cheese from a box with a bit of protein and garden-fresh vegetables.


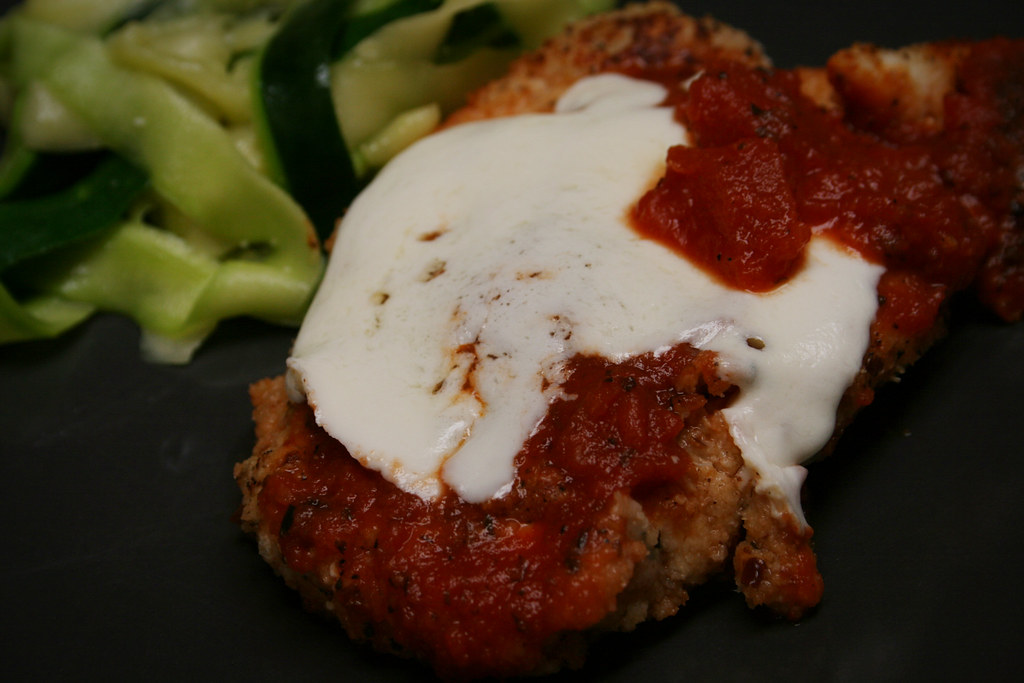
This is another faux-carb pasta — it's melt-in-your-mouth goodness, lovely on its own or paired with heavier fare. Pictured here, the ribbons of squash are a background supporter to chicken parmesan, but they really deserve to be front and center on their own.


Saturday, March 3, 2012

Patrick-crepes with (or without) Wild Arugula and Balsamic Reduction


If you are enjoying the luck brought by leprechauns this March, this recipe will help you bring more greens to the table. This good-looking crepe (with no artificial colors)  is a delicious way to wrap up even more greens inside it.  It is also a chance for your kids to get acquainted with different tastes. Another possibility is to fill it up with cream cheese or ricotta seasoned with pesto or simply cheese and turkey ham.

My boys gave mixed reviews about it: With arugula and balsamic reduction it was a 10 out of 10. Without the pretend "shamrocks" these crepes were a 100 out of 10, if you know what I mean ... They rolled the crepe-pancakes and just ate them.

This is the first of a mini-series with some green food  that we will post up to March 17. As you know by now, Darienne and I can't resist celebrating holidays with food.  This is a great and inspiring one: If food has to be green, that's the most beautiful occasion to take advantage of!


Patrick-Crepes With (or Without) Arugula and Balsamic Vinegar Reduction

1 cup milk
1 cup cooked or 2 cups raw baby spinach (if cooked simmer with olive oil and a tablespoon of water)
1 cup flour
1 egg
1 to 3 tablespoon Parmesan cheese, grated
1/2 teaspoon dried savory or garlic powder
1/2 teaspoon baking powder
Kosher salt to taste
Balsamic vinegar reduction, to taste (optional, see note below)
Arugula (optional)


Mix ingredients with an electric hand blender. Let the mix stand for 10 minutes at room temperature and then blend it again.

Preheat griddle to 300 F (or use a skillet over medium heat), and coat it with a thin layer of olive or canola oil. Ladle the equivalent of 1/2 cup of crepe mix onto the griddle, and cook each side for about three minutes.

Pile cooked crepes on a plate to retain moisture and temperature. After about five minutes, plate them with arugula, a drizzle of balsamic vinegar reduction, or your favorite filling.

Note: To make balsamic vinegar reduction, simply bring vinegar to a boil over medium heat. Continue to cook over low heat until vinegar is reduced by at least half.

Thursday, December 22, 2011

Healthy Holidays: Oven-Baked Purple Latkes


Every year, when it gets close to Hanukkah, I start  fretting over frying. As tradition demands, hot oil is the most important reminder of the miracle of Hanukkah. And what a wonderful excuse to indulge in sufganiots (donuts) and latkes (potato pancakes). Eating them, I mean. But not preparing them...

My personal belief as a cook is that deep-frying is exactly what I don't aim for, and many times I substituted the process by a little trick, called baking and broiling. This has been the case for some recipes already tested here with success such as mini kibbeh, made possible because of this little kitchen miracle, the oil mister.

So, if celebrating the eight nights of Hanukkah — we are today lighting the third candle — this is a very tasty bite. It might be the ideal company for soup, for good conversation with friends, or just a cause for celebration. Happy healthy Hannukah!


Oven-Baked Purple Latkes

After reading many recipes and ideas on preparing potatoes for latkes, I came across this very good one: Use a salad spinner to get rid of water and starch from the potatoes. That will guarantee the crunchiness of the final product.

8 medium purple potatoes (or 4 large ones), grated (no need to peel if they are organic), or about 4 cups grated potatoes
1/2 purple onion, grated
3 free-range eggs, lightly beaten
1/2 cup matzoh meal or flour, add more if mix is runny
Kosher salt to taste
1/2 teaspoon garlic powder
White pepper, ground
Extra-virgin olive oil spray, or in a mister

Grate potatoes, transfer to a salad spinner, and spin about 6 times to get rid of the water and starch from the potato.

Preheat oven to 400 F. Line two baking sheets with heavy aluminum foil. Let potatoes drain for about 15 minutes in the salad spinner basket while the oven gets hot.

Beat eggs and matzo meal and add to the potatoes in a bowl, and then add grated onions. Sprinkle with salt, garlic powder, and freshly ground white pepper. If you feel the mix is too runny, add more matzo meal or flour: You want to get a fluffy moist mix, not runny but not dry.

Spray olive oil on the foil-lined sheet. With a soup spoon, splash latkes over the sheet, leaving a 1/4-inch space between each.

Bake for 20 minutes on the top rack of oven. Broil for two minutes. Serve hot with your favorite recipe for applesauce.

Thursday, December 15, 2011

Healthy Holidays: Happy Spinach Salad

We want to celebrate the holidays with a 6-course menu with recipes from our repertoire with a holiday twist.
From today up to next week we will post our favorite choices and some new ones to welcome a very healthy New Year! 

For our first course  we chose this simple yet amazing Strawberry Spinach Salad. The colors are very holiday-ish, you can even decorate it as a Christmas tree. And if you are not close to any fresh strawberry as we are, here in California, you can substitute for fresh kiwis, figs or ripe yellow peaches.


Baby Spinach Salad with Black and Red Dressing

You can choose different ingredients for the main salad. I've combined it with rocket and once used basil instead of spring onions. Kids might want to join you on the presentation, which can be really cool.

Salad:
4 cups fresh baby spinach
1 sliced medium strawberry for each plate

Dressing:
1 ripe strawberry, diced in tiny pieces
1 tablespoon olive oil
1 tablespoon balsamic vinegar
1 spring onion, finely chopped
1/3 cup apple juice or lemonade
Kosher salt to taste


Mix all ingredients for the dressing at least one hour before serving. Organize each plate with a bed of spinach and slices of strawberry. Serve with the dressing on the side or pour over the salad, leaving the guest to redesign the plate. Enjoy!

Tuesday, October 18, 2011

Monster Treats


100903_CPE_monster treats_small

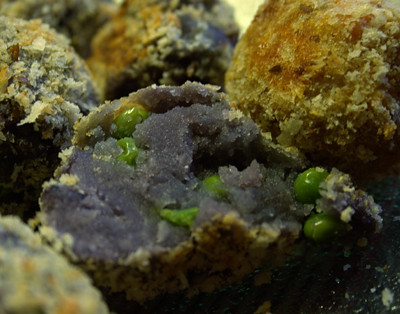
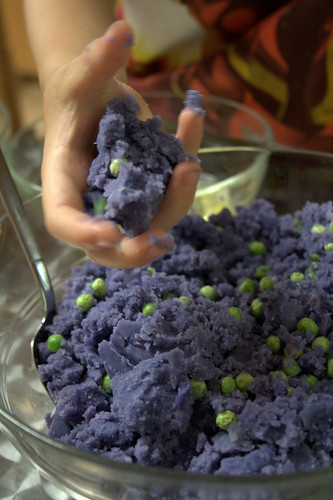
100903_CPE_monster treats_1Not all Halloween treats need to involve chocolate, caramel, and candy corn. These Monster Treats are a fun way to get your vegetables. Covered in a crisp bread crumb coating, they break open to reveal brilliant purple potatoes and bright green peas. Monster guts? Monster boogers? Call 'em what you like. We call them deliciously fun.

Monster Treats

We liked the combination of bright green peas with deep purple potatoes, but you can mix in almost anything you like. You can use leftover mashed potatoes to speed up prep time.

2 pounds purple potatoes, peeled and cooked
2 teaspoons butter
salt and pepper to taste
1 to 2 cups frozen peas
2 egg whites
1 1/2 cups bread crumbs (I mix regular bread crumbs with panko)

Combine potatoes, butter, salt and pepper in a large bowl and mash with a fork or masher. Stir in peas. Refrigerate until well chilled.

Put egg whites in a shallow bowl and stir briefly with a fork or small whisk. Put bread crumbs in another shallow bowl.

To form treats, scoop up a tablespoon or so of the potato mixture and shape into a nugget or ball. Dip into egg white and then into bread crumbs.

To freeze: Arrange nuggets on a plate or pan and set in the freezer for a few hours. Store frozen nuggets in a sealed freezer bag; take them straight out of the bag to bake.

To bake in the oven (my preferred method): Preheat oven to 400 degrees. Set nuggets on a parchment-lined baking sheet and spray lightly with olive oil or cooking spray. Bake for 20 minutes or until nuggets are lightly browned and crispy.

To pan-fry: Lightly spray a non-stick pan with olive oil or cooking spray. Cook nuggets over medium heat for a few minutes on each side until lightly browned and crispy. (You can also fry them in oil.)

Tuesday, July 12, 2011

Easy Blue Cheese Dip


As a toddler, my older son ate almost anything served with "dip-dip," which was usually sweet: ketchup, honey, maple syrup. But he has always made a stinky face at hummus, ranch dressing, baba ghanoush, and any other veggie dip, even as he's grown to love peanut sauce with satay, dipping sauce with pot stickers, and balsamic vinegar and olive oil with bread. I finally figured it out: He likes strong but distinct flavor and hates texture. This easy dip satisfies both criteria: Spreadable blue cheese gives this dip assertive flavor without suspicious-looking blue-tinged chunks of cheese.

Laughing Cow Light Blue Cheese smooths out the tang of yogurt for a smooth, tasty blend. My favorite combination is with non-fat Greek-style yogurt: very low in fat and loaded with protein.

Blue Cheese Dip

I like to make this with non-fat Greek-style yogurt, which gives this a significant protein boost.

4 wedges Laughing Cow Light Blue Cheese
6 tablespoons plain yogurt (regular or Greek-style)
vegetables for dipping

Combine cheese and yogurt in a small bowl and blend well. Serve with vegetables for dipping. Makes about 3/4 cup of dip.

Thursday, May 26, 2011

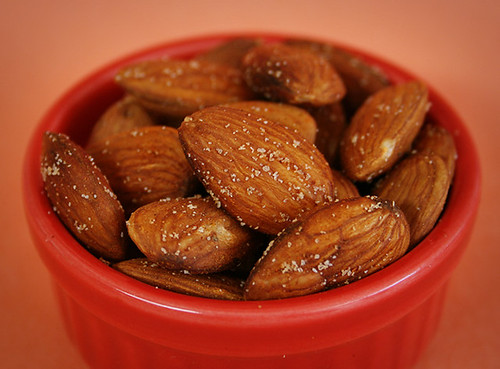
Roasted Almonds with Smoked Paprika, Lavender and Thyme

201105_CPE_almonds2


I've been nibbling on raw almonds lately, trying to kick my craving for tortilla chips and pretzels. Almonds have been satisfying — and are certainly more healthful — but I like my nibbly snacks salty. Really salty.

Roasting and salting the almonds is a simple enough solution, but then I'm back to munching mindlessly. I needed something in there to make me slow down and take notice.

The answer is one of my favorite cure-alls: smoked paprika. It's sultry and seductive, the kind of spice that makes me completely lose my train of thought. I tossed in a little lavender and thyme, and ended up with the kind of snack I can enjoy without overdoing it.

The paprika might make this too spicy for some kids — as always, adjust the seasoning to suit your own taste.

Roasted Almonds with Smoked Paprika, Lavender and Thyme

201105_CPE_almonds3
Be sure to use culinary lavender, available in specialty markets and natural food stores like Whole Foods. You can also snip some off a plant if you're sure it hasn't been treated with pesticides.

8 ounces raw almonds
1 teaspoon olive oil
1 teaspoon culinary lavender, finely chopped
1/2 teaspoon sea salt
1/2 teaspoon fresh thyme, finely chopped
1/4 teaspoon smoked paprika
1/8 teaspoon sugar

Combine all ingredients in a bowl and stir well to combine. Spread almonds on a baking sheet and roast at 300 degrees for 15 to 20 minutes, stirring occasionally. Taste, and if you want to adjust the seasoning, toss the almonds in a bowl, add seasoning, and stir.

Let cool and store in an air-tight container.

Tuesday, May 24, 2011

Lemongrass Chicken Meatballs

1105_CPE_meatballs


I hate to admit this, but I should declare it up front: The kids didn't care much for these light, lemony meatballs. I'm not sure why, but I didn't put much effort into figuring it out – because the grownups liked them just fine. A bright lemongrass pesto with garlic, ginger, and herbs makes this a nice warm-season appetizer or main dish. If you have leftover pesto, stir it into pasta to serve on the side.

If you love lemongrass, you might want to try growing your own – it's surprisingly easy! Lemongrass is fairly common in markets here, but too often the stalks are dry and ... sad. Find a good-looking stalk at the market (bonus points if there are any bits of roots on the stem end). Plunk it in a jar of water and set it somewhere it can get a fair amount of indirect sunlight. Watch and wait: You should soon see roots growing. When they're two inches long or so, plant your lemongrass in a pot or a sunny patch outside and watch it take off. I coaxed roots out of a particularly humble-looking stalk in the fall and now have a foot-wide plant – and that's after carving out several chunks to share with friends.

Lemongrass Chicken Meatballs

Use fresh lemongrass if you can find it (try well-stocked stores or Asian markets): Cut off the bottom stem and top leaves so you have only 4 or 5 inches of stalk, then peel off and discard the tough outer layers. I use lemon balm in the pesto as well, but you can substitute whatever herbs you like – cilantro or mint would be great variations. Try serving with satay sauce and/or chopped peanuts.

Meatballs:
1 pound chicken, cut into large chunks (or store-bought ground chicken)
1/2 cup bread crumbs
1/2 onion, minced
1 egg, lightly beaten
2 tablespoons lemon juice
salt and pepper to taste
1/2 cup Lemongrass Pesto

Lemongrass Pesto:
2 cloves garlic, chopped
1 tablespoon ginger, minced
2 stalks fresh lemongrass, minced (see note)
zest and juice from 1 lemon
1/2 cup Parmesan cheese
1 cup lemon balm leaves (or mint, cilantro, parsley, or basil)
1 cup parsley leaves
salt and pepper to taste
1/2 cup olive oil

Preheat oven to 400 degrees. Line a baking sheet with parchment paper or a silicone baking mat.

To make pesto, combine all ingredients except olive oil in a food processor and puree. While machine is running, pour in olive oil in a thin stream and continue processing until well combined. (Alternatively, you can make the pesto with a mortar and pestle.) Transfer to a bowl and set aside.

To make meatballs, pulse chicken in the food processor (no need to clean out the pesto bits) until minced – don’t overdo it or you’ll end up with mush. (Skip this step if you're using ground chicken.) Transfer chicken to a large bowl and add remaining ingredients. Stir well until thoroughly combined.

With your hands, form chicken mixture into meatballs about the size of golf balls and set themthe on prepared baking sheet. Spoon remaining pesto over the tops of the meatballs. Bake for 15 minutes or until cooked through, then move baking sheet to broiler position and broil for 3 to 5 minutes or until lightly browned on top.

Tuesday, March 22, 2011

Spring Pea Dip

110315_springdip2


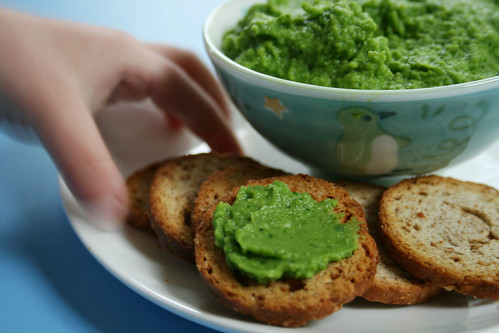
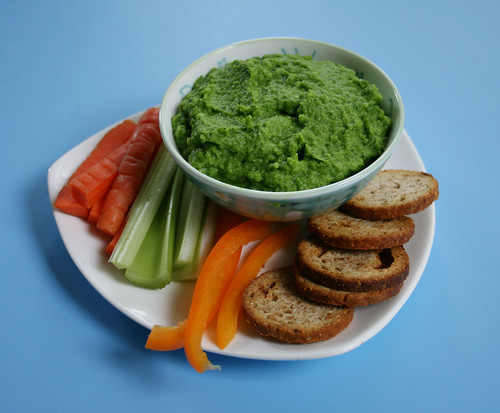
The kids didn't go for this easy, healthy dip. They're crazy. Just meant more for me, and I couldn't stop scooping it up. Peas, an added boost from spinach, a burst of lemon, and a kiss of nutmeg -- yum! This looks and tastes like spring to me.

Set this out as a dip for raw veggies, slather it on Melba toast, or spread it in a pita as a base for a veggie sandwich. It takes just a few minutes to whip up.

110315_springdip1


Spring Pea Dip

To play with the flavor, try adding a handful of fresh herbs -- mint, cilantro, or parsley would work nicely.

2 cups peas, frozen or fresh
1/2 cup water
generous handful of baby spinach leaves
2 tablespoons grated Parmesan cheese
1 tablespoon olive oil
2 teaspoons lemon juice
1 teaspoon lemon zest
a pinch or two of nutmeg
salt and pepper to taste

Combine water and peas in a saucepan. Bring to a boil, cover, reduce heat, and cook for 5 minutes. Strain peas, reserving cooking liquid.

Combine peas and remaining ingredients and blend thoroughly in a food processor or blender. Add a tablespoon or more of the cooking liquid and keep blending until you reach the desired consistency.

Serve dip with fresh vegetables, bread, or crackers.

Monday, December 20, 2010

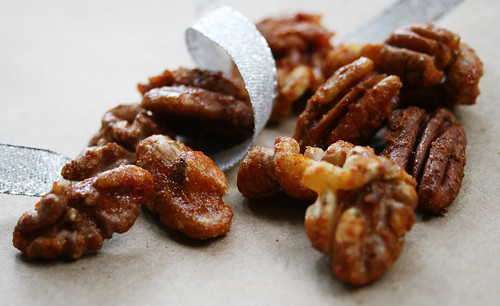
Kids Cook Monday: The Best Spiced Nuts

20101209_spiced nuts_1


These might have too much sugar to qualify as a purely healthy contribution for The Kids Cook Monday campaign, but they sure beat all the other holiday sweets lying around.

I first made these nuts a few years ago as a Christmas gift for my mother. They're now the only kind of seasoned nuts I make because, as the recipe's genius creator notes, they are the best spiced nuts.
How good?
  • The kids can't stop eating them.
  • One dad says he wants two things when he retires, and one of them is to have these nuts every day. (I didn't find out what the other thing is, because he was too distracted by the nuts.)
  • I lost the original recipe, but when I saw it re-posted at The Hungry Tiger, I did a little dance and ran to share the news with my husband.
That's how good they are.

The flavor is nuanced and addictive. The secret is the Thai hot sauce Sriracha and garam masala, a seductive Indian spice blend. (Think cumin, cinnamon, cardamom...) If you can't find it in a store near you, you can easily mix your own. There are lots of recipes for it, but this one relies on readily available spices you may have on hand. If you're looking for more of a project, there are countless recipes online for toasting your own seeds.

The two kids I recruited to help loved running the stand mixer and smelling the vibrant, colorful seasonings. Kids can help with every step except sliding the nuts off the hot cookie sheets. This comes together quickly and makes a great holiday gift -- I'm bringing another jar home for the holiday. Here's the recipe, courtesy of The Hungry Tiger.

Best Spiced Nuts

I decrease the sugar by just a few teaspoons because I can't help trying to de-sugar the kids. This makes about 6 cups.

Raw, unsalted walnuts, pecans, and/or almonds
2 egg whites
1 tablespoon olive oil
3/4 cup of white sugar
2 teaspoons salt
2 teaspoons garam masala
1 tablespoon paprika
1 teaspoon Sriracha or other hot sauce
1 teaspoon soy sauce

Preheat the oven to 325 degrees. Line two cookie sheets with parchment paper (don't skip this; this mixture can make a mess of a baking pan).

Beat the egg whites until they're foamy but don't hold a peak. Add everything else except the nuts, and mix together. Now start piling in the nuts, and stir to coat them well. Kids who like getting messy might enjoy using their clean hands to do this part.

Spread the nuts on the parchment-lined baking pan in a single layer. If you have leftover coating in the bowl, toss in more nuts to coat and add them to the pan.

Bake the nuts for about 30 to 40 minutes — start checking them at 25 minutes or so. When you take them out of the oven, slide the parchment and nuts right onto the counter or a rack. Wait a few minutes so that they aren't painfully hot and steal a little nibble. Leave the rest alone until they cool completely, then break them up into pieces.

Store in an airtight container so they stay crisp. I left some sitting out a little too long and they got gooey; 20 minutes in a 200 degree oven crisped them up again.

Thursday, November 4, 2010

Playdate Special: Homemade Hummus

Sometimes they just want to play. And the "cook" and "explore" part of the deal is just not so convenient for "that" energetic time of the day. That seemed to be the case with our afternoon-snack playdate on a sunny afternoon before Halloween. The original plan was good: I wrote down a easy recipe in a very readable 18 font size, so that the 6-year-old boys could read it loud. I gathered all measurement cups and took my lovely mini-food-processor from the cupboard. But nothing in this world was good enough to stop them. So, they played.

In the meantime, Darienne and I had fun watching the fresh garbanzo beans turn into a paste. We gradually added all ingredients in the noisiest food processor ever, and tasted it up to the point when we felt that hummus was ready to be served.

And for our pleasure, the kids came back hungry and curious enough to try this very tasty homemade treat, very different from the ones we buy from the store. Hummus was tasted with toasted mini-ptta bread, slices of cucumber, baby carrots and the seasonal Boo chips. There we had the "explore" part of the mission. To add fun to the story, they built up a very improvised clubhouse in the backyard made of cardboard and a clothes dryer.  In their little imaginative play, the al fresco restaurant was just the ideal place to have their snack. And for us, the moms, preparing the snack was again a playful time to catch up.

Little Monsters Homemade Hummus

I used freshly cooked garbanzo beans. If you are in the mood to try that, just follow the package instructions. I added garlic, olive oil, and salt to the water, and as always, soaked the beans overnight. I truly believe it's possible to have very good results with canned beans. And as Darienne suggested, adding a bit of bell peppers is a great touch to the hummus.

1 1/4 cups cooked garbanzo beans, drained
1 teaspoon garlic powder
1 tablespoon olive oil
3 teaspoons lime juice
Kosher or sea salt to taste
1 tablespoon tahini
Water to thin the mix (if using freshly cooked beans, use water from the pot)
Paprika or zaatar to garnish

Start processing the beans on medium speed. Add gradually the garlic, olive oil, lime juice, salt and tahini and process for enough time to have all ingredients very well mixed. Start to add drops of water up to the point you feel that the mix is smooth enough to be used as a spread or dip. Enjoy!

Monday, October 25, 2010

The Kids Cook Monday: Smokey Dill and Cheese Muffins

My grandma always insisted that soup was the best thing on Earth. The way she found to convince me to eat all contents from that huge white porcelain bowl was to bring something delicious as a side: Sometimes it was just plain fresh roll from her favorite bakery to be covered with butter. Other times one of her creative appetizers was there, something like stuffed cheese and ham filled potatoes.
So, for today's part of the campaign The Kids Cook Monday, here's one more way to enjoy the arrival of rainy days,and give hearty stews and soups a good company: a delicious savory muffin. The delicate dill touch enhances the smokey touch from the turkey ham. When the mix of cheeses melts inside, it create a unique texture to this impossible-to-stop-eating muffing.


Smokey Dill and Cheese Muffin
If inspired to have kids helping you, the opportunity is fantastic. They can help measuring and mixing and also chopping ham. One popular activity with the 3 years old kids is to spray the muffin pan or cups with oil.

1 cup turkey smoked ham, chopped
2 cups unbleached all -purpose flour
1 tablespoon sugar
2 teaspoons baking powder
1 teaspoon salt
1 1/2 teaspoons garlic powder
4 teaspoons dill
1/2 cup Parmesan cheese
1 cup lite cheddar and jack cheeses, shredded
1 egg
1/2 cup nonfat milk
1/2 cup non fat yogurt
1/2 cup canola oil

Pre-heat oven to 400 F. Stir fry smoked ham in a hot skillet and set aside. Mix all dry ingredients in a bowl. In another bowl whisk egg with milk, yogurt and oil.  Pour the wet mix into the dry bowl gradually. Add ham, and mix the batter slowly. Bake in a greased muffin pan (or muffin cups) for about 25 minutes. Yields 12 muffins.

Monday, October 18, 2010

The Kids Cook Monday: Monster Treats

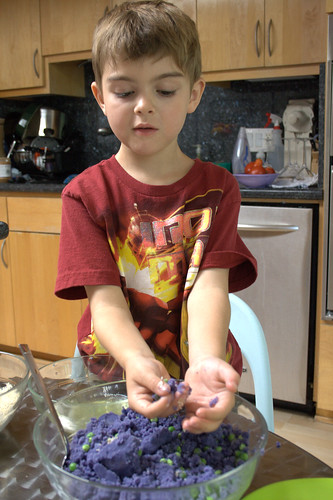
100903_CPE_monster treats_1We had almost as much fun coming up with silly descriptions for these as we did making these fun nibbles for The Kids Cook Monday -- part of the Healthy Monday campaign. They're one of the creepy treats featured in our free e-booklet, Spook Play Explore. If you haven't snagged your copy, click here or the link to the right to get your free copy. And don't forget to enter our Amazon gift card giveaway before Wednesday!

Monster Treats gave my son the most leeway in sharing them with friends: They could be special treats for monsters, or special treats made out of mashed-up monsters. (The peas, of course, are monster boogers.)

Nondescript on the outside, these treats break open to reveal vibrant purple and brilliant green. For an even more colorful presentation, pair these with a batch of Sweet Potato Nuggets.

100903_CPE_monster treats_small

Monster Treats

We liked the combination of bright green peas with deep purple potatoes, but you can mix in almost anything you like. You can use leftover mashed potatoes to speed up prep time.

100903_CPE_monster treats_4
2 pounds purple potatoes, peeled and cooked
2 teaspoons butter
salt and pepper to taste
1 to 2 cups frozen peas
2 egg whites
1 1/2 cups bread crumbs (I mix regular bread crumbs with panko)

Combine potatoes, butter, salt and pepper in a large bowl and mash with a fork or masher. Stir in peas. Refrigerate until well chilled.

Put egg whites in a shallow bowl and stir briefly with a fork or small whisk. Put bread crumbs in another shallow bowl.

To form treats, scoop up a tablespoon or so of the potato mixture and shape into a nugget or ball. Dip into egg white and then into bread crumbs.

To freeze: Arrange nuggets on a plate or pan and set in the freezer for a few hours. Store frozen nuggets in a sealed freezer bag; take them straight out of the bag to bake.

To bake in the oven (my preferred method): Preheat oven to 400 degrees. Set nuggets on a parchment-lined baking sheet and spray lightly with olive oil or cooking spray. Bake for 20 minutes or until nuggets are lightly browned and crispy.

To pan-fry: Lightly spray a non-stick pan with olive oil or cooking spray. Cook nuggets over medium heat for a few minutes on each side until lightly browned and crispy. (You can also fry them in oil.)

Friday, July 2, 2010

Cookout Week : Shrimps Skewers with Orange and Dill

When I was little, I always liked to see wooden skewers on the grill. They looked cute and helped me eat morsels of chicken, beef or shrimps. This magic also worked with the boys here: Not that they just loved to unthread the shrimps from the skewers, but also they enjoyed the sweetness of the seasoning.

This recipe is very simple, yet it brings some different touches. Fresh herbs from the garden and orange juice (from the tree I have in the backyard) were an improvised way of seasoning while we were laying the charcoal in the grill.  Add to that some patience to wait for the perfect timing to let them become golden and delicious.

This marinade here can also be used for different types of fish: We tried it already with fresh salmon, and it was great. I suggest, again, to make sure that the shrimp choice can be healthy for you and the environment checking the Seafood Watch from Monterey Aquarium.

Grilled Shrimps in Orange and Dill Marinade


1 pound raw medium shrimps, cleaned, tail on
2 cups fresh orange juice
2 tablespoons extra virgin olive oil, in a mister
Kosher or Coarse sea salt, to taste
Dill or other herb that might bring more "colors"to the orange juice
Ground white pepper, to taste

First of all, don't forget to soak the skewers in water some hours before prep. Wash and pat dry shrimps, and in a bowl cover them with orange juice, salt and dill for at least 30 minutes. Take them out of the marinade, thread on to skewers and reserve the juice with seasonings it to use for basting while grilling.  Coat shrimps with olive oil. Grill skewers on the top of a medium- hot grill and keep turning it up to the point that flesh is orange. Enjoy with freshly ground white pepper with some drops of lemon. 

Tuesday, June 29, 2010

Cookout Week: Grilled Eggplant

grilled eggplant

We recently hosted a BBQ for a few dozen people, grilling Drive-Through Burgers, hot dogs, and eggplant. There wasn't a vegetarian in the bunch, so I was surprised that it was the eggplant that people were raving about. It's a dream to prep for a party: no salting, no marinating, and minimal seasoning. It doesn't get much simpler -- or tastier.

Grilled Eggplant

This is wonderful fresh, and the leftovers work well in just about any eggplant dish you can imagine. We've enjoyed the eggplant diced with noodles and peanut sauce.

eggplant, any type or size
olive oil
salt
freshly ground pepper
chopped fresh oregano and marjoram, or other herbs

Slice eggplant into half-inch-thick slices. Lightly brush olive oil on each side. Grill over medium-high heat for a few minutes on each side, until you see grill marks, brushing with more oil if the eggplant looks dry. Remove from heat, season with salt, pepper, and herbs, and serve.

Tuesday, June 15, 2010

Playdate Special: Vanilla-Seared Scallops with Mango, Cherries and Tomato


Something about the abundance of cherries at the market triggered a compulsion to pair them with scallops. It was a strange urge, as I'd prepared scallops exactly once before, years ago, and overcooked them horribly.

This time, however, I nailed it: nicely caramelized with a hint of vanilla, paired with spring cherries at their peak and a beautiful mango. It was still missing a little something -- a light sprinkling of sea salt, and a bit of the season's first tomatoes. Perfect. (And another contribution to the anniversary party over at Mango & Tomato!)

It's an appealing presentation for kids who may be unsure of scallops. Two of the four kids liked it, and one more at least tried it. We enjoyed this as an appetizer, but it also makes a great summer entree. The scallops need half an hour in the refrigerator before cooking, but total time on the stove is just a few minutes.

Vanilla-Seared Scallops with Mango, Cherries and Tomato

Topped with fresh fruit, these scallops are a lovely light summer meal. This recipe serves 4 as an entree, or 8 as an appetizer. If you've made compound butter with vanilla, you could substitute that for the separate butter and vanilla here.

1 pound large sea scallops
olive oil
1 tablespoon butter
1 vanilla bean (or 1 1/2 teaspoons vanilla extract)
1 mango, stoned and chopped
1 cup fresh cherries, pitted and quartered
1 yellow or orange tomato, chopped
freshly ground pepper
sea salt

Rinse scallops and pat dry. Set on several layers of paper towels and put in refrigerator, uncovered, for 30 minutes to allow scallops to dry.

Combine mango, cherries and tomato in a bowl; set aside.

When ready to cook, spray a non-stick pan with olive oil, set it over medium-high heat, and add butter. Split vanilla bean lengthwise with a paring knife and scrape vanilla seeds into the pan (or add extract, if using). Season scallops with salt and pepper and set in a single layer in the pan (you might need to cook this in two batches if your pan is small).

Cook 2 to 3 minutes, until bottom of each scallop is nicely browned and releases easily from the pan. Turn scallops over and cook another two to three minutes. Arrange cooked scallops on a platter and top with fruit mixture and remaining butter from pan. Sprinkle lightly with sea salt and serve immediately.

Friday, June 4, 2010

Tips and Gadgets: Tomato and Mango Celebration, a Coulis for Shrimps


If you, like us, like to experiment, here's an inspiration: The author of Mango and Tomato is celebrating the second anniversary of her blog with a contest, looking for new recipes than include her favorite ingredients.

Of course, those are mangoes and tomatoes.

So this recipe is to take a chance of creating something daring and help her celebrate her adventures in the kitchen.

While our very young explorers didn't yet have yet the chance to try that, my oldest son had a look on the pictures and said: "I want to eat those." We tasted this little amusing hors d'óeuvre  on Tuesday night and found it charming, and she suggested to add more sweetness to it, so instead of honey, I added a bit more sugar.  We bet that the most adventurous kids will give it try, while the cautious ones will be at least curious. In the meantime, something refreshing and colorful from our table to yours:

Wrapped Shrimp with Mango and Tomato Coulis

As always, it's a good idea to consult the Monterey Bay Aquarium guide to buy the best option of shrimps available. Here I am thinking of a portion of four shrimps per guest as an appetizer, with enough sauce to amuse them.

Grilled shrimps:
16 shrimps, de-veined, cleaned, tail on
Olive oil
16 pieces of apple-smoked bacon (or turkey bacon) strips, long enough to cover the shrimp circumference

Coulis:
1 cup peeled, chopped fresh tomato (go for the sweet types), no seeds
1 cup chopped fresh flesh of mango (used a pink Mexican fruit)
1 tablespoon brown sugar
1 teaspoon cachaça (Brazilian sugar cane liquor)  or cognac (optional), a non-alcoholic option would be some drops of fresh lime juice
Little salt to taste
1 garlic clove, minced
Freshly cut chives to garnish

Stir-fry shrimps in a mist of olive oil over medium heat on a shallow skillet. When flesh turns pink, remove shell but leave the tail,  and wrap each shrimp with the bacon strip. The bacon will close itself with the heat, creating a ring around the shrimp. When bacon is crispy and shrimp all cooked, it is all ready to go.

For the coulis, start blending both fruits together and gradually add garlic, salt and sugar. At the end use the liquor or some drops of lime juice until all is smooth and integrated.  On the first test of this recipe, I simmered the sauce to make sure all the flavors were there. But on the second I just used it fresh and loved it. You can also strain everything to make sure you are honoring the name "coulis". Some mango fibers will need that help!

Serve shrimps with the sauce. An option is to serve it as a traditional prawn cocktail.

LinkWithin

Related Posts Plugin for WordPress, Blogger...