Showing posts with label Garden. Show all posts

Saturday, March 15, 2014

Leprechaun Shelter Salad... and Green Pea Dip


Photo by J. Balbi
Maybe they say they don't like greens. But when it comes to building a hiding place for a leprechaun... perhaps the little ones will change their mind.

While looking for ideas of something healthy to make with the kids at school I finally put the project together while browsing the aisles of my favorite grocery store. Lately I've been working a more with food presentation with older children, but thought that the idea of building a hut, a bed or even a boat made of vegetables would be enticing enough to make kindergartners and first graders enticed.  After building,  we were working with the notion that the best place to "hide" the secret leprechaun hideout would be their tummy, not the trash can.

I was lucky enough to have J. working with me at school that day, who was fortunate enough to have a mini figurine of a leprechaun in her bag, and a good eye for taking the photos which are in this post.
Photo by J. Balbi
A big bag of romaine hearts, some micro-greens to imitate little shamrocks, pea stick and lots of imagination made the whole experience a great activity. They all helped to blend the green dip, excited with the mouse from the hand blender. The green pea dip, inspired on this dip recipe by Darienne, was the foundation. For some children, it was a unique chance of eating salad, disguised as something they had built for the little man.

Happy St. Paddy's Day!
Photo by J. Balbi

Leprechaun Shelter Salad with Green Dip
You can always play with the greens around the project, but it's good to have something to make the structure possible, like a big leaf for the shelter, and some cucumber sticks to be the support. 

For the salad

Romaine Heart Leafs as needed
Cucumber, cut in sticks in same length
Green pitted olives
Green pea baked snacks (such as Inner Peas by Trader Joe's
Baby Spinach
Curley Parsley

For the dip

1 bag frozen organic green peas
4 oz whipped cream cheese
2 tablespoons grated Parmesan cheese
2 teaspoons garlic powder
2 teaspoons oregano
Kosher salt to taste


Cook peas as directed by package. Drain and blend with all other ingredients in a food processor or hand blender up to when it reaches a creamy texture. Serve on the side of salad or on the bottom of the late to serve as the foundation for the hut. 

Wednesday, June 12, 2013

Kale Chips


My kids love kale! Yay!!! We'll... the truth is...

I mean, they love kale chips. Loaded with olive oil, garlic, and sometimes a bit of salt, those crunchy leaves are the ideal treat. My 6-year-old kindergartner loves it so much that he asked me to roast three full bags of fresh kale, planted and harvested by the students at school, to share with his friends. I was tired but enthusiastically spent 40 minutes in front of the oven on a hot night preparing their treat.

He told me that they all loved it so much. And I could believe it... See the photo below with the leftovers in the huge bowl?

I've been working with this recipe for years, and possibly every mom I've met in California has her own version. The important part is that kale is a wonderful source of nutrition and is the perfect pairing for black beans (see this classic Brazilian recipe here) and other vegetables. Or enjoy these chips on their own, as a wonderful snack.

Kale Chips

My favorite way is to make these is with green or purple kale. But dinosaur (a.k.a. Lacinato) kale works too. Make sure to get rid of the overly moist stems and leaf ribs and use just the shredded leaves. You also might want to use an olive oil sprayer.


kale leaves, washed and dried
extra-virgin olive oil, enough to spray or coat the whole batch
garlic powder
salt to taste (optional)

Preheat oven to 400 F. Line a baking sheet with aluminum foil. Spread kale leaves evenly on sheet and spray with olive oil (or drizzle olive oil over the leaves and invite little hands to mix the leaves with the oil). Sprinkle kale with garlic powder and, if using, some salt.

Roast for 5 minutes, then open the (HOT!) oven and use long tongs to turn the leaves to make sure they roast evenly. Roast for 5 more minutes and check. If the leaves aren't crunchy enough for your taste, roast just a bit longer. 

Thursday, September 20, 2012

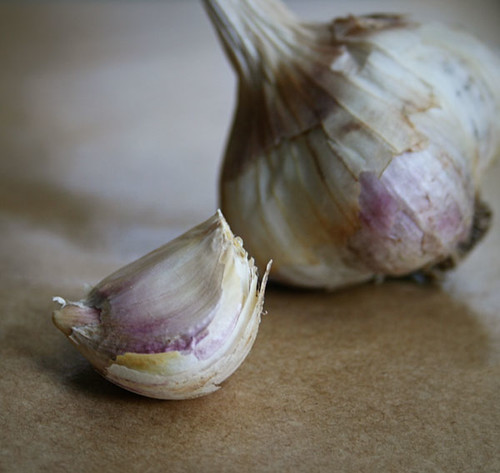
Homegrown garlic

12_CPE_garlic2


It’s almost time to plant garlic! Even if you aren’t much of a gardener — even if you don’t have a garden — you should stick some garlic cloves in dirt. It takes almost no effort and the potential rewards are gratifying.

To me, it’s a meditative pleasure to begin so many meals with aromatic garlic grown just steps away from my kitchen. Even if dinner is just spaghetti tossed with garlic and olive oil, that homegrown garlic makes it mine.

Growing garlic is simple and satisfying for kids too: Those bulbs under the ground are a promise of spring’s bounty.

Tuck some cloves into the ground this fall and by next summer you'll be cooking with your own freshly harvested garlic. Enjoy the spring garlic and scapes, but be sure to leave plenty to harvest later so you can enjoy them well into winter.

Like most things, there's an easy way and a hard way. The easiest way: Separate some nice, big cloves from an ordinary garlic bulb from your market. Poke them an inch or two into the ground, pointy end up, and keep them 4 to 6 inches apart. Cover with some mulch, such as fall leaves, and ignore until spring.

That’s pretty much what I do, though I do order bulbs so I can be sure exactly what I’m planting. It's good to know whether you’re planting hardneck or softneck garlic. Hardneck garlic is generally better for colder climates and provides the added bonus of garlic scapes in spring. Softneck garlic typically lasts longer in storage and can be woven into a pretty braid. (I’m planting both.)

If you’re really fussy, you can inoculate the cloves before planting and fertilize in the spring ... I don’t bother. They seem to do fine in their own, even in the heavy clay soil here.

In early summer I watch for leaves turning brown. When just a few green leaves are left, I gently dig the bulbs out of the dirt, carefully shake off as much soil as I can, and set them on newspaper in a single layer, out of the sun, so they can cure for storage.

After a few days, you might want to brush more dirt off the drying bulbs. Be careful not to bruise them. I was overly aggressive last year and damaged quite a few, so this year I skipped this extra cleaning. My bulbs look a little grubby, but they taste great.

120920_CPE_garlic1


I aim for planting my garlic the first two weeks of October or so, but you should check advice specific to your part of the world.

For more detailed guidance, try these simple tips from the Daily Green. Apartment Therapy offers a primer on growing garlic in a container.

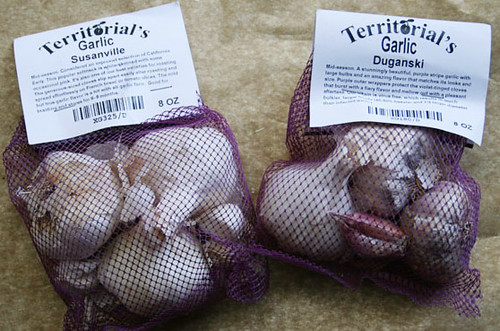
If you want to order bulbs for planting, do it now! I like Territorial Seed Company (I ordered their softneck/hardneck combo) and John Scheepers Kitchen Garden Seeds.

LinkWithin

Related Posts Plugin for WordPress, Blogger...