Showing posts with label Dressings and Sauces. Show all posts

Saturday, March 15, 2014

Leprechaun Shelter Salad... and Green Pea Dip


Photo by J. Balbi
Maybe they say they don't like greens. But when it comes to building a hiding place for a leprechaun... perhaps the little ones will change their mind.

While looking for ideas of something healthy to make with the kids at school I finally put the project together while browsing the aisles of my favorite grocery store. Lately I've been working a more with food presentation with older children, but thought that the idea of building a hut, a bed or even a boat made of vegetables would be enticing enough to make kindergartners and first graders enticed.  After building,  we were working with the notion that the best place to "hide" the secret leprechaun hideout would be their tummy, not the trash can.

I was lucky enough to have J. working with me at school that day, who was fortunate enough to have a mini figurine of a leprechaun in her bag, and a good eye for taking the photos which are in this post.
Photo by J. Balbi
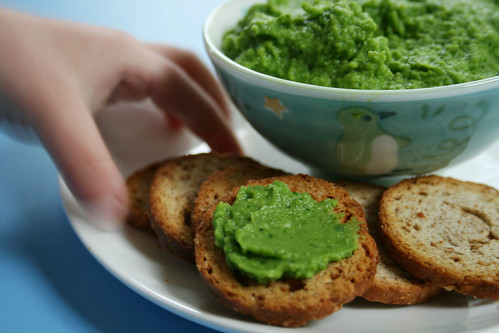
A big bag of romaine hearts, some micro-greens to imitate little shamrocks, pea stick and lots of imagination made the whole experience a great activity. They all helped to blend the green dip, excited with the mouse from the hand blender. The green pea dip, inspired on this dip recipe by Darienne, was the foundation. For some children, it was a unique chance of eating salad, disguised as something they had built for the little man.

Happy St. Paddy's Day!
Photo by J. Balbi

Leprechaun Shelter Salad with Green Dip
You can always play with the greens around the project, but it's good to have something to make the structure possible, like a big leaf for the shelter, and some cucumber sticks to be the support. 

For the salad

Romaine Heart Leafs as needed
Cucumber, cut in sticks in same length
Green pitted olives
Green pea baked snacks (such as Inner Peas by Trader Joe's
Baby Spinach
Curley Parsley

For the dip

1 bag frozen organic green peas
4 oz whipped cream cheese
2 tablespoons grated Parmesan cheese
2 teaspoons garlic powder
2 teaspoons oregano
Kosher salt to taste


Cook peas as directed by package. Drain and blend with all other ingredients in a food processor or hand blender up to when it reaches a creamy texture. Serve on the side of salad or on the bottom of the late to serve as the foundation for the hut. 

Wednesday, February 20, 2013

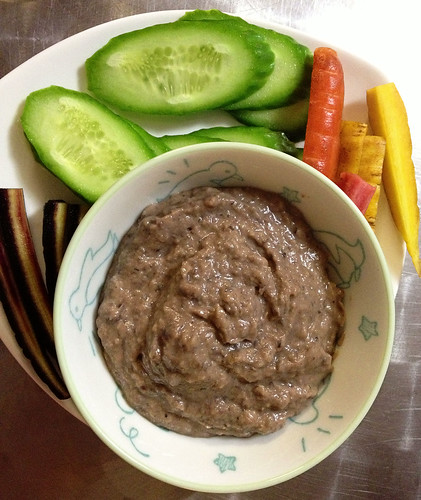
Black bean hummus, two ways

130209_CPE_black-bean-hummus


I love hummus. I love it with raw veggies, I love it spread on sandwiches, I love it with chips, I love it straight off a spoon.

And I love garbanzo beans, which usually provide the creamy base for hummus. But we've been enjoying garbanzos as a meal with increasing frequency (as in this delicious slow cooker dinner, or a version of this easy warm salad for lunch), and I don't want to see them yet again at snack time. Not even puréed.

Black bean hummus, however, is a completely different dip.

After toying with a few variations, I've settled on these two favorites. The first is bright and fresh, infused with oranges. The second is bolder and spicier, and just as delicious.

I prefer my hummus without olive oil. If you find it too thick for your liking, add more water or juice, or a bit of olive oil. If you have citrus salt, use it here.

Orange Citrus Black Bean Hummus

If you have citrus salt, use it here.

1 1/2 cups cooked black beans
2 tablespoons orange juice
grated zest from 1 orange
1 tablespoon tahini
1/2 teaspoon salt
1/2 teaspoon cumin

Combine all ingredients in a food processor and blend until smooth.

Paprika-Lime Black Bean Hummus

1 1/2 cups cooked black beans
2 tablespoons reserved bean liquid
1 1/2 tablespoons lime juice
1-2 cloves garlic
1 tablespoon tahini
1/2 teaspoon salt
1/2 teaspoon cumin
1/4 teaspoon smoked paprika

Combine all ingredients in a food processor and blend until smooth. If you like it spicy, add a few drops of Sriracha.

Wednesday, May 23, 2012

In season: Cherries

I'm so happy to see piles of cherries at the farmer's market: They're one of my favorite fruits for snacking on. I'm gearing up for an evening of pitting and canning cherries (a jar of cherries with simple syrup and vanilla bean is pure heaven in midwinter), but for now we're just nibbling handfuls and savoring their sweetness.

Fresh cherries take the spotlight in these recipes we've featured on Cook Play Explore: a fruity topping for vanilla-kissed scallops, a simple vinaigrette to dress up roasted beets, the sweet note in chicken salad, and the perfect sauce to drape over coconut-scented pudding. Read on for links and details


This recipe was inspired by a contest at Mango & Tomato — and to our delight, it took top honors! This is simple and elegant, a perfect entrée to share with friends on a gorgeous summer evening.


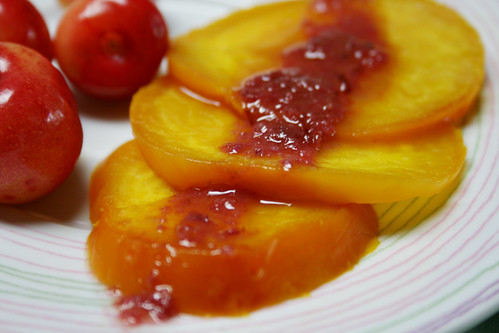
Earthy, earnest beets get all dressed up in a cherries and balsamic vinegar — just the right touch of sweetness to maybe coax the kids to try these delicious vegetables.

100716_CPE_beets


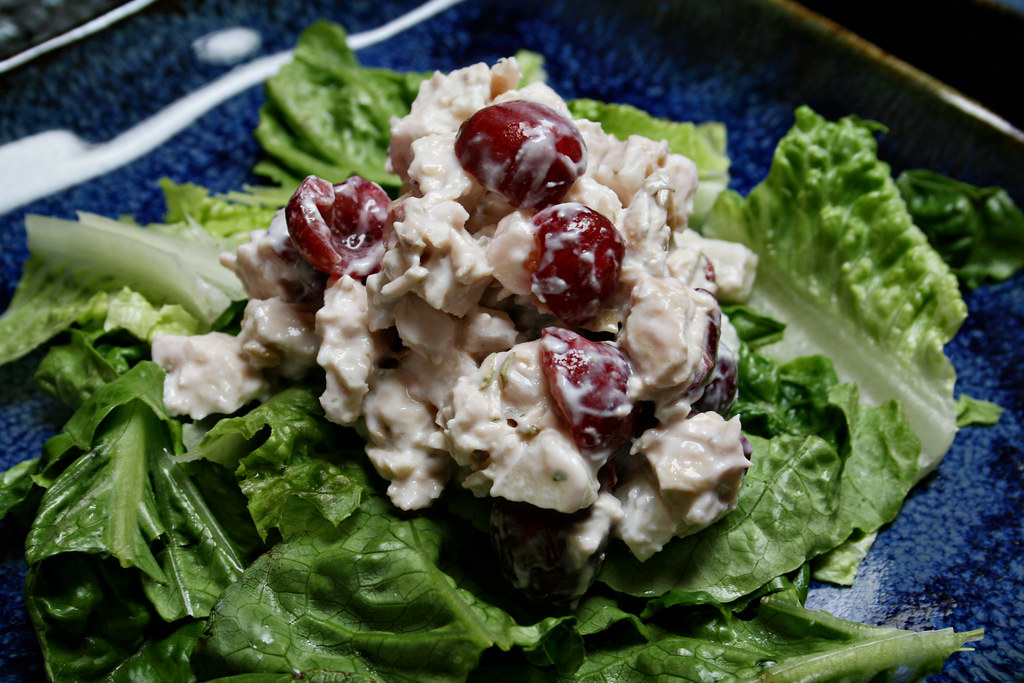
Jicama brings crunch and Greek yogurt supplies the tang in this mayo-free chicken salad. Sweet cherries are the vibrant finishing touch. Delicious in a sandwich, on a bed of greens, or shoveled with a spoon.


Did your mother make molded puddings like these back in the day? Mine did too. But Anna's updated version takes this comforting treat to a whole new level, using coconut milk and an infusion of fruity flavor. Topping it all off, of course: a wonderful cherry sauce.


Sunday, February 12, 2012

Bella Notte Red Sauce


Valentine's spirit started to fly around here when I was watching a commercial break reminding me of the cuteness of The Lady and The Tramp. And that Bella Note song, and ... the unforgettable night of two dogs and one plate. But neither the pasta nor the meatballs triggered my disposition to run to the kitchen. The red sauce actually was the one to make me go to Trader Joe's, as fast as I could.

Of course the Italian chef of the movie would never make that sauce from cans or jars, right?

Before this, I tried many recipes for a tasty tomato sauce, but none was good enough to make me forget about the tomato pelatti  from Italy ready to be prepared in my kitchen. Or the sometimes delicious ready-made sauces that abound in the shelves of Trader Joe's.

This sauce made my kids happy and they were fascinated to see the once-upon-a-time tomatoes turned into sauce by being processed with an old-school food mill. I used organic tomatoes from Mexico — a shorter trip to California than the Italian ones from a can. Can't wait for the tomato season to start here as I am daydreaming about a sauce made of heirloom tomatoes. Then I will happily repeat this recipe of homemade pasta here: Semolina and Farro Togliolini.

This recipe was inspired by Alton's Brown roasting method. I hope this will inspire you too. I always think that there's no trouble on the comfort brought from food. But when made from scratch, the red sauce will maybe bring romantic notes to your table, or maybe just the feeling that you've traveled to Italy — or whatever inspirations suit your Valentine's dreams.

Red Sauce Bella Notte

There's a big debate about seeds, peels and tomatoes when making tomato sauce. I tested with and without seeds, and the results were very similar. I also read that what really matters is the pot material: Some advocate the use of non-reactive materials such as tempered glass or enamel. THis time I used pyrex and a Le Creuset baking dish. Some believe that there's no need to worry about seeds, and that the nonnas in old Italy will cook good tomato sauce in any pot, with lots of love. 

4 pounds roma tomatoes
5 cloves of garlic (if you find the giant garlic from California, even better)
1/2 cup extra-virgin olive oil
Garlic-infused olive oil to drizzle
Kosher salt to taste
Oregano, to taste
Thyme, to taste
4 bay leaves
Fresh basil to garnish (optional)
1/2 cup of wine (optional, your choice of red or white)
Caramelized yellow onion to garnish (optional)

Preheat oven to 325 F. Coat baking dishes with olive oil. Halve tomatoes and put them with the open side facing up on the baking dish. Sprinkle with salt, herbs and drizzle with olive oil. Bake for two hours, checking and turning after the first hour. After two hours raise the oven temperature to 400 F and roast for about 15 to 30 minutes more.

Remove and process the tomatoes with a food mill to get rid of skins and seeds. It's possible to do this with a sieve, pressing the tomatoes with a wooden spoon. (I used seeds and skins to make a topping for a bruschetta.)

Heat the sauce in a saucepan and add wine. Cook on high heat for about 3 minutes, and simmer for about 7 minutes more. Adjust salt and other spices if you need to. If you need a little bit of sweetness added, half a teaspoon of raw sugar will do the trick.

Wednesday, January 25, 2012

Simply citrus: Homemade syrups, salts, and preserved lemons


Citrus season is in full swing here, and I'm making the most of it. My lemon tree is churning out a generous bounty, and I'm loading my market bag with blood oranges, grapefruit, and some of the most spectacular navel oranges I've ever enjoyed. Today I have a handful of recipes to help you make full use of winter citrus while it's at its peak. These are all simple and economical recipes to help preserve the best of the season: syrups and frozen concentrates, finishing salts, and preserved lemons.

It's worth seeking out organic fruit for these recipes, particularly those that make use of the peel. This is a good time to score a bargain on organic citrus. These are easy to make with kids, too (be sure to supervise them if they use a grater).

If you're crazy for still more citrus, start a batch of limoncello that will be ready in time for summer, make lemon curd (or mango-lime curd, swoon!), or treat your favorite people to candied citrus peels.


Blood orange juice
Lemonade Syrup, and Blood Orange Variation

Store the syrup in the refrigerator for up to a week, or freeze as homemade juice concentrate. I love the taste of raw or organic sugar, but it adds a golden-brown tint. It's barely noticeable in lemonade, but it blunts the the vivid color of blood orange juice. This recipe yields four 8-oz. drinks; scale up or down to meet your needs.

1 cup sugar
1 cup water
1 cup lemon juice

Combine sugar and water in a saucepan and bring to a boil, stirring to dissolve sugar. Let cool, the combine with lemon juice.

To prepare a drink, combine equal parts lemonade syrup with water — you may need to adjust proportions to suit your taste.

For concentrate, freeze portions in plastic containers, then store the frozen blocks in an airtight freezer bag or container.

Blood Orange Syrup: Substitute blood orange juice for lemon juice. This syrup is also especially good poured over shave ice or added to a glass of sparkling water. 

Frozen blocks of lemonade concentrate, waiting for summer


Citrus Salt

I intended to make this ages ago, after seeing it over at Steamy Kitchen, but only just got around to it after it was featured at 101 Cookbooks. Try citrus salt as a finishing touch with chicken, seafood, and vegetable dishes. Be sure to juice the fruit after removing the zest and use it to make the syrup recipes that follow.

organic lemons, oranges, and/or limes
sea salt

Scrub fruit well and dry thoroughly. Zest fruit, being careful not to remove the bitter white pith. Combine about 1 tablespoon of zest with 1/2 cup sea salt, mixing thoroughly with a fork.

Lay salt blend on a baking sheet lined with parchment paper. Let it sit out a while to dry, or put it in a 200 degree oven for 75 minutes to two hours, until zest is dry and crumbles easily between your fingers. You could do this in a dehydrator, too.

Store in an airtight container and it should keep for a few months.

Lemon salt, top, and orange-lime salt

Preserved Lemons

Try dicing preserved lemons and whisking them with a bit of olive oil, salt, and pepper for a fantastic dressing, as in my Persimmon and Fennel Salad. They're delicious with rice and other grains, in marinades, and atop simply cooked chicken and fish.

organic lemons
kosher salt or coarse sea salt
a large jar with tight-fitting lid
optional spices: cinnamon stick, cloves, cardamom pods, bay leaves, coriander seeds, fennel seeds, peppercorns

Be sure to have enough lemons to fill your jar, plus a few more for juice. First, sterilize your jar and lid by boiling them in water for 10 minutes.

Scrub lemons well and trim away any stems. Slice the lemons almost completely in half, but not all the way through. Make another cut, perpendicular to the first, so you've cut the lemons nearly into quarters. Sprinkle some salt in the bottom of the jar. Pack the cuts in the lemons with salt and put them in the jar. Pack firmly, squishing out some of the juice. Add any spices, if you wish, top off with another sprinkle of salt, and add enough lemon juice to completely submerge the lemons.

Shake the jar every day or two to evenly distribute juice and salt. As lemons soften, add a few more.

Your lemons will be ready in 3 to 4 weeks. They're very salty: You may want to rinse them before using, and taste before adding more salt to a dish.

I've been assured the jar never needs refrigeration, but I stick it in the fridge after opening it and try to use them up within 6 to 8 months.

091204_persimmon salad_3
Preserved lemons are perfect for Persimmon and Fennel Salad

Monday, October 24, 2011

Whipped Pumpkin Cream Cheese

We're addicted to Trader Joe's Pumpkin Cream Cheese. My older son tried it late in the season last year and turned to me, eyes huge: "I. Love. This!" It recently returned to store shelves for a second year, and now my younger son — the one who doesn't like cream cheese — is loving it too. We're happy it's back, but what will we do when it disappears from the stores again? The answer, of course: Make our own.

If you have a TJ's near you, definitely seek out this spread. But if you don't, or if you want a version with less fat or less sugar, or it's April and you're craving pumpkin cream cheese, whip this up. I'm comfortable with the amount of sugar here, but you probably can reduce it by another tablespoon or two.

It's delicious on bagels, but don't stop there — this spread is wonderful on celery ribs, quick breads, scones, and fresh warm bread, and as a dip with apple and pear slices or cookies.

We served it as a dip with baked cinnamon chips, made from homemade pumpkin tortillas cut into bat shapes. (Cut tortillas into triangles or into shapes with cookie cutters, brush with melted butter, sprinkle with cinnamon sugar, and bake at 350 degrees for about 10 minutes or until crisp.)


Whipped Pumpkin Cream Cheese

If you wish, substitute regular cream cheese or whole milk for the lower-fat equivalents and use prepared pumpkin pie spice instead of the individual spices. This doesn't have the shelf life of a store-bought blend — if you don't plan to use it up within a couple days, make a smaller batch.

8 ounces reduced-fat cream cheese, at room temperature
1/2 cup pumpkin pureé
1/4 cup brown sugar
1/2 teaspoon vanilla extract
1/2 teaspoon cinnamon
1/2 teaspoon allspice
1/2 teaspoon nutmeg
1/4 teaspoon cloves
1/4 teaspoon ginger
1 to 2 tablespoons low-fat milk (optional, for thinner spread)

Combine cream cheese through spices in a mixing bowl. Using a stand mixer with a whisk attachment, blend for a few minutes until light. Gradually add milk, if desired, and continue to beat until light and fluffy. You're not going for the texture of whipped cream, just lightening up the cream cheese.

Chill for at least an hour before serving.

Tuesday, August 2, 2011

Lemongrass-Coconut Tomatillo Sauce

One of the new additions to my garden this year is a tomatillo plant. I plunked it in the dirt with no idea what I'd do with it; I just liked the green fruits wrapped in papery husks, like little gifts. We recently returned from a tropical vacation to find ripe tomatillos showering down, so it was time to figure out how to use them. Reluctant to let go of vacation too quickly, I decided to try them with lemongrass and a bit of coconut.

Tomatillos look like green tomatoes, beneath their husks, but they taste nothing like them. These are the green goods for salsa verde, which is essentially what I made — but with a healthy infusion of Pacific Islands flavor. A good tomatillo fills out its husk nicely. They start out bright green and tart, and gradually turn yellow and mellow. My plant is turning out tiny tomatillos, about an inch across. You'll find much larger ones at the market. You can use them raw, roasted, or cooked; here, I boiled them briefly to make them a little less punchy.

We threw in an Anaheim chile harvested at our school garden, lemon verbena from the front yard, and a bit of juice. The result: Wow. The tart-sweet, light sauce saved our otherwise unremarkable chicken and guarantees space for tomatillos in next year's garden.


Lemongrass-Coconut Tomatillo Sauce

Use fresh lemongrass if you can find it (try well-stocked stores or Asian markets): Cut off the bottom stem and top leaves so you have only 4 or 5 inches of stalk, then peel off and discard the tough outer layers. If you don't have lemon verbena, try lemon balm, cilantro, or lemon basil. You might want to throw in a jalapeño for a bit of heat. You can freeze the sauce without the coconut milk; blend in the coconut milk after heating the thawed sauce.

1/2 pound tomatillos
1/4 cup onion, coarsely chopped
1 Anaheim chile, seeded and coarsely chopped
1 clove garlic, coarsely chopped
2 stalks lemongrass, coarsely chopped (see notes)
1 tablespoon fresh lemon verbena, coarsely chopped (see notes)
1/4 cup light coconut milk
1 tablespoon pineapple or apple juice
1/4 teaspoon salt or to taste

Husk tomatillos and wash to remove the sticky residue. Bring a pot of water to a boil, add tomatillos, and simmer for 5 minutes. Drain and coarsely chop.

Combine tomatillos and remaining ingredients in a food processor or blender and puree. Serve with grilled chicken, fish, rice, or vegetables.

Tuesday, July 12, 2011

Easy Blue Cheese Dip


As a toddler, my older son ate almost anything served with "dip-dip," which was usually sweet: ketchup, honey, maple syrup. But he has always made a stinky face at hummus, ranch dressing, baba ghanoush, and any other veggie dip, even as he's grown to love peanut sauce with satay, dipping sauce with pot stickers, and balsamic vinegar and olive oil with bread. I finally figured it out: He likes strong but distinct flavor and hates texture. This easy dip satisfies both criteria: Spreadable blue cheese gives this dip assertive flavor without suspicious-looking blue-tinged chunks of cheese.

Laughing Cow Light Blue Cheese smooths out the tang of yogurt for a smooth, tasty blend. My favorite combination is with non-fat Greek-style yogurt: very low in fat and loaded with protein.

Blue Cheese Dip

I like to make this with non-fat Greek-style yogurt, which gives this a significant protein boost.

4 wedges Laughing Cow Light Blue Cheese
6 tablespoons plain yogurt (regular or Greek-style)
vegetables for dipping

Combine cheese and yogurt in a small bowl and blend well. Serve with vegetables for dipping. Makes about 3/4 cup of dip.

Saturday, June 4, 2011

Strawberry Season Special: Spinach with Balsamic Dressing


This simple yet charming salad combination was made for a Mother's Day brunch many years ago. At that time I ended up not posting the recipe because I didn't like the photo. But this week, inspired by the beautiful red strawberries, I found many fun ways to arrange the spinach leaves and strawberries, and take pictures of them. Its freshness is amazing, and kids (sometimes) love it—as the dressing has some hidden sweetness blended with the tangy combination of balsamic vinegar and strawberries.

Baby Spinach Salad with Black and Red Dressing

You can choose different ingredients for the main salad. I've combined it with rocket and once used basil instead of spring onions.

Salad:
4 cups fresh baby spinach
1 sliced medium strawberry for each plate

Dressing:
1 ripe strawberry, diced in tiny pieces
1 tablespoon olive oil
1 tablespoon balsamic vinegar
1 spring onion, finely chopped
1/3 cup apple juice or lemonade
Kosher salt to taste


Mix all ingredients for the dressing at least one hour before serving. Organize each plate with a bed of spinach and slices of strawberry. Serve with the dressing on the side or pour over the salad, leaving the guest to redesign the plate. Enjoy!

Tuesday, March 22, 2011

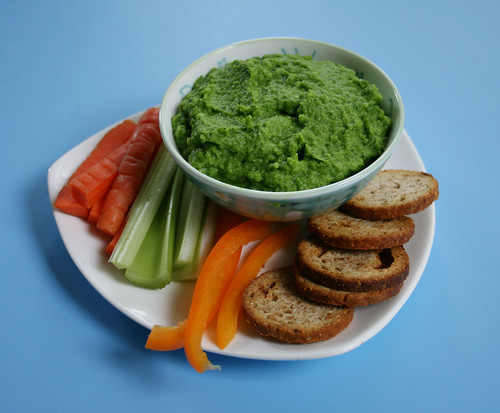
Spring Pea Dip

110315_springdip2


The kids didn't go for this easy, healthy dip. They're crazy. Just meant more for me, and I couldn't stop scooping it up. Peas, an added boost from spinach, a burst of lemon, and a kiss of nutmeg -- yum! This looks and tastes like spring to me.

Set this out as a dip for raw veggies, slather it on Melba toast, or spread it in a pita as a base for a veggie sandwich. It takes just a few minutes to whip up.

110315_springdip1


Spring Pea Dip

To play with the flavor, try adding a handful of fresh herbs -- mint, cilantro, or parsley would work nicely.

2 cups peas, frozen or fresh
1/2 cup water
generous handful of baby spinach leaves
2 tablespoons grated Parmesan cheese
1 tablespoon olive oil
2 teaspoons lemon juice
1 teaspoon lemon zest
a pinch or two of nutmeg
salt and pepper to taste

Combine water and peas in a saucepan. Bring to a boil, cover, reduce heat, and cook for 5 minutes. Strain peas, reserving cooking liquid.

Combine peas and remaining ingredients and blend thoroughly in a food processor or blender. Add a tablespoon or more of the cooking liquid and keep blending until you reach the desired consistency.

Serve dip with fresh vegetables, bread, or crackers.

Tuesday, March 1, 2011

Broccoli, Almond and Lemon Zest "Pesto"


This is so delicious that I ended up eating it on the top of a toast.
Last week was crazy: Kids were enjoying a Winter break, one was sick and they were running around most part of the time. I just encountered peace in the kitchen, now and them baking friendly cookies to cheer up, trying new ingredients and developing new recipes.
Above all things that came from the kitchen during the whole week, my favorite  creation was this one. I shared some of it with Darienne and her boys. Some loved it, some didn't care for it.
Also, it has other beautiful characteristics: it  includes lemons - my latest passion- and almonds. Not to mention that it brings the wonderful broccoli. And all the goodness of those powerful foods.  After some research about the origins of Pesto alla Genovese - my favorite Italian sauce-  I found out that its name comes from the method used to prepare it - the old kitchen gadgets, the pestle and mortar.
Not intimidated by tradition, though, and short of ingredients in my fridge and pantry, I needed something fresh to serve with my vegetarian feast. And tested this sauce. The black stone pestle and mortar I have were sitting on the countertop. And so was the food processor. The second won, as I was short of time. But I promised to myself that next time I will make it like my ancestors, using the pestle and mortar, and perhaps will go for the traditional recipe. In the meantime, I already reviewed this recipe, ate it again yesterday on the top of a toast. Perhaps tomorrow I will toss it on a delicious homemade pasta.


Almond, Broccoli and Lemon Pesto

1 cup broccoli florets,  chopped
2 teaspoons garlic, chopped, (or 1 teaspoon garlic powder)
8 almonds, roasted, unsalted, whole
4 oz Parmesan cheese, in a chunk (or 1/4 cup shredded)
1 plus 4 tablespoons extra virgin olive oil
1 to 2 tablespoons lemon juice
1 teaspoon lemon zest, chopped
Kosher salt to taste

Heat small skillet with 1 tablespoon olive oil. Add broccoli and garlic and shallow fry on medium heat for about 5 minutes. Add warm broccoli and all other ingredients in a food processor and pulse up to when it reaches a coarse texture. Add salt to taste. Add more olive oil and pulse more if you want it creamier. Dress it up with a few curls of lemon zest. 

Thursday, January 20, 2011

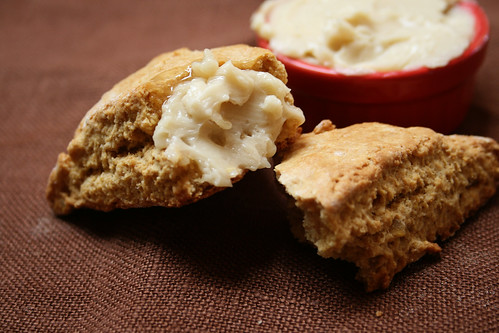
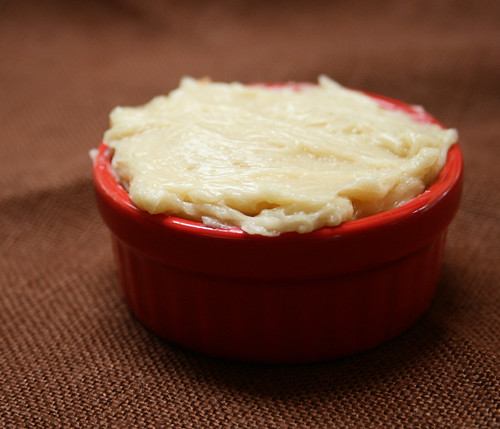
Maple Butter

110104_CPE_maple butter_2

Once the frosty magic of early winter gave way to the bleak, barren New England winter of February, when the ice had worn out its welcome and the snow was sullied by a season's worth of sand and salt, I looked forward to sugar shack season. On an unseasonably warm weekend each winter, my family would pile into the car and head to a sugar shack, where maple syrup -- and maple sugar candy! -- is made.

I don't know if the shacks are more tourist-oriented these days, but the places we went all seemed the same: We'd pass through the humid main building to sit at a rickety picnic table, set on pea gravel in a drafty, plastic-sheet-covered porch. The pancakes were never as good as my mom's -- probably made from a mix -- and there was always a wet, smelly dog running around looking for extras. But the syrup was heavenly, and for a few months after we savored the pure syrup we brought home in a little plastic jug.

That probably began my love affair with maple syrup. The relationship deepened two decades ago when I went to Quebec on a school trip. We stopped at a roadside spot for maple butter slathered on warm French bread, and I haven't been able to forget that spread.

This is not that butter. At least, I don't think it is. Authentic maple butter doesn't have any butter in it. It's a process of heating and reheating syrup, but it requires precise temperatures and I'm not up for the challenge right now. As soon as typed that, I began thinking... hm, I really should try it. When I do I'll report here. In the meantime, though, this easy spread will do just fine.

110104_CPE_maple butter_3

Maple Butter

Enjoy this on toast, waffles, pancakes, muffins, popovers, and more. We enjoyed them with Whole Wheat Ginger Scones.

1/2 cup butter, softened
1/4 cup pure maple syrup

Combine butter and maple syrup in a mixer bowl. Using whisk attachment, blend with stand mixer (or mix with a fork) until smoothly combined. Store in the refrigerator.

Tuesday, August 10, 2010

Second Helping: Beets with Cherry Vinaigrette

100716_CPE_beets


As I dropped my first-grader off at day camp, I asked if he wanted anything in particular from the farmer's market.

"Those yellow raspberries," he said. "And beets."

Beets?! It was the kind of response parents dream about, the kind we like to casually mention to friends (and I did): Beets! He asked for beets!

Beets certainly can be a hard sell. I used to think I hated them; it turns out, I don't like canned beets. And I avoid the commonplace red beets. Not because I'm a snob, but because I hate staining my fingers, the cutting board, and my clothes with magenta juice. Gold beets aren't messy, and best of all are chioggia beets. They have beautiful red-and-white rings when sliced, and a nice sweetness. Both are gorgeous on a plate.

Chioggia beets are easiest to find at farmer's markets and in CSA shares, and you should be able to find golden yellow beets at a good produce market. If you have a patch of dirt to spare, trying growing some at home.

My son likes them steamed or roasted, plain, in chunks or slices, sometimes with a bit of butter or olive oil. I like them all these ways and simply grated raw. The first time you offer this to kids, serve the vinaigrette on the side in case it's a deal-killer.

Beets with Cherry Vinaigrette

This makes enough to serve four, with dressing left over. It works nicely on a greens salad, with chicken, and I would think with citrus fruit. Feel free to use all red wine or balsamic vinegar, if you prefer.

3 golden or chioggia beets
For vinaigrette:
1/2 cup extra-virgin olive oil
2 tablespoons red wine vinegar
1-2 tablespoons balsamic vinegar
1 teaspoon Dijon mustard
6-8 sweet cherries, pitted
salt and pepper to taste
1 or 2 shallots (optional)

Scrub the beets well and wrap each individually in foil. Cook the beets using one of these methods: steam in a pressure cooker for 15 minutes, simmer for 40 minutes, or wrap in foil and bake at 400 degrees for an hour or until tender. Run cooked beets under cold water to cool and slip off skins. (You can store the cooked beets for a few days in the fridge.)

Combine vinaigrette ingredients in a blender and whir until well combined, adjusting seasoning to suit your taste. You can make this ahead and store it in the refrigerator a few days; whisk well before serving.

To serve, slice beets and arrange on serving plates. Drizzle vinaigrette over beets, or serve on the side.

Friday, April 30, 2010

Make It With Milk: Butter, Straight Up and Flavored

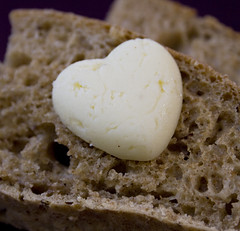
100429_CPE_butteronToastRedo

You've probably made butter before, perhaps in elementary school or at camp: Put some heavy cream in a jar and shake, shake, shake. And then you never made it again.

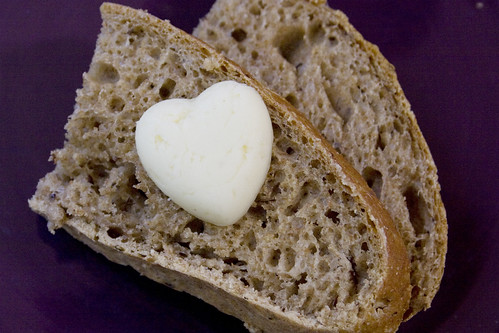
Time to revisit butter. This time, use the stand mixer. Whip up some butter, customize it with your favorite flavors, and stash the flavored, or compound, butter in the freezer. Slice off a bit to instantly perk up steamed vegetables, pastries fish, steak, great bread ... Minimal effort with elegant, great-tasting results. It's addictive. You can cheat and make compound butter by mixing your extras into store-bought butter, but how cool is it to present your own butter when having friends over for brunch?

My 6-year-old was cool to the idea of making butter -- been there, done that -- so my 3-year-old helped with this batch. We taste-tested the cream as it transformed into butter, and he helped mix in our extras. We made about 7 ounces of butter and split it into two logs: one with honey, cinnamon, and vanilla, and the other with garlic and basil. The 6-year-old was no more excited about the butter when his brother and I served up toasted homemade wheat bread with honey butter for an after-school snack... until he tasted it. "More! More!" Success.

Last summer I added lemon verbena to the garden, and my summer obsession was a log of butter with verbena and lemon zest. I just got my hands on a full pound of wonderfully fragrant vanilla beans, and I suspect my next obsession may be butter with vanilla bean and rum. Or cardamom. Or both. Spooned into a steamy hot fresh popover. Mmmm.

Butter, Straight Up and Flavored

This is a small batch, yielding a little less than 7 ounces of butter, but you can double the recipe. A bit of salt greatly enriches the flavor -- I prefer unsalted butter generally, but homemade tastes better with a pinch. You can also make butter by shaking the cream in a jar, but I found that to be enjoyable exactly once. Your kids may feel otherwise.

1 pint heavy cream
pinch of sea salt

Pour cream into mixer bowl. Add a pinch of salt, or more to taste. Begin whipping the cream, at high speed. Stop occasionally to scrape the bowl and taste how the cream is changing, because it's fun.


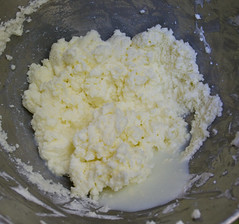
Once you have whipped cream, you're almost there: Keep going. The airy cream will collapse and condense, growing crumbly-looking and slightly yellow. When you see a bit of liquid separating in your bowl, you're there.

Pack the butter into a ball. Knead it and wash in cold water to rinse away the so-called buttermilk. (This is not the buttermilk you cook with!) Keep washing until the water runs clear. Your butter is ready!

If you're flavoring your butter, mix in your goodies now. (See variations below.)

Spoon the butter into a strip along the a sheet of parchment and then roll it up, much like rolling sushi. A sushi mat would work wonderfully with this, but I make my rolls nice and tight by folding it over and pressing the opposite edge tight with a dough scraper. Twist the ends to close, and store for a week or so in the refrigerator or a few months in the freezer. Just slice off coins when you need them. Alternatively, you can pack the butter into ramekins, small dishes, or candy molds.

For flavored butter:
Options include herbs (I use fresh herbs, but make sure they're dried well), garlic, pepper, vanilla bean, flavor extracts, honey, spices, citrus zest, rum, blue cheese, caramelized onion, sun-dried tomato, chipotle chile, vinegar, and much more. Add to softened butter, mix it in, and wrap and store your butter. If you have a favorite mix-in to share, I'd love to hear it. I'm turning into a butter junkie.

Tuesday, April 13, 2010

Second Helping: Artichoke with Dark Dressing

Gone were the days when finding a good artichoke was a very rare treat. Here, in California, the exquisite flowers abound at this time of the year, and the best part of this happy climatic and geographic situation is that they can be found easily. Before being so lucky to be so close to Castroville, where most of the produce comes from,  I tried the delicious artichoke with many dips, such as mayonnaise sauce or French style vinaigrette.
My mother serves it, during the winter, with melted butter. What a delicious memory. Sometimes she will prepare a rosé dressing, combining mayonnaise, ketchup, cognac and mustard. She pairs it with cold dry white wine, a combination that I will always relate to my mom's fine taste for delicate flavors.
On Sunday, miles away from my parents home, I wanted to try something different, and made this special dressing. It is the kind of multicultural fusion that pleases and provokes my palate. And the kids were also interested on trying that beautiful combination and the chocolatey color of the dressing and the sensation of eating petals of a beautiful and unusual Mediterranean flower.


Artichoke with Dark Dressing

Prepare the artichoke as you prefer, or using these simple tips here from Simply Recipes. This time I  tried a different method. I first roasted them upside down in a Le Creuset pot with kosher salt and olive oil on the top and water in the bottom. It took more time than I thought - the usual 25 minutes  when using the pressure cooker - and I had to finished the process on the stove top up to when the leaves were soft enough.

1 tablespoon Japanese reduced sodium soy sauce
1/2 to 1 tablespoon Italian balsamic vinegar (Modena), depending on your taste for acidity
1 tablespoon Italian or Greek extra virgin olive oil
2 tablespoons water at room temperature
1/4 teaspoon California garlic powder (or 1 teaspoon fresh grated garlic)
1/4 teaspoon fresh ground black pepper
1/4 teaspoon dried tarragon

Mix all in a small bowl at least about one hour before serving for the flavors to infuse. Use it as a dip for the petals fleshy parts and as a perfect companion for the artichoke heart.

Saturday, September 12, 2009

Second Helping: Popeye Sauce

You can use it on pasta or gnocchi. And to attract a younger audience, you'd better say that you this is the one sauce that helped the famous cartoon sailor to grow strong. If they don't know yet who you are talking about, it is your chance to introduce them to Poooo-peee-ye!
Fresh baby spinach from a salad bag will do wonders. If not available, it may be possible to do from frozen. Or from the spinach in the can - just like in the cartoon.


1 bag (6 cups) fresh baby spinach
1 tablespoon water
Kosher Salt to taste
1/2 cup cream cheese or Mascarpone cheese
1 cup fresh cream
Freshly ground black pepper
1/2 cup Parmesan cheese


Simmer spinach with water in a sauce pan. When cooked and tender, stir in cream cheese, black pepper, Parmesan and black pepper. Turn heat off, add cream and process everything in the pan with a hand blender. Serve it with pasta or gnocchi.

Tuesday, August 18, 2009

Playdate Special: Pesto Magic!

090813_CPE_pesto_4

Classic basil pesto has long been one of my favorite ways to dress up a simple pasta dish. Who doesn't love the bright flavors of summery basil beautifully blended with Parmesan, olive oil, and garlic?

Everyone else in my family, apparently.

But that hasn't stopped me. I work basil into much of my summer cooking, but more often than not my pesto features other flavors my boys enjoy more. Begin by thinking of it as green sauce and then start playing. Experiment with mint, cilantro, parsley, sage, lemon thyme -- keep going, you can think of more. Try them alone or in combination. Incorporating spinach is a nice way to get some extra-good veggies into your kids. As for nuts, try walnuts, pistachio, pumpkin seed, or leave the nuts out entirely.

090813_CPE_pesto_2090813_CPE_pesto_3It's easy to get snobby about pesto, insisting everything must be hand-chopped and that you must grate fresh Parmesan and use a lovely olive oil and mash it together by hand. But I find it easier to be practical and remember that I'm cooking for preschoolers, and a husband who eats like a preschooler. I use the Parmesan in the green can for family meals and mix everything up in the food processor. And I always make way more than I need, freezing leftovers in an ice cube tray for a quick and easy taste of summer all year long.

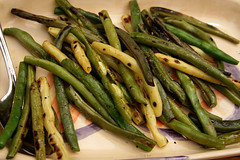
Lemon balm pesto has become our hands-down favorite. Our favorite preparation involves tossing the pesto with Trader Joe's tri-color ribbon pasta; a cup of shredded, cooked chicken; and a cup or so of halved cherry tomatoes from the garden. It's a rare no-complaints dinner for our family -- and the boys' friends devoured it at our playdate. Every single child, however, rejected the pan-roasted green beans I served with it. Can't win them all.

Lemon Balm Pesto


You can add pine nuts or walnuts if you wish. I sometimes throw in a bit of lemon verbena for an even sunnier taste.


3-5 cloves garlic (more or less depending on taste), peeled
3 cups packed lemon balm leaves
1 teaspoon salt
1 cup olive oil (or more)
a squeeze of lemon
6 ounces grated Parmesan cheese (about 1 1/2 cups)
pepper to taste


Rinse lemon balm well. Pat dry with a kitchen towel or paper towels and remove leaves.
Set up food processor (you could also use a blender). With machine running, drop in garlic cloves and continue running until garlic is minced.
Add lemon balm leaves and salt to food processor. Process until finely chopped. While machine is still running, slowly pour in olive oil and add a squeeze of lemon. Adjust olive oil according to your preference.
Add Parmesan cheese and process briefly. Add pepper and more salt as desired.

LinkWithin

Related Posts Plugin for WordPress, Blogger...