Showing posts with label Make It With Milk. Show all posts

Sunday, February 24, 2013

The Calcium, the Kale, and a Recipe

My mother just left. And there I was, alone, left with a full bottle of calcium tablets, a bunch of kale and some questions.

But before you start thinking that I am going nuts, there's the whole story: My mom who lives in Rio stayed with us for almost 2 weeks and was very assertive on recommending that I should start considering taking daily calcium supplements to avoid bone loss. Her argument was indisputable:  She echoed my family doctor's advice. Immediately I found an unopened bottle of calcium with vitamin D -the one I bought after the doctor's office July 2012 -  in the pantry and started gobbling three pills a day. Later, I just found an article and another  showing new studies, and suggesting that calcium should be better eaten in food, and not just in supplements or milk. Another article, a bit older was celebrating the wonders of kale.

Three days after her depart, my worries were immediately transferred to my children's diet.  My immediate question was if their daily intake of calcium is satisfactory. After some research, I found out that they are probably not. They don't find it pleasant to drink the recommended 3 to 4 servings of milk - or almond or soy milk-  per day, plus some other calcium rich foods. Because they are not so happy about drinking their calcium, I now will add to my daily improvised menu some of the foods that might add what is missing: always some Swiss cheese (a slice has the daily 30% Calcium!) inside a sandwich, more yogurt (check this amazing way of making it at home!) in the house, but mainly adding  more calcium loaded non-dairy ingredients to our meals: Kale, spinach, almonds, oranges and broccoli.
Thanks mom for the good advice. And here a last minute recipe full of calcium!


Kale, Spinach and Cheese Gratin
This is a very loaded calcium food, and for my surprise both boys ate all their portion of gratin last night at dinner. 

2 tablespoons Earth Balance vegetable spread
2 tablespoons all purpose non-bleached  flour
1 cup 2% milk
2 cups kale, chopped
1 cup spinach
Kosher salt, to taste
2 slices swiss cheese

In a flame and oven proof skillet or small casserole melt vegetable spread and add flour, making a paste (roux). Add milk and stir continuously to make the béchamel sauce. Toss kale and spinach, mix, and sprinkle some salt. Cover with Swiss cheese and transfer to a 350 F pre heated oven. Bake for about 15 minutes. Open oven and stir vegetables and béchamel. Bake for 5 minutes more and serve. Yum!

Friday, September 28, 2012

Cereal Energy Shake

       
Yes, after all these years writing about attempts to raise brave, adventurous and healthy kids I have a confession: My 7-year-old is currently and frequently too busy to eat. I had to call an emergency plan to make sure he's getting enough fuel for his daily jumping and running.

I am sure his calorie expenditure is high: When not sitting in the classroom, the boy is, most of the time, in action, and seems to have endless energy. What I am also sure of is that some days he is extremely distracted, not interested in food of any color or shape, and his lunchbox comes home still full of food from the school.
       
For those days, when he is not in the mood to eat his whole bowl of cereal, drink his milk, eat the recommended fruit portion for his age, and "no way Mom" he's not going to eat almonds,  I just use my new Waring blender and pack as much nutrition in a cup as I can.

After testing some ready-made shakes to help with kids who don't want to eat, I made our own. It's not gourmet, and far from trendy, but it works. It seems like after drinking the cereal drink in the morning, his day goes smoother, and he's less cranky and has more appetite. Cheers!

Cereal  Energy Shake

I am still testing other mixes that may include almond butter or peanut butter.

7 ounces cold coconut milk (from cartons, or soy, or regular milk)
1/2 frozen banana
1/2 cup fortified oat-based cereal (or any cereal in your cabinet)
2 tablespoons slivered almonds
2 tsp cocoa (optional )
Pinch of cinnamon (optional)

Mix all ingredients in a blender on high speed until smooth and mixed well,  and serve immediately in an attractive tall cup. 

Monday, June 25, 2012

Sweet Corn and Coconut Ice Cream

In Brazil, at around this time of the year, people celebrate St. John's and St. Anthony's month with a party called Festa Junina. From busy urban centers to small towns, it's celebrated everywhere even if you're religious or not, Christian or not. The dress-up code is quite peculiar: Everybody looks like living in a farm, and usually, girls look like rag dolls and boys like scarecrows. Kids just love it!
Besides the hilarious music and traditional dance, one of the sweet memories I have about the month are the flavors of the festa junina: mostly corn and coconut based food seasoned with cinnamon.
While browsing amazing pictures of my friends and their kids ready to go to the parties, with a bit on envy, at Facebook, I came across this thought: why not bring the flavors of the festa junina to a Summer treat?  My kids were puzzled while they were trying to figure out what it was made of. If you are also curious and adventurous, that's a very nice flavor to add to your Summer.

Sweet Corn and Coconut Ice Cream
You can use either fresh corn or frozen. I just would avoid canned, because  it just doesn't taste fresh. 

1 small bag frozen organic yellow corn
1 cup coconut milk (or milk)
1 cinnamon bark
1 can sweet condensed milk
1 cup heavy cream
Ground cinnamon
2 tablespoons dry unsweetened coconut (optional)

Bring corn and coconut milk to a boil and simmer with cinnamon bark for about 10 minutes. When cold enough to the touch, blend the mix with a hand blender and pass contents through a sieve, with the help of a wooden spoon, or through a food mill. Mix the corn cream with condensed milk and cream and again blend it with the help of a hand blender up to when very smooth. Process ice cream maker for about 27 minutes or as indicated by your machine. Freeze for about two hours and serve.


Wednesday, November 30, 2011

Chocolate Chai Pudding

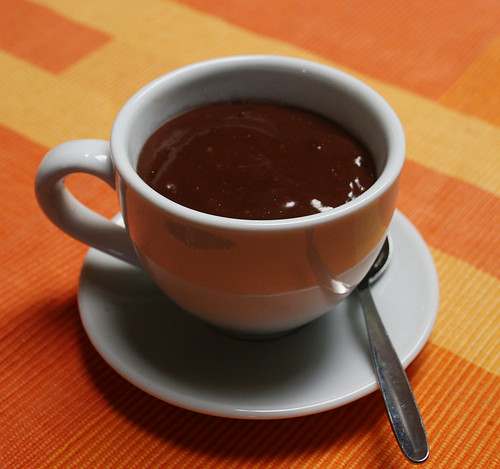
Chocolate Chai Pudding


Confession: I hadn't even heard of cornstarch pudding until a few weeks ago. And now I'm obsessed with it. It's easy and versatile, adaptable to dietary needs and whims: Make it with cream, whole milk, or skim milk, or dairy-free substitutes including soy and rice milk. You don't need much sugar, and butter and eggs are strictly optional. Where has this been all my life?!

I have my friend Heather to thank. She pointed me to an online recipe from The Joy of Cooking (I may be the only food blogger in the world who doesn't have that cookbook), and mentioned she likes to prepare it with chai mix.

Yum.

I couldn't decide if I wanted to make chocolate or chai pudding, so I tinkered with both. My kids don't like the chai infusion, so it's more of a treat for me. And I'm OK with that: From the run-up to Halloween through the end of the year, much of our family life seems to revolve around kid-oriented seasonal delights, edible and otherwise, and so I savored this simple pudding for myself. They'll get their vanilla and chocolate versions for now, but someday I suspect a warm dish of subtly spiced chocolate pudding will taste like home.

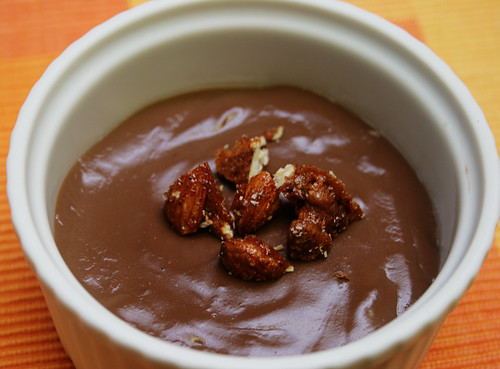
If a child hasn't sneakily devoured all the sweets in your baking pantry, as seems to have happened in my house, you could swap semisweet or dark chocolate for the cocoa powder (be sure to cut back the sugar a bit to compensate). Anna suggested the perfect topping: the Best Spiced Nuts. These also would be delicious with a dollop of whipped cream or a sprinkling of chopped toffee.

Chocolate Chai Pudding


Chocolate Chai Pudding

Use whatever kind of milk you like. (Soy goes especially well with chai and yields the rich-looking pudding pictured at the top, but dairy versions are creamier.) You may want to adjust the amount of sugar to suit your taste. If you're feeling really indulgent, stir in a bit of softened butter at the end.

This makes 6 servings — dish them out in tea cups for maximum cuteness.

3 cups milk, divided
2 chai tea bags
1/3 cup sugar
3 tablespoons unsweetened cocoa
pinch of salt
3 tablespoons cornstarch

In a saucepan, warm 2 1/2 cups milk over medium heat until steaming. Remove from heat, add tea bags, cover, and let steep for 5 minutes. Remove tea bags.

Add sugar, salt, and cocoa to chai milk and reheat over medium heat. In a small bowl, stir together cornstarch and remaining 1/2 cup milk until smooth. When the chai milk mixture begins to steam, stir in cornstarch mixture. Continue stirring about 5 to 7 minutes until mixture just comes to a boil. Reduce heat to low and continue to stir until pudding is thickened, about 5 minutes.

Spoon pudding into serving dishes. Serve warm or chill for up to a day.

Tuesday, June 14, 2011

Ben & Jerry's Homemade Vanilla Ice Cream


Few weeks ago I sent an email to Ben & Jerry's PR asking for permission to publish this amazing recipe. We got it this week, and I thought that would be a lovely way to celebrate the arrival of warm weather—with a homemade ice cream!

Don't get intimidated by the presence of raw eggs. We tested the recipe many times, and the prep story was included in our celebration of Children's Book Week. The recipe is from the awesome Ben & Jerry's Book of Homemade Ice Cream and Desserts.

If you want to have a good story book for reading time with the kids while waiting for the ice cream to be ready, here's our recommendation: The Ice Cream King, by Steve Metzger. The book, illustrated by Julie Downing, was our choice to celebrate ice cream in our Children's Book Week.

Ben & Jerry's French Vanilla Ice Cream

These are the original ingredients plus some comments I added after making it more than five times with the Cooking Club at my first-grader's school. We also tested it at home with our kids, and they all had fun preparing it—and, of course, eating it.

2 large eggs
3/4 cup sugar
2 cups cream
1 cup milk
2 teaspoons vanilla extract

Whisk the eggs in a mixing bowl until light and fluffy—do it manually, like in the old times, for 1 to 2 minutes. The fluffier it gets, the better the final result. Kids might give a helping hand using the whisk. They love to use the noisy ball whisk, or a traditional one. During the classes at school, we pretended each kid was a machine, so they had to keep working continuously.

Whisk in the sugar, a little at time, and continue whisking until completely blended, about 1 minute more. Pour in cream, milk, and vanilla and whisk to blend.

Transfer to a ice cream to a pre-frozen drum and churn for about 20 minutes. We used different models of Cuisinart machines, and they all did a good job.

Serve right away. If you want a more solid texture, transfer ice cream to the freezer for the time recommended by your ice cream maker.

Serve it plain, with chocolate fudge, or with fruit salad and granola. It is absolutely rich—and delicious. 

Tuesday, February 22, 2011

Make It With Milk: Paneer

110215_CPE_paneer_4

Paneer may be the easiest fresh cheese you can make. It's so easy that when a friend suggested it, mere hours before I planned to tackle a new butter chicken recipe for dinner guests, I didn't hesitate.

It takes about an hour, start to finish, and requires only two ingredients. It's nearly idiot-proof. And it's delicious. I've made fresh cheese with this technique before, but stopped short of pressing it into paneer. I finally took it all the way, and I'm so glad I did!

When our dinner guests showed up, my friend fried it up with thickly sliced garlic and a ton of spices, particularly garam masala. Paneer is something of a blank slate, and we found it took a surprising amount of spice to get much flavor to stick to it.

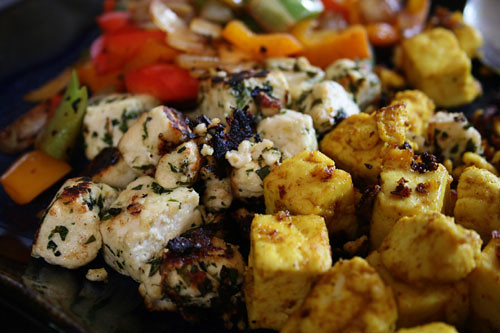
A few weeks later, I made another batch for our playdate and tried two different marinades. A cilantro and mint blend added nice flavor; the curry and turmeric version was less vivid, but still tasty. Recipes for both follow; Anna suggests that toasting the spices before mixing up the marinade might boost the flavor further still. I fried the marinated paneer along with peppers and onion, and served them with naan and beet and ginger chutney. The kids ignored the paneer in favor of naan -- I'll try to entice them with saag paneer next time.

Tune in tomorrow for the butter chicken recipe!

110114_CPE_paneer_5

Paneer

This makes about 9 ounces of paneer. Most recipes insist on whole milk, but I'm happy with the results from 1% milk. I pour the leftover whey -- the liquid that's strained out of the cheese -- onto azaleas and blueberries, but you can check out this guide for ideas on putting it to good use.

8 cups milk
juice of 1 lemon (3-4 tablespoons)
optional seasoning: cardamom, coriander, red pepper flakes, salt, etc.

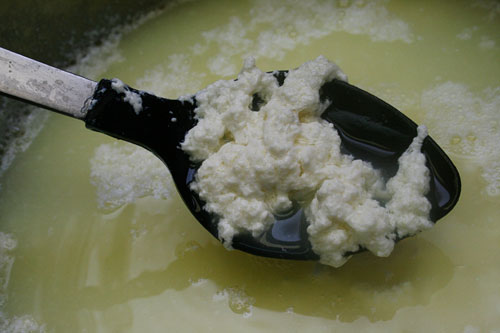
Heat milk in a large saucepan over medium heat, stirring regularly to avoid burning it. When it's close to boiling, you can add a bit of spices or seasoning if you wish, but I prefer to add them later. When it just starts to boil and foam, rising up in the pot, take it off the heat and slowly stir in the lemon juice. Stir for a minute or two until you see the curd -- this looks like clumps -- separating from the yellowish liquid whey. Let it rest for a few minutes. (Note: If not much is happening, add a splash of vinegar -- you should see the curds clump pretty quickly.)

110215_CPE_paneer_1
Curds and whey
110114_CPE_paneer_3
Pressing paneer
Line a strainer or colander with a thin cotton cloth, such as muslin or a tea towel. (Set a bowl underneath if you plan to save the whey.) Pour curds into the prepared strainer; if you're using spices, add them now. Pull up and tie the ends of the fabric so you can hang the ball of curds from the faucet, or from a kitchen spoon set across the bowl. I squeeze it a bit to get some of the whey out quickly. Let the ball hang for 15 to 30 minutes.

110215_CPE_paneer_3
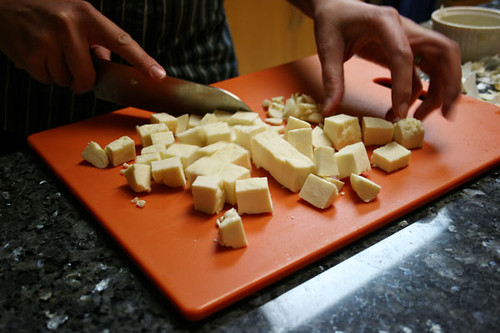
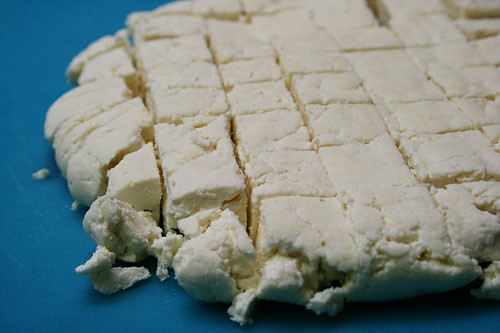
Pressed, cubed, and ready to go!
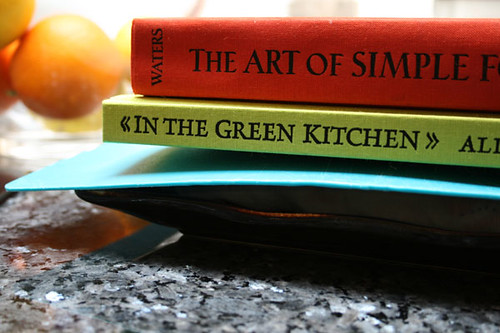
Untie the ball and gently rewrap the paneer in a cloth towel. Set on a plate or inverted bowl, and then top with something heavy -- a pot or cookbooks -- to press it. (I top mine with a cutting board and a cookbook or two.) Let it sit for 30 minutes to an hour. Unwrap, cut into cubes, and enjoy!

I use my paneer the same day, storing it wrapped in a damp towel in the fridge until it's time to cook. I've read that paneer can be refrigerated up to a week in water, changing the water every day or two as you would for tofu, and that it keeps well wrapped in a towel. It's also OK to freeze it, though I haven't done that and can't speak to how freezing affects the consistency. If anyone has more experience with storing paneer, let us know!

Cilantro-Mint Marinade

2 tablespoons yogurt
2 tablespoons chopped cilantro
1 tablespoon chopped mint
1/2 teaspoon minced garlic
1 small green chile, minced
pinch of salt
squeeze of lime or lemon

Combine all ingredients in a small bowl. Add paneer cubes, stir gently to coat, and marinate at least an hour.

Turmeric-Curry Marinade

This looks like a lot of spice -- and it's still pretty mild. Keep the spices handy when you fry up the paneer, and add more if it isn't strong enough.

2 tablespoons yogurt
1 1/2 teaspoons minced garlic
1 1/2 teaspoons coriander
1/4 teaspoon turmeric
1/4 teaspoon curry
1/4 teaspoon cumin
1/2 teaspoon minced ginger or ginger paste
pinch of garam masala
pinch of salt
squeeze of lime juice

Combine all ingredients in a small bowl. Add paneer cubes, stir gently to coat, and marinate at least an hour.

Wednesday, October 6, 2010

Make It With Milk: Mascarpone

100918_CPE_mascarponeWe've made yogurt, and we've made butter. Don't you think it's time for a treat? The latest in our occasional series on cool stuff you can make with milk is decadent mascarpone.

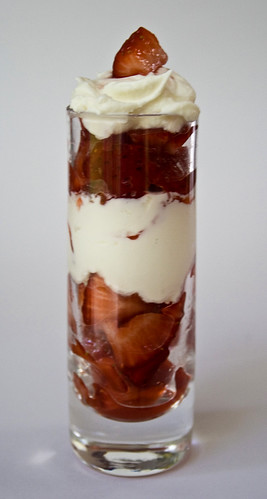
Fresh, rich mascarpone is best known in tiramisu, but it's beautiful in all sorts of sweet and savory dishes. It's a rich finish for a homemade pasta sauce, a heavenly companion to fresh fruit, a willing partner to stronger cheeses for a delicious spread. You can use it to make our Hands-On Gnocchi or Popeye Sauce ... or eat it straight with a spoon. Or your fingers. We enjoyed it in strawberry-topped crepes, then in strawberry-mascarpone parfaits.

My older son swooned over it; the younger one wouldn't even try it, but he doesn't like whipped cream either. (I hope he'll outgrow the condition.)

This is deliciously simple, perhaps 15 minutes total hands-on time. But it does take time for the magic to work -- up to 24 hours. Tartaric acid may be hard to find, but if you love mascarpone, it's worth tracking down (try online shops, brewing shops, or earthy-crunchy stores). You'll have plenty left over to make this again and again and again.

Mascarpone

100917_rootbeer_12
This yielded just over 9 ounces of mascarpone. Tartaric acid is available at beer- and wine-making supply shops, and online (try the New England Cheesemaking Supply Company). It is not the same as cream of tartar! Also, avoid using ultra-pasteurized milk products here. Pasteurized is fine; ultra won't work well. This is drawn from several recipes floating around the Interwebs, but relies most heavily on Fankhauser's Cheese Page.

1 pint half-and-half
1 pint heavy cream
1/4 teaspoon tartaric acid (see Note)

Combine half-and-half and cream in a pot and heat to 180 to 185 degrees. Dissolve the tartaric acid in a tablespoon of water, then stir into the heated cream mixturey. Keep the cream at 180 to 185 degrees for 5 minutes, stirring occasionally. It should start thickening a bit.

Put the cream in the refrigerator in a covered container (I keep it in the pot) and let it cool thoroughly (I leave it about 12 hours).

Line a fine-mesh strainer with clean muslin, cheesecloth, or a coffee filter and set it over a bowl. Pour the thickened cream into the strainer, cover, and let it sit in the refrigerator for at least 12 hours until the mascarpone thickens to the consistency you want. Store the finished mascarpone in a covered container and use soon. Some people say you need to eat it in a day or two; others say a week. Use your judgment.

Friday, April 30, 2010

Make It With Milk: Butter, Straight Up and Flavored

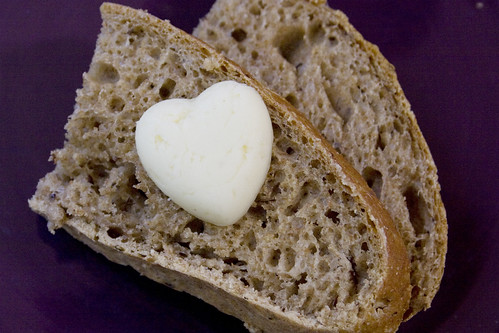
100429_CPE_butteronToastRedo

You've probably made butter before, perhaps in elementary school or at camp: Put some heavy cream in a jar and shake, shake, shake. And then you never made it again.

Time to revisit butter. This time, use the stand mixer. Whip up some butter, customize it with your favorite flavors, and stash the flavored, or compound, butter in the freezer. Slice off a bit to instantly perk up steamed vegetables, pastries fish, steak, great bread ... Minimal effort with elegant, great-tasting results. It's addictive. You can cheat and make compound butter by mixing your extras into store-bought butter, but how cool is it to present your own butter when having friends over for brunch?

My 6-year-old was cool to the idea of making butter -- been there, done that -- so my 3-year-old helped with this batch. We taste-tested the cream as it transformed into butter, and he helped mix in our extras. We made about 7 ounces of butter and split it into two logs: one with honey, cinnamon, and vanilla, and the other with garlic and basil. The 6-year-old was no more excited about the butter when his brother and I served up toasted homemade wheat bread with honey butter for an after-school snack... until he tasted it. "More! More!" Success.

Last summer I added lemon verbena to the garden, and my summer obsession was a log of butter with verbena and lemon zest. I just got my hands on a full pound of wonderfully fragrant vanilla beans, and I suspect my next obsession may be butter with vanilla bean and rum. Or cardamom. Or both. Spooned into a steamy hot fresh popover. Mmmm.

Butter, Straight Up and Flavored

This is a small batch, yielding a little less than 7 ounces of butter, but you can double the recipe. A bit of salt greatly enriches the flavor -- I prefer unsalted butter generally, but homemade tastes better with a pinch. You can also make butter by shaking the cream in a jar, but I found that to be enjoyable exactly once. Your kids may feel otherwise.

1 pint heavy cream
pinch of sea salt

Pour cream into mixer bowl. Add a pinch of salt, or more to taste. Begin whipping the cream, at high speed. Stop occasionally to scrape the bowl and taste how the cream is changing, because it's fun.


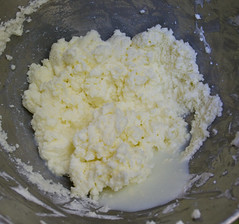
Once you have whipped cream, you're almost there: Keep going. The airy cream will collapse and condense, growing crumbly-looking and slightly yellow. When you see a bit of liquid separating in your bowl, you're there.

Pack the butter into a ball. Knead it and wash in cold water to rinse away the so-called buttermilk. (This is not the buttermilk you cook with!) Keep washing until the water runs clear. Your butter is ready!

If you're flavoring your butter, mix in your goodies now. (See variations below.)

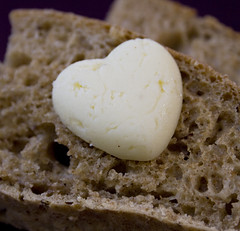
Spoon the butter into a strip along the a sheet of parchment and then roll it up, much like rolling sushi. A sushi mat would work wonderfully with this, but I make my rolls nice and tight by folding it over and pressing the opposite edge tight with a dough scraper. Twist the ends to close, and store for a week or so in the refrigerator or a few months in the freezer. Just slice off coins when you need them. Alternatively, you can pack the butter into ramekins, small dishes, or candy molds.

For flavored butter:
Options include herbs (I use fresh herbs, but make sure they're dried well), garlic, pepper, vanilla bean, flavor extracts, honey, spices, citrus zest, rum, blue cheese, caramelized onion, sun-dried tomato, chipotle chile, vinegar, and much more. Add to softened butter, mix it in, and wrap and store your butter. If you have a favorite mix-in to share, I'd love to hear it. I'm turning into a butter junkie.

Monday, April 19, 2010

Make It With Milk: Homemade Yogurt

100419_CPE_yogurt

Stay with me here: I'm trying to convince you to make yogurt. And cheese. And butter. Trust me, I'm no Martha. I don't need to make more work for myself. But this little series on cool things you can make -- easily -- from milk is a fun way to try some kitchen science with your kids, and make a few discoveries yourself.

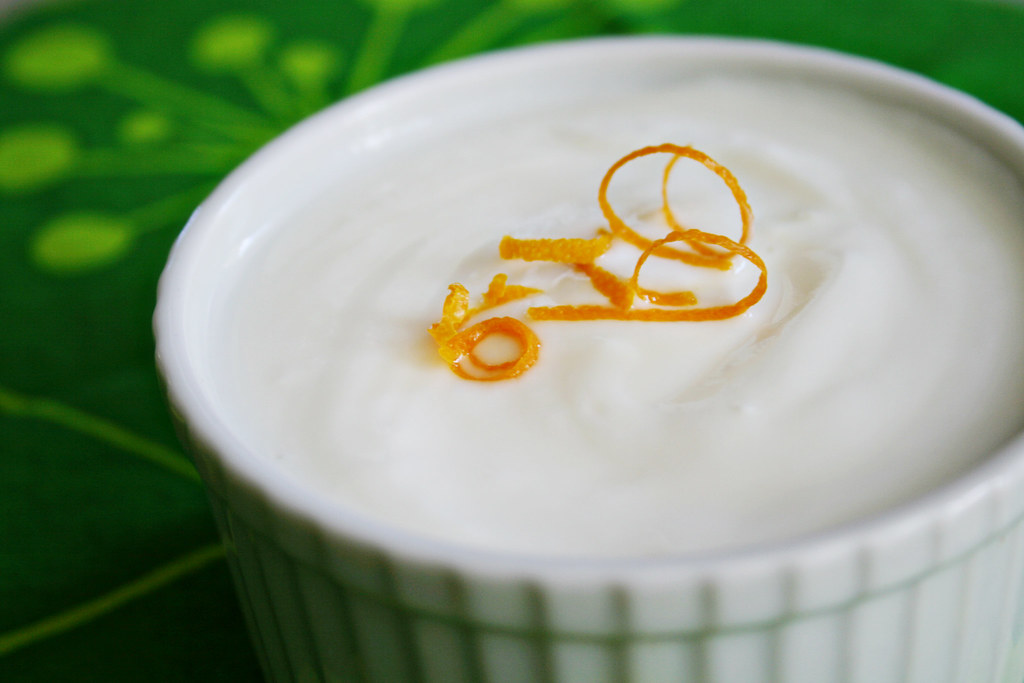
First up is yogurt. It's versatile, it's delicious, and it's ridiculously easy. You need only two or three common ingredients, and the only special equipment required is a thermometer. Hands-on time is minimal, and kids can help. Basically, you heat up milk, add a bit of yogurt as a starter and perhaps some powdered milk, then incubate it -- keeping it warm for several hours.

The trickiest part is rigging an incubator to keep the yogurt warm. Some people keep it at room temperature, but that hasn't worked for me. I use recycled jam or sauce jars, swaddled in towels and set atop a heated mat (it doubles as a seedling warmer). To keep curious kids from shaking the jars and keep in the heat, I invert a stock pot over them. Other options:
  • Keep the yogurt warm in a crock pot;
  • Swaddle your jars with towels;
  • Set the jars in the oven with the pilot light on;
  • Put the jars in a cooler filled with hot water;
  • Buy a yogurt maker, if you really like buying unnecessary gadgets.
The only other challenge is figuring out how long to incubate your yogurt. It might be ready in three hours or 10. Trial and error is the best way to find what you like. Keep in mind that your yogurt will grow increasingly tart the longer it incubates, and that it will firm up further once it's chilled for a few hours. For your first batch, you might want to use several small jars, removing them from your incubation setup at different times to compare taste and consistency.

Have a favorite way to enjoy yogurt? I love it added to oatmeal, used in pancakes or muffins, and with fruit. If you need fresh ideas, check out this inspired in-progress compilation of 101 ways to dress up plain, unsweetened yogurt.

Homemade Yogurt

Whole milk and whole-milk yogurt yield a thicker, creamier finished yogurt. If you use skim or low-fat milk, you can thicken it by adding powdered milk or straining the finished yogurt for a few hours. I've done both, and am happy with the results.

4 cups milk (whole, low-fat, or skim -- see note)
2 to 4 tablespoons plain yogurt with live cultures (I've used Trader Joe's and Nancy's organic nonfat yogurt)
2 tablespoons nonfat dry milk powder (optional)

Heat milk in small, thick-bottomed saucepan, keeping a thermometer clipped to the side. If you're using powdered milk, stir it in. (I prefer not to stir the milk as it warms, which means a little more work later scrubbing the pan but less time standing over the stove.) Heat the milk to 185 degrees, then turn off the burner. Leave the pot on the stove until it cools to 110-120 degrees, about 45 minutes.

Meanwhile, put your jars and lids into a large stock pot, cover with water, and bring to a boil. Cover, turn off heat, and let sit until ready to use.

Spoon a cup or so of warm milk into a small bowl and gently whisk in the yogurt. Add this mix to the milk in the pot and stir. Pour mixture into jars, secure lids, and set up your jars for incubation. Then leave them alone! Shaking and stirring will disrupt the process.

Begin checking your yogurt at three hours, but you might want to let it sit for as long as 10. Stir your finished yogurt and chill in the refrigerator for two hours to overnight. It's good for at least a week in the refrigerator. Save a few tablespoons to start a new batch (you can save it in the freezer).

LinkWithin

Related Posts Plugin for WordPress, Blogger...