Showing posts with label The Kids Cook Monday. Show all posts

Sunday, January 13, 2013

Pizzwich and the Simple Changes


The idea of change is always stimulating for me, but sometimes it is just overwhelming when applied to real life. When New Year's decisions come to my mind, they might sound like just what we need. But at the end of the first month of the year they might be too drastic, heavy and just ... boring. This is always what I think about food-diet-healthier-related New Year's decisions: Oh yes, they may sound wonderful. Really?

Somehow the documentary Hungry for Change got my attention last Monday, while zapping to find something to relax me. And that's how it turned my next day upside down: I went to sleep. Far from being relaxed.

Enticed by the renewed argument about sugar-addictive foods — along with already adopted Food Rules ideas, and how we are hungry while being poorly and overly fed with over-processed foods — I shared my anxiety with my 8- and 6-year-old boys in the morning. I read the labels of their cereal at 7 a.m., and ignored the rule to think-before-you-say-something to the kids. I just plainly said:
_ That's it: We are all eating the wrong way. This is all empty food. Lots of refined sugar, syrup, etc. etc.

They were puzzled. I told them that I'd watched a documentary the night before. They wanted to watch it. I was a bit doubtful. I would not like to convert them to green juice gurus. Instead I just told them:

_ Let's just eat things that come from the garden, from nature, not from the factory.

And they listened.

But changes, to be profound, have to be made slowly and consistently. After three days running happily on fresh vegetables, fruits, grains, vegetable soups, grass-fed meat, and wild-caught fish, they were suddenly craving a classic pizza slice from one of their favorite pizza restaurants, made with very white flour and sugary tomato sauce.

I remembered someone in the movie suggesting substitute ingredients for a healthier version of it.  And that's how the boys happily prepared their own Pizz-wiches.

Pizz-wich

The success of the recipe depends on the quality of the ingredients. Look for preservative-free ingredients and no unnecessary sugar in the tomato sauce and bread. 

4 slices highly nutritious whole-wheat bread slices with less than 1g sugar per serving
4 slices partly skim vegetarian mozzarella slices (5g fat, maximum)
4 tablespoons tomato sauce (homemade or prepared with less than 1g sugar per serving)
2 teaspoons organic oregano

Cover each slice of bread with one tablespoon of red sauce. Add the slice of cheese and sprinkle oregano on top. Broil on high for 3 minutes or until the cheese melts. Enjoy!

Monday, December 27, 2010

The Kids Cook Monday: Their Favorite Salad

This post is a mix of a "few of our favorite" recipes and one that can symbolize what the campaign for the Kids Cook Monday aims for: A healthier diet and making a contribution for our kids to be able to like and even make foods that are (unfortunately) excluded from the average kid's menus.
Here's a toast for one of the simplest, yet successful, recipe I shared in this blog in 2010. Later after I made it with our playgroup friends, this recipe and step to step guide was shared with about 60 kindergarteners and first graders of my son's school. It was my first project for their Wednesday Cooking Club, where I currently teach hands-on recipes once a week with two enthusiastic volunteers and one amazing school teacher.
During three weeks we witnessed how kids minds are so opened to try out something new - and how their participation on the prep can make a difference. The result was amazing: few leaves of Romaine lettuce were abandoned on the plates. The resemblance with a classic "grown up" Caesar Salad, the happiness to find out that they could use scissors to cut, the wonderful aroma of the croutons coming from the oven - all made the kids curious to try the salad. And some were so proud that they wanted to bring the recipe home to share with their family.
Scissors Salad


Croutons:
4 slices wheat bread
Garlic powder, to sprinkle
Grated Parmesan cheese, to sprinkle
Olive Oil Spray

Salad
5 large leaves of Romaine (or 10 hearts) of Romaine lettuce
Cherry tomatoes, if in season, (to taste)

Dressing:

1 tbsp olive oil
2 tbsp apple juice
1/2 tsp garlic powder
1/4 tsp dried basil or other herb
1 tsp mustard
1/4 tsp salt
1/4 tsp fresh ground pepper (optional)

Invite the kids use their very well washed craft scissors to cut the bread to small squares. Show to them how to spray olive oil on the bread pieces, and ask them to sprinkle it with garlic powder and Parmesan cheese. The scissors will be used to chop the Romaine leaf and will leave it on the side in a bowl. In the meantime toast the croutons in a 350 F pre-heated oven for about 7 minutes. In a small bowl let them measure and mix the ingredients for the dressing. They can now prepare their final salad, dressing it up, adding the homemade croutons Have fun! And a Happy and healthy new year!

Monday, December 20, 2010

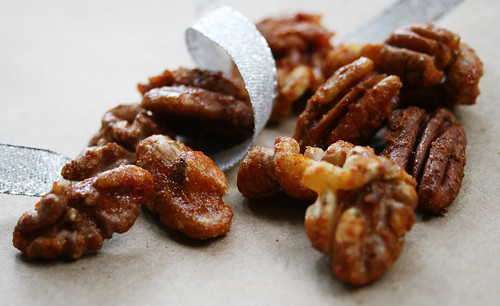
Kids Cook Monday: The Best Spiced Nuts

20101209_spiced nuts_1


These might have too much sugar to qualify as a purely healthy contribution for The Kids Cook Monday campaign, but they sure beat all the other holiday sweets lying around.

I first made these nuts a few years ago as a Christmas gift for my mother. They're now the only kind of seasoned nuts I make because, as the recipe's genius creator notes, they are the best spiced nuts.
How good?
  • The kids can't stop eating them.
  • One dad says he wants two things when he retires, and one of them is to have these nuts every day. (I didn't find out what the other thing is, because he was too distracted by the nuts.)
  • I lost the original recipe, but when I saw it re-posted at The Hungry Tiger, I did a little dance and ran to share the news with my husband.
That's how good they are.

The flavor is nuanced and addictive. The secret is the Thai hot sauce Sriracha and garam masala, a seductive Indian spice blend. (Think cumin, cinnamon, cardamom...) If you can't find it in a store near you, you can easily mix your own. There are lots of recipes for it, but this one relies on readily available spices you may have on hand. If you're looking for more of a project, there are countless recipes online for toasting your own seeds.

The two kids I recruited to help loved running the stand mixer and smelling the vibrant, colorful seasonings. Kids can help with every step except sliding the nuts off the hot cookie sheets. This comes together quickly and makes a great holiday gift -- I'm bringing another jar home for the holiday. Here's the recipe, courtesy of The Hungry Tiger.

Best Spiced Nuts

I decrease the sugar by just a few teaspoons because I can't help trying to de-sugar the kids. This makes about 6 cups.

Raw, unsalted walnuts, pecans, and/or almonds
2 egg whites
1 tablespoon olive oil
3/4 cup of white sugar
2 teaspoons salt
2 teaspoons garam masala
1 tablespoon paprika
1 teaspoon Sriracha or other hot sauce
1 teaspoon soy sauce

Preheat the oven to 325 degrees. Line two cookie sheets with parchment paper (don't skip this; this mixture can make a mess of a baking pan).

Beat the egg whites until they're foamy but don't hold a peak. Add everything else except the nuts, and mix together. Now start piling in the nuts, and stir to coat them well. Kids who like getting messy might enjoy using their clean hands to do this part.

Spread the nuts on the parchment-lined baking pan in a single layer. If you have leftover coating in the bowl, toss in more nuts to coat and add them to the pan.

Bake the nuts for about 30 to 40 minutes — start checking them at 25 minutes or so. When you take them out of the oven, slide the parchment and nuts right onto the counter or a rack. Wait a few minutes so that they aren't painfully hot and steal a little nibble. Leave the rest alone until they cool completely, then break them up into pieces.

Store in an airtight container so they stay crisp. I left some sitting out a little too long and they got gooey; 20 minutes in a 200 degree oven crisped them up again.

Monday, November 29, 2010

Kids Cook Monday: Jewel Salad

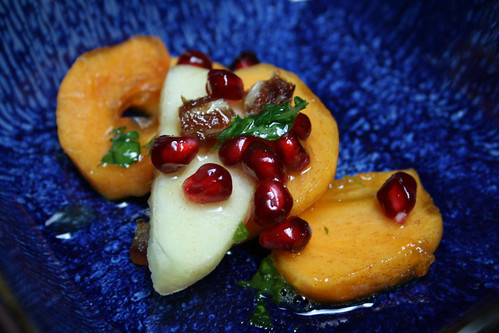
101116_jeweled salad_2

I'm in love with this seasonal fruit salad, a happy accident that came together on a day when nothing else was going smoothly.

We had leftover brownies and pumpkin bread on hand, but not much more. I was barely able to clear off a table before the playdate -- I hadn't put any thought into making something new.

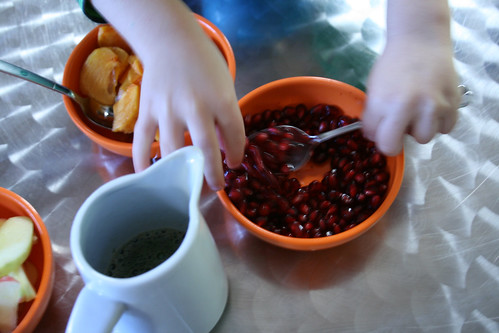
Fresh fruit to the rescue. I sliced up persimmons and apples, pulled apart a pomegranate, and chopped up some dates. The dressing came together quickly, and Anna suggested the perfect finishing touch: a dash of cinnamon and a bit of fresh basil.

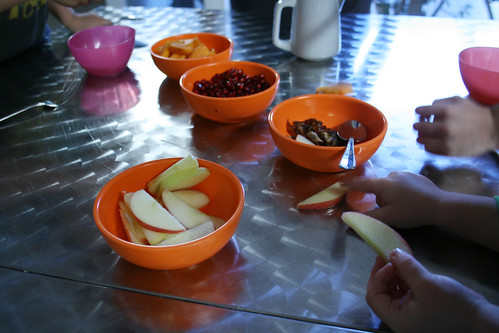
I invited the kids to make their own salads. They sampled freely, lighting up with surprise when they tasted something they liked ... and wrinkling their noses when they nibbled something less appealing. In the end, each enjoyed a personalized dish of late autumn's best. A healthy, perfect little something for The Kids Cook Monday!

If you're crazy for persimmons, try Persimmon Compote, which is delicious stirred into yogurt or oatmeal or spooned over ice cream. We also have Persimmon and Fennel Salad, a crunchy and colorful salad with greens.

101116_jeweled salad_4

Jewel Salad

Pears are a nice substitute for the apples. For tips on using fresh pomegranate, check out this post.

arils from 1/2 a pomegranate
2-3 Fuyu persimmons, peeled and sliced
2 apples, cored, peeled, and sliced
4 dates, pitted and chopped
juice of 1/2 a lemon
water
Dressing:
juice of 1/2 a large orange (about 2 ounces)
2 tablespoons cider vinegar
1 tablespoons honey
1/8 teaspoon cinnamon
1 teaspoon chopped fresh basil (optional)

Combine the lemon juice and two cups of water in a small bowl. Add the apple slices and let sit for 10 minutes (this helps prevent browning), then rinse and drain well.

Set out apple slices, persimmon slices, pomegranate, and dates in separate bowls.
In a small bowl, combine dressing ingredients and whisk until blended. Pour dressing into a cream pitcher or measuring cup to make it easy to pour.

Children can spoon fruit into their bowls and pour dressing over it.

If you're making this without the help of little hands, just combine all the fruit in a large bowl, add dressing to taste, and stir to combine.

101116_jeweled salad_3

Monday, November 15, 2010

Kids Cook Monday: Tapioca Flour Cheese Popovers

We all love popovers here and can't wait to see them again every Autumn. Darienne's recipe is a great one, and watching her to prepare a batch for a playdate, I just realized how similar the Brazilian "pão de queijo de liquidificador" (cheese puffs made in a blender) is to the American Thanksgiving staple. Inspired by this similarity and the possibility of having an alternative recipe for the friends who are gluten intolerant, I prepared one batch of it for our last snack playdate.
Like wheat flour popovers, those have also a life of their own, and have to be in the oven up to when ready - anxiety is not a friend of those, and opening the oven is sort of ultimate sin. A change on the Brazilian classic is the method: I grew up believing that you would need a blender to prepare it. But now I know that this is not necessary. A good whisk will do the job as well as the electric gadget.
So, if you want to try something very different but still very in tune with the coming holiday you might enjoy this. Kids loved it and approved it.  They were invited to prepare it with us but chose to play instead. But if you want to insist on their participation, they can break eggs, whisk, measure and have fun.

Tapioca Flour Cheese Popovers

I sometimes buy the tapioca flour (or starch) at Asian markets. Lately I tried a wonderful organic one from Amazon, imported from Brazil. A bit pricey, but with perfect results.

2 cups tapioca flour
1 cup grated Parmesan or Pecorino cheese
Kosher salt to taste
2 eggs
1 cup fat free milk
1/2 cup canola oil
Dried rosemary  to sprinkle on the top


Pre-heat oven to 380 F. Grease with oil or oil spray aluminum muffin cups. Combine dry ingredients and set aside. In a bowl beat eggs, and gradually add oil and finally milk. Pour liquid over flour, whisking constantly. When everything is well mixed - and it will be incredibly liquid - pour on baking cups. Bake for around 30 minutes or when the tops is getting golden. Enjoy and Happy Thanksgiving!

Monday, November 8, 2010

The Kids Cook Monday: Pumpkin Tostadas with Black Beans

The kids did help make this Kids Cook Monday recipe -- but they didn’t eat much of it. They suspiciously eyed the bowl of pumpkin salsa and beans, and all but one bypassed it completely in favor of plain cheese-topped tostadas, one adorned with a pumpkin-seed happy face.

Yet the adults liked it, it was easy, and I know that somewhere out there is a child who likes salsa. So I’m sharing it with you today.

I threw this together for an after school snack during a hectic week. I really worked hard on it: I opened two cans, one jar, and a bag of shredded cheese. Feel free to roast a pumpkin yourself, chop up fresh salsa, cook the beans from scratch, and make your own tortillas. I’ll watch from here.

Oh, I confess: I offered raw pepitas and fried some sage leaves to fancy it up. I couldn’t keep it that simple.


Pumpkin Tostadas with Black Beans

This is an easy way to use up leftover bits of canned pumpkin. It makes enough to serve 8, with some leftover salsa.

8 tortillas, whole-wheat or corn
olive or canola oil
1/2 cup salsa (I used Trader Joe's Double Roasted Salsa)
1/2 cup canned pumpkin puree
1 can black beans, rinsed and drained
shredded Mexican cheese blend
raw pepitas (optional)
fried sage leaves (optional; see recipe below)

Preheat oven to 400 degrees. Brush both sides of tortillas with oil (or spray well with oil) and arrange in a single layer on baking sheets. Bake for 5 minutes, then turn tortillas over and bake another 3-7 minutes or until crispy. Remove from oven and let cool.

In a large bowl, have kids combine salsa and pumpkin puree, stirring until blended. Set out the pumpkin salsa, the beans, cheese, pepitas and sage.

Set a crisped tortilla before each child. With a spoon, they can spread salsa over the tortilla, then help themselves to whatever other toppings they want.

Return the topped tortillas to the oven and bake until the cheese melts.

Fried Sage Leaves

fresh whole sage leaves
olive oil
salt

Wash sage leaves and dry well, blotting with a paper towel. Heat olive oil in a small skillet. Drop a few sage leaves in at a time and watch them carefully: They should turn a deep pine green and crisp in under 30 seconds. Don’t let them brown! Remove them with tongs and set on a plate lined with paper towels to drain and cool. Sprinkle with salt to taste.

Save the leftover sage-infused olive oil for cooking or dressings.

Monday, October 25, 2010

The Kids Cook Monday: Smokey Dill and Cheese Muffins

My grandma always insisted that soup was the best thing on Earth. The way she found to convince me to eat all contents from that huge white porcelain bowl was to bring something delicious as a side: Sometimes it was just plain fresh roll from her favorite bakery to be covered with butter. Other times one of her creative appetizers was there, something like stuffed cheese and ham filled potatoes.
So, for today's part of the campaign The Kids Cook Monday, here's one more way to enjoy the arrival of rainy days,and give hearty stews and soups a good company: a delicious savory muffin. The delicate dill touch enhances the smokey touch from the turkey ham. When the mix of cheeses melts inside, it create a unique texture to this impossible-to-stop-eating muffing.


Smokey Dill and Cheese Muffin
If inspired to have kids helping you, the opportunity is fantastic. They can help measuring and mixing and also chopping ham. One popular activity with the 3 years old kids is to spray the muffin pan or cups with oil.

1 cup turkey smoked ham, chopped
2 cups unbleached all -purpose flour
1 tablespoon sugar
2 teaspoons baking powder
1 teaspoon salt
1 1/2 teaspoons garlic powder
4 teaspoons dill
1/2 cup Parmesan cheese
1 cup lite cheddar and jack cheeses, shredded
1 egg
1/2 cup nonfat milk
1/2 cup non fat yogurt
1/2 cup canola oil

Pre-heat oven to 400 F. Stir fry smoked ham in a hot skillet and set aside. Mix all dry ingredients in a bowl. In another bowl whisk egg with milk, yogurt and oil.  Pour the wet mix into the dry bowl gradually. Add ham, and mix the batter slowly. Bake in a greased muffin pan (or muffin cups) for about 25 minutes. Yields 12 muffins.

Monday, October 18, 2010

The Kids Cook Monday: Monster Treats

100903_CPE_monster treats_1We had almost as much fun coming up with silly descriptions for these as we did making these fun nibbles for The Kids Cook Monday -- part of the Healthy Monday campaign. They're one of the creepy treats featured in our free e-booklet, Spook Play Explore. If you haven't snagged your copy, click here or the link to the right to get your free copy. And don't forget to enter our Amazon gift card giveaway before Wednesday!

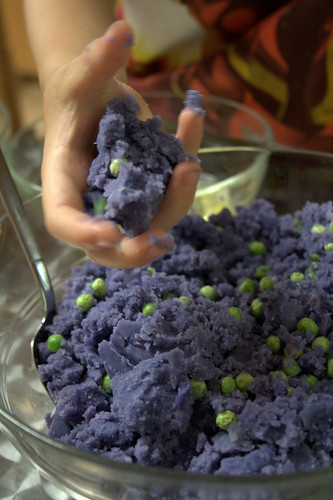
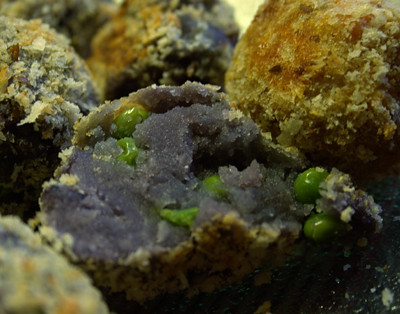
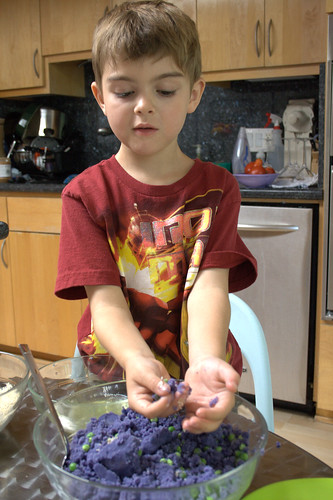
Monster Treats gave my son the most leeway in sharing them with friends: They could be special treats for monsters, or special treats made out of mashed-up monsters. (The peas, of course, are monster boogers.)

Nondescript on the outside, these treats break open to reveal vibrant purple and brilliant green. For an even more colorful presentation, pair these with a batch of Sweet Potato Nuggets.

100903_CPE_monster treats_small

Monster Treats

We liked the combination of bright green peas with deep purple potatoes, but you can mix in almost anything you like. You can use leftover mashed potatoes to speed up prep time.

100903_CPE_monster treats_4
2 pounds purple potatoes, peeled and cooked
2 teaspoons butter
salt and pepper to taste
1 to 2 cups frozen peas
2 egg whites
1 1/2 cups bread crumbs (I mix regular bread crumbs with panko)

Combine potatoes, butter, salt and pepper in a large bowl and mash with a fork or masher. Stir in peas. Refrigerate until well chilled.

Put egg whites in a shallow bowl and stir briefly with a fork or small whisk. Put bread crumbs in another shallow bowl.

To form treats, scoop up a tablespoon or so of the potato mixture and shape into a nugget or ball. Dip into egg white and then into bread crumbs.

To freeze: Arrange nuggets on a plate or pan and set in the freezer for a few hours. Store frozen nuggets in a sealed freezer bag; take them straight out of the bag to bake.

To bake in the oven (my preferred method): Preheat oven to 400 degrees. Set nuggets on a parchment-lined baking sheet and spray lightly with olive oil or cooking spray. Bake for 20 minutes or until nuggets are lightly browned and crispy.

To pan-fry: Lightly spray a non-stick pan with olive oil or cooking spray. Cook nuggets over medium heat for a few minutes on each side until lightly browned and crispy. (You can also fry them in oil.)

Monday, October 4, 2010

Kids Cook Monday: Beef, Spinach and Mushroom Pockets


This recipe has a very specific inspiration: the Syrian-Lebanese sfihas served in Rio de Janeiro. Traditionally in their original source, they are made with ground lamb, but the popularity of those delicious morsels - as easy to prepare as to eat -  was so big that after crossing oceans and generations they ended up being adapted and now have all different fillings.  They may be stuffed with ground beef, green collards, and even some kind of ricotta cheese. Sfihas might be also found with different types of dough and shapes. But the one I can't forget was a perfect triangle, and each bite of it made my mouth be full of water .
That said, I can now indulge on something else. As a recipe that is beyond an adaptation. A free-short-cut and free-style interpretation of sfihas. And a very easy one, so that I could invite the kids to cook with me. Kids helped to roll and cut the dough and even wrap their beef in diverse shapes. The result was delicious. And the now are asking me if this is going to be a regular Monday dinner!

Spinach and Mushrooms Beef Pockets
Those can be prepared ahead time and par-baked. I followed the instructions for my favorite whole wheat pizza dough sold at TJ - about 10 minutes at 450 F, and you can leave a bit less to end baking later or the next day. A possible vegetarian/vegan alternative for this recipe is to work with firm tofu instead of beef. 

1 tablespoon extra-virgin olive oil, and plus to garnish and spray on the top
1 pound ground beef (15% fat maximum is great, I used grass-fed organic ground beef)
Kosher salt
1 cup finely sliced crimini mushrooms or baby Portabella
1 cup spinach, chopped (fresh or frozen)
1 teaspoon ground allspice
1 package of fresh pizza dough
More olive oil, to be sprayed with a mister
Z'aatar (more about it here)  or sesame seeds to be sprinkled on the top


Start up with the filling: Heat olive oil in a pot. With high heat on, add beef and fry it up to when it is almost totally cooked. Turn heat to medium, adding mushrooms and spinach. When all is cooked (mushrooms still al dente) get rid of the liquid collected on the bottom of the pot. Add allspice. Simmer for about 15 minutes, stirring to get all juices in the mix.
In the meantime, turn the oven to 450 F. Sprinkle a baking sheet with some whole wheat flour or corn flour and spray a thin layer of olive oil over it. Roll the dough and cut all shapes that kids (or you) like. Transfer the dough pieces to the baking sheet. With the help on one spoon, put beef filling over pieces of dough, and close the parcels as you like. You mary roll, wrap the contents on a rectangle or triangle shape or just in a pocket style. You can invite kids to both of those parts of the process. Spray olive oil and sprinkle za'atar or sesame seeds on the top of each morsel. Add some couple more minutes to the time recommended by the dough package or your recipe if you are using home made dough. Garnish with a stream of olive oil around the pocket and some more spices if you love them. Enjoy while it is still hot. 

Monday, September 27, 2010

The Kids Cook Monday: Sweet Potato Nuggets

For today's The Kids Cook Monday post -- part of the Healthy Monday campaign -- I've got one of our favorite vegetables: sweet potatoes.

100903_CPE_croquettes
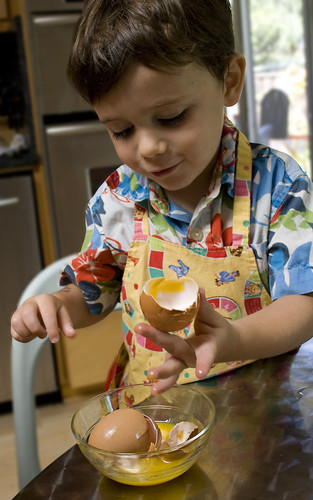
Cracking eggs is a tough skill to master, but so much fun
They're full of flavor and, as Anna wrote last week, packed with beta carotene (and fiber!). We love them roasted with other root vegetables, or sliced up as oven-baked fries.

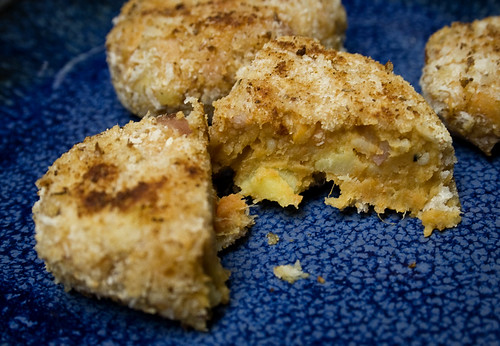
Another fun way to eat them is in the form of croquettes. A fancy term like that makes my kids suspicious, so we call them potato nuggets. My boys wouldn't touch mashed potatoes -- but a crispy breaded coating makes all the difference. You can mix in almost anything your kids might like (a great way to use up leftovers) then bake or pan-fry them. They freeze well, too, making them a great homemade "fast food" for busy days.

Kids who don't mind getting their hands dirty will have fun making these. My 3-year-old picked chicken-and-apple sausage as his mix-in, and handled everything from cracking eggs to squishing nuggets into shape and coating them with bread crumbs.

CPE_croquette_cut

Sweet Potato Nuggets

This is a very basic recipe you can adapt to suit your taste. Choose deep orange sweet potatoes for maximum nutrition -- and fun.

2 pounds sweet potatoes, cooked and peeled (see note below)
1 teaspoon butter
salt and pepper to taste
optional add-ins: curry powder, chili powder, chopped meat, chopped chives or green onions, parmesan cheese
2 egg whites
1 1/2 cups bread crumbs (I mix regular bread crumbs with panko)

Combine sweet potatoes, butter, salt and pepper, and any spices in a large bowl and mash with a fork or masher. Stir in any extras, such as chopped meat or herbs. Refrigerate until well chilled.

Put egg whites in a shallow bowl and stir briefly with a fork or small whisk. Put bread crumbs in another shallow bowl.

To form nuggets, scoop up a tablespoon or so of the potato mixture and shape into a nugget or ball. Dip into egg white and then into bread crumbs.

To freeze: Arrange nuggets on a plate or pan and set in the freezer for a few hours. Store frozen nuggets in a sealed freezer bag; take them straight out of the bag to bake.

To bake in the oven (my preferred method): Preheat oven to 400 degrees. Set nuggets on a parchment-lined baking sheet and spray lightly with olive oil or cooking spray. Bake for 20 minutes or until nuggets are lightly browned and crispy.

To pan-fry: Lightly spray a non-stick pan with olive oil or cooking spray. Cook nuggets over medium heat for a few minutes on each side until lightly browned and crispy. (You can also fry them in oil.)

Note: To cook sweet potatoes, wash them well and prick them with a fork. Rub with oil and bake in a 400 degree oven for 30 to 60 minutes or until soft. Or set on a white paper towel in the microwave and cook on high 12 to 18 minutes for four potatoes. Or cut peeled potatoes in 1 1/2-inch chunks and cook in a pressure cooker for 5 minutes.

Monday, September 13, 2010

Playdate Special: Scissors Salad for The Kids Cook Monday


Great headlines here: Three boys from 3 to 6 years old ate all their salad bowl at a playdate.

Yay! Before too much of a celebration, I must make a confession: I've been truly obsessed about developing a new way of thinking about how I feed my kids. That perhaps -- following my intuition -- they trust me as a good reference for what to eat as much as they trust my suggestions for how to dress. And as many other things in life, they might think that if I think it's just no big deal for them to eat salad, they will do it. Naturally. I've been working on this change lately, so to accept that they might even like and eat what I don't, something like roe and osso bucco.

I am learning to be more open-minded with two close sources of mine: My mother-in-law and husband proudly eat and happily try anything labeled or called edible food. One of my boys goes with the same DNA. For me and somehow my older kid, things are a bit more complicated, and we love all the good-looking foods but sometimes not all greens and types of meat and foods with unusual textures. That might also run in the DNA. But I promise, at least we will try to eat that something that just doesn't look so yummy.

Before I go too deep into the troubled waters of the classic debate "nature vs. nurture," I will just share here something very, very easy: a strategy to turn "making salad" into play time. To ease our way into eating the ultimate green – aka lettuce -- I invited the kids to help me with scissors, plastic lettuce knives, a oil mister, and garlic “sprinkles.”

When I served the salad itself, I gave them the power of chopping the already-cut leaves into smaller pieces, and also the possibility of using the dressing (at the playdate we served Organic Light Balsamic form Newman's Own) and sprinkling croutons, served with shaved Parmesan cheese.

Scissors Salad

Croutons:
fresh bread, cut into 1/2-inch dice
olive oil
garlic powder

Salad:

3 hearts Romaine lettuce, chopped in large pieces
2 cups shaved Parmesan cheese

Suggested dressing:
3 tablespoons olive oil
1 tablespoon freshly squeezed lemon juice or balsamic vinegar
4 tablespoons apple juice
1/2 teaspoon basil
Salt to taste

Prepare the croutons ahead of time. You can ask the kids to sprinkle the diced bread with garlic powder and spray the olive oil with the aid of a mister. Bake for about 6 minutes in a 300F pre-heated oven.

Cut lettuce leaves and dry them well. Mix the dressing. Serve the lettuce in a bowl with a pair of scissors (we used a kid's Fiskar), the dressing, croutons and cheese on the side. Have fun!

Monday, September 6, 2010

Back to School Lunches: Brown Rice Onigiri

CPE_Sept10_onigiri soy wrapper2

We're kicking off a week of Back to School Lunches with the start of another new feature: The Kids Cook Monday!

We've been invited to help Healthy Monday with its Kids Cook Monday campaign by posting great meals and snacks families can make together. Of course, we said yes! Quite a few family-oriented food blogs have signed on, and we're delighted to participate. We encourage you to check out the website for Healthy Monday, a 5-year-old public health project in association with Johns Hopkins University, Columbia University and Syracuse University. And check back here on Mondays for our ideas.

And all this week, we'll share recipes and tips for packing your child's lunch bag. We have three preschoolers, two kindergartners, and one first-grader among us -- and lots of ideas for packing meals kids will enjoy.

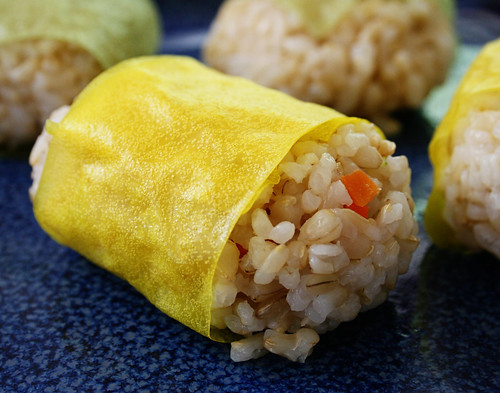
CPE_Sept10_onigiri soy wrapper1Onigiri is a favorite lunch bag treat for my boys, and something they can help make. Onigiri are essentially Japanese rice balls. You can make them with just rice, or tuck inside bits of diced meats, vegetables, pickles, eggs, whatever. It's a handy way to use up leftover bits from dinner.

Kids can help make onigiri a day or two ahead. You can freeze them for longer storage, but be sure to zap them in the microwave in the morning. They don't taste as good if you leave them alone to thaw.

CPE_Sept10_F makes onigiri

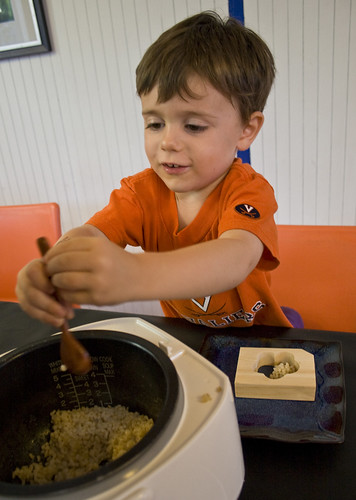
Short-grain rice is easiest to work with. These are impossible to make with long-grain rice -- don't even try! I have a hard time getting brown rice to work with onigiri molds (my 3-year-old loves the wooden flower one in the photo above), but I've had no trouble shaping the rice with the plastic wrap technique described below.

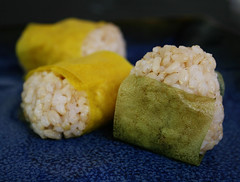
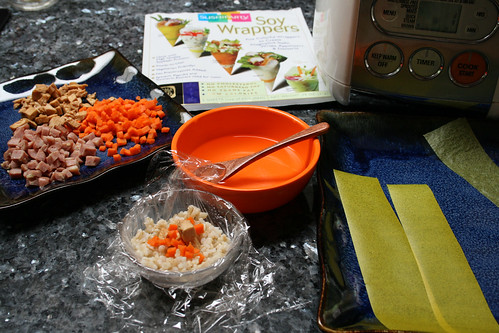
Traditionally, onigiri are wrapped with nori, but my kids don't care for the roasted seaweed sheets. I leave them unwrapped or use colorful SushiParty Soy Wrappers (I find them at Asian markets; go to their website to order online). The variety pack -- including turmeric yellow, paprika orange, and spinach green -- really brightens up a plate.

Finally, you can carefully toast onigiri on the stove top, to make yaki onigiri. One of my boys loves his yaki onigiri brushed with a bit of low-sodium soy sauce. Yum!

Brown Rice Onigiri

Be sure to use short- or medium-grain brown rice (you can substitute white rice). Long-grain, basmati, jasmine rice and the like won't work! This looks like an involved project, but it really takes just minutes once you get the hang of it.

2 cups short-grain brown rice, freshly cooked and hot
salt
water
optional fillings, diced
nori or soy wrappers, optional
small bowl or cup
plastic wrap

CPE_Sept10_onigiri layout

Get everything ready for assembling the onigiri. Have fresh, hot rice ready to go with a small spoon for scooping. In a bowl, mix a generous amount of salt with water, which will help keep the rice from sticking to everything. Set out the diced filling options -- you only need a small amount -- on a plate. If you're using wrappers, cut them into wide strips. Keep the roll of plastic wrap close at hand.

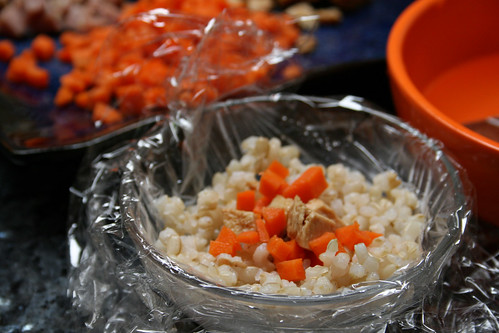
Tear off a small bit of plastic wrap and lay it in a bowl. Have your child dip his hands in the salted water and sprinkle a bit onto the plastic wrap. He can scoop out a small amount of rice into the bowl, then sprinkle a spoonful or so of filling in the middle. Top it off with another spoonful of rice.

CPE_Sept10_onigiri filling

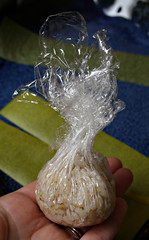
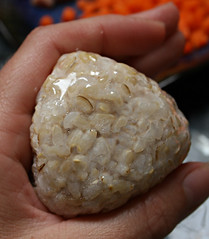
CPE_Sept10_onigiri wrapCPE_Sept10_onigiri shapeThe next step might require a grownup's help: Pull of the sides of the plastic wrap around the rice and twist, packing the rice together. Use your hands to shape your onigiri: You can make a broad oval, a triangle, a square, or a ball.

Remove the plastic wrap. If you're using nori or soy wrappers, you can wrap it around the onigiri now or, if you don't want the wrapper to soften and get a little soggy, when you're ready to eat it. Wrap the finished onigiri neatly in fresh plastic wrap and store in the refrigerator or freezer.

LinkWithin

Related Posts Plugin for WordPress, Blogger...