Wednesday, March 31, 2010

Small Bites Week: Mini Kibbeh or Quibinhos

It is not difficult to understand the reason for their popularity at parties and bars in my home country: quibinho's crunchiness is out of this world, and the unusual delicate seasoning and texture brings life to what could be just a average meatball.

After some reading I learn that kibbeh arrived in Brazil with the Lebanese immigrants, by the end of the 19th century. The most traditional recipes call for lamb, preparation on a tray, and filling with pine nuts and other goodies. Nowadays you can find all kinds of versions everywhere - even in fast-food chains there or frozen in big supermarkets.

I  found some inspiration for cooking those delicious bites from my favorite Brazilian blog on Food and Kids, Comer para Crescer . This one I bring to you is very, very simple and baked in the oven. And I can guarantee, very similar to the one that lives in my memory of nice party trays. There they were, in my pictures, besides other salgadinhos, like empadinha de queijo, rissoles, croquetes, oh so many of them.... how delicious. Now, off to buy some more ingredients to prepare it for the next party here!

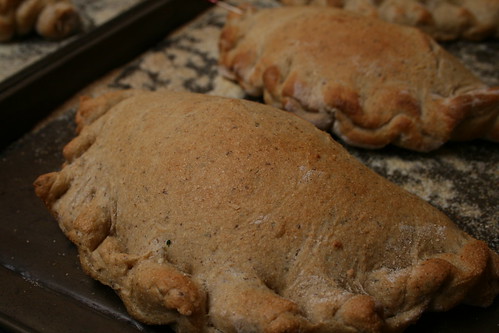
Mini Kibbeh - Quibinhos

I used Bob's Red Mill Bulgur Wheat, that needs to be soaked just for one hour before preparation. I usually soak few hours before cooking time. The main factor is to get rid of the excess of water from the bowl. Allspice is also indicated, but I ran out of it, prepared without it, and didn't really missed it at the final flavor.

1 pound ground sirloin
3 cups pre-soaked bulgur wheat
1 cup white onions, chopped or grated
2 teaspoons ground cumin
1 teaspoon fresh ground pepper
2 tablespoons lemon juice
1/4 cup extra virgin olive oil
1 cup fresh mint leaves, chopped or cut with scissors, thinly

Mix all ingredients and combine to a uniform dough. It can be done by hand or food processor. Pre-heat oven to 400 F. Roll the equivalent of one tablespoon of dough into a football-like shape with your hands greased with olive oil. Spray a shallow cookie sheet with olive oil. Turn oven off and change to broiler. Broil on high for 10-15 minutes, turn the kibbeh-pieces and broil for another 10 minutes to have all of its circumference equally grilled and browned. Serve with some lemon wedges, mint leaves and  hot sauce on the side.

Tuesday, March 30, 2010

Small Bites Week: Blue Cheese, Apricot, and Sage Zucchini Twirls

100326_zucchini twirls_5

I wanted to find a way to enjoy creamy white beans as finger food without slathering them on bread or blending it into a dip. These little skewered twirls do the job perfectly. Blue cheese can have a strong bite, but it smooths out nicely when blended with the beans. Sage, always a good partner to white beans, adds an earthy layer, and dried apricots bring a touch of sweetness.

Blue Cheese, Apricot, and Sage Zucchini Twirls

The bean and cheese filling can be made well ahead of time, but the twirls are best assembled soon before serving. Don't skip salting the zucchini, or you'll end up with a soggy, limp mess. Makes about 16 twirls.

1 1/2 cups cooked white beans, such as cannellini or navy
3 oz. blue cheese
salt
freshly ground pepper
2 zucchini
14 sage leaves
16 dried Turkish apricots

In a medium bowl, mash beans and blend thoroughly with blue cheese. Season with salt and pepper to taste, cover, and refrigerate for at least an hour.

Slice zucchini lengthwise into long, thin strips, about 1/8 inch thick. A mandoline is great tool for this, or you could try using a vegetable peeler. Sprinkle salt on both sides of the zucchini strips and lay them out on a clean kitchen towel or paper towel for 15 minutes. While the zucchini rests, cut the sage and apricots into long, thin strips.

Dry the zucchini with a fresh towel and begin assembling the appetizers. At one of the each strip, lay out a few strips of sage and apricot and top with a teaspoon of the bean and cheese blend. Roll up the zucchini strip, gently but firmly, and secure with a toothpick.

Sunday, March 28, 2010

Small Bites Week: Roasted Red Pepper, Walnut, and Rosemary Dip

100326_roasted pepper dip_6

We're in the mood for a little something, so we're declaring Small Bites Week: We're serving up  a week's worth of tasty, relatively heathful appetizers, no utensils required. 

First up, a sweet and savory dip we couldn't stay away from. And that's OK, because it's pretty darn good for you: no added fat or sugar. Its rich, vibrant color is a nice alternative to the family of onion, ranch, sour cream dips. This went over well with kids and adults -- my 5-year-old would eat this with a spoon. Me too.

Roasted Red Pepper, Walnut, and Rosemary Dip

This sweet, healthful dip pairs beautifully with celery and jicama, but I like it best with homemade whole-wheat pita chips (recipe follows). You can use roasted red peppers from a jar, but it's easy enough to make your own. Makes about 2 cups of dip.

3 roasted red peppers (recipe follows)
1 cup walnuts (can substitute pecans)
2 cloves garlic
leaves from 7 3" rosemary sprigs
a squeeze of fresh lemon juice
salt and freshly ground pepper to taste

Combine all ingredients in the work bowl of a food processor and puree. Refrigerate four hours to overnight.

Roasted Peppers

Wash and dry sweet bell peppers. Slice in half and remove seeds and membranes. Lightly spray a baking sheet with olive oil and lay peppers cut-side down. Broil for 10 to 20 minutes until pepper skins are charred and blistered. Transfer hot peppers to a bowl and cover tightly with plastic wrap. Wait at least 15 minutes, then remove peppers and slip off blistered skins. Use peppers immediately, store in refrigerator (I don't know how long they keep -- ours disappear within days), or freeze.

Whole-Wheat Pita Chips

Preheat oven to 400 degrees. Cut whole-wheat pitas into 8 wedges, then split each wedge in half to form 16 triangles. Spritz with olive oil spray or brush lightly with olive oil; squeeze a few drops of lemon juice over them and sprinkle with sea salt. Lay pita wedges on a baking sheet and bake for 5 to 7 minutes, until crisp and lightly browned. Store in an airtight container.

Saturday, March 27, 2010

Second Helping: Gefilte-Matzo Ball Fusion Soup


Some might think that I just went crazy. The idea of putting together on the same plate matzo balls and a twisted gefiltefish came while I was trying to sleep. And this is why... After I got married, Seder was planned so much in advance that its preparation became something like a delicious process with family traditions and memories. Before kids and marriage it was only the occasional luck of being invited to celebrate with some of my friends, like Sheila, who introduced me to a very nice Sephardic Seder, with an unforgettable Charoset, the best I ever tasted in my life!

This year is just the contrary. Not having any family around makes me sad, but also gives me some room to dare. My imagination is that a very well-flavored fish and vegetable broth and a matzo ball with something else could work fine.

So, after some reading and research I tried this new thing. The basic recipe is from a Manischewitz Matzo Meal packet, but I adapted a little bit, using also the excellent matzo ball recipe published by Jewish Holiday Feasts (by Louise Fiszer and Jeannette Ferrary) as a reference.

I don't want to change tradition or challenge the best matzo ball soups I ever tasted before. Also, this is a good way of introducing kids to gefiltefish. And finally I just want to try something new. As I learn every year, Passover is the celebration of Freedom. Happy Passover, Chag Sameach!

Matzo Fish Ball Soup with Lemon Zest and Ginger

The recipe was developed last week and tested once. My husband, who loves traditional matzo ball soup, described it as a happy fusion of three of his grandmother's delicious food: matzo balls, gefiltefish and borscht.

3 tablespoons olive oil, divided in three
2 stalks celery, chopped
1/2 fennel bulb, chopped
1 tablespoon grated ginger
1/2 white onion, chopped
12 ounces white fish fillets (I used wild-caught orange roughy, and tilapia might be a good choice)
2 gallons water, divided
Kosher salt to taste
2/3 cup matzo meal (good for Passover)
3 eggs, beaten
zest of 1/2 lemon
2 tablespoons fresh dill
1 medium carrot, cut in swirls with a peeler
horseradish and beet to garnish (Chrain)

In a heavy-bottomed large stock pot, heat 1 tablespoon olive oil and garlic. Add celery, fennel, ginger and onion, frying them without browning. Add fish fillets and shallow fry with vegetables and ginger. Add  8 cups of water and simmer for 50 minutes. Remove fish and let it cool. Simmer broth, with remaining vegetables, for 20 minutes more.

When fish has cooled to room temperature, shred it finely and reserve. In another bowl, mix matzo meal, eggs, 2 tablespoons of the fish stock, and remaining 2 tablespoons of olive oil. Add shredded fish and dill. Mix to a uniform dough and let it rest for at least 15 minutes in the fridge, or more if indicated by your matzo meal package.

In another large pot, bring about one and a half gallons of water (24 cups) to a boil. Reduce heat and immerse balls of matzo mix (each about 1 tablespoon) to the water. When balls reach the water's surface, simmer and cook for about 35 minutes. Remove and refrigerate balls.

When serving, heat matzo fish balls in the strained fish and vegetable broth, adding more water, if necessary. Serve with lemon zest, a dollop of horseradish and beets mix, 2 to 3 carrot swirls, and a branch of fresh dill.

Monday, March 22, 2010

Second Helping: Fresh Garbanzo Beans

CPE_garbanzo_Mar2010

I was heading out of the market when I spotted a bin of soft, green pods practically glowing beneath a stack of boxed plums being set out in the sunshine. I had to ask: “What are those?!”

“Garbanzos,” the worker replied. “Have some!” And he scooped a few cups into a bag and handed them to me, gratis. “Just come back and buy more later.”

That’s the way to sell someone on something new. Not that fresh garbanzos – the lovely alter ego of the more familiar dried or canned chickpeas – need much selling. They’re delicious right out of the pod, and I hear they’re tasty just about anywhere you might use peas, edamame, or fava beans. I wouldn’t know because we opted for lightly steaming them, then pan-roasting them just a bit, and then devouring them. But we’ll be getting more.

CPE_garbanzos3_Mar2010

Fresh Garbanzos

Look for fresh beans at well-stocked produce markets, the farmer's market, or Mexican grocery stores.

2 cups fresh garbanzo beans, in the pods
a few tablespoons of water
sea salt

Heat a skillet over medium-high heat. Add beans, then a few tablespoons of water. Cover and steam for a few minutes. When the water is nearly gone, remove the cover and roast on the stove-top, stirring occasionally, for 2-3 minutes.
Put pods in a bowl, sprinkle liberally with salt, and slurp them right out of the pods.

Variation: If you prefer them more on the roasted side, omit the water and use olive oil. Cover and cook, shaking pan occasionally, for about 5 minutes.

Friday, March 19, 2010

Tips and Gadgets: Food to Read

This is not a recipe, but may inspire you to cook. Cook every day, I mean.
The first time I had the chance to know more of Michael Pollan's work was through a best friend who prepared a in-depth TV special feature about Slow Food. I was quite impressed with his ideas.
It took me a while to read more of his work. I found that The Botany of Desire was available at Netflix to watch instantly.

So, after watching, I was so intrigued that I immediately ordered his last book, Food Rules, published by Penguin Books last year.
It is most definitely suitable for on-the-go people. And very useful for all kinds of eaters to cooks, from mothers to chefs. Small, precise and one of the best things I can carry with me on a trip to the supermarket. You can also read it in parts; and if that is the case, kids' interruptions won't really affect your comprehension of the content of the guide. It also has some simple ideas and smart shortcuts that might help you to reconnect with the meaning of food. But most important of all: It is humorous.

So, one week after reading it, here are some of his tips that are really useful here, specially with kids. Those are:
  • Best cereals are the ones that don't change the color of milk.
  • Nobody really needs high-fructose-glucose-syrup.
  • This one, I love:  "It's not food if it arrived through the window of your car." I just have to find a fun explanation for the kids for this one.
  • Treating treats like treats can be part of all days of the week that start with S. 
  • Buy your snacks at the farmer's market.
Even if some rules are still hard to follow currently, and some might sound quite extreme for a frequent fast-food eater, Pollan's guide is a good choice to help make wise eating decisions.

But above all, rule number 63, for me, is the one that really embraces one of the truths I believe: "Cook." And have all powers over what you and your family are really eating. And of course, don't forget to play and explore too...

Tuesday, March 16, 2010

Playdate Special: A Few of My Favorite Things


Memories that are powerful enough to make me cook something new are always welcome in the kitchen. Last week, inspired already by the chocolate fudge balls, I  chose to prepare a collection of mini party food for our playdate -- things that I never had time to test before. And we had a good reason to celebrate: We just published our recipe number 100!

The first treat prepared and served were the tiny hot dogs. They were followed by empadinhas, an elegant version of a very delicious mini quiche. The recipe was generously given by my dear auntie Regina. I wanted to remember that lovely smell of her home on Sundays. Nice melted cheese inside a crunchy shell of buttery pastry!

To finish the three courses of fun food, quibinhos were served. They are another specialty frequently served in parties. They are tiny meat treats that carry special spices and bulgur wheat, a tradition that came from Lebanon and stayed in Brazil for good. That will be published later, when I plan to do a small plate bar feast for our potluck.

I also considered this playdate as a opportunity to rehearse the kind of food  I would love to serve in a party. Darienne helped me a lot on the prep -- that might take some time but can be done on the night before. Some of our kid devoured the empadinhas, most didn't really like the foreign spice of the quibinhos. For them, mini hot dogs were the winner! As for me, the taste and texture of empadinhas made me travel in time. There I was, like a kid, besides my kids and friends, eating a few of my favorite things of my childhood!

Aunt Regina's Empadinhas de Queijo 

Any good brand of ground Parmesan cheese will do for the filling. The pastry is not the original, that required the use of lard, but the same I used for my Butternut Squash Pie. We covered each cupcake cup with about 1 tablespoon of dough.

Crust
1 cup flour
1/2 cup vegetable spread or butter
3 tablespoons cold water
salt to taste

Filling
2 cups Parmesan cheese
1 cup reduced- or full-fat milk
1 tablespoon butter
4 eggs

For the crust:
Prepare dough about 2 hours before baking. Mix flour and vegetable spread or butter (cold), and add water gradually at the end. Knead to a uniform texture. If needed, add more flour to reach a silky and not so wet texture. Wrap in parchment paper and reserve in the fridge. When ready to bake, use a thin layer to cover each foil cupcake cups (Reynolds brand).

Filling:
Beat all ingredients together and pour about 2 tablespoons of liquid mix on the cupcake cups coated  with dough. Bake at 400F temperature in the middle shelf of oven for about 30 minutes, making sure they are golden at the top. Don't get upset if the beautiful aerated top goes down after a while right after serving.


Mini Hot Dogs

1 tablespoon olive oil
24 mini beef franks or mini cocktail sausages (I used for this one Lit'l Smokies from Hillshire Farms)
2  teaspoons California garlic powder
1 cup marinara sauce (your favorite brand or homemade)
1 package of fresh, ready-to-make pizza dough

Heat olive oil on a skillet, add sausages and let them brown for a while, adding the powdered garlic in the process. Pour marinara sauce over them and cook for abot 10 minutes over lower flame.
Stretch pizza dough on a floured surface. Brush marinara sauce on a line of dough and line up sausages. Wrap them on a single layer and cut each sausage wrap. Bake on a 400F oven upper shelf for about 10 to 15 minutes until golden.

Monday, March 15, 2010

Celebrating: St. Patrick's Day, and Giveaway Winner

We love St. Patrick's Day around here -- my husband and kids are Irish, and growing up in Massachusetts, I sometimes forget I'm not -- but we don't care much for traditional St. Patrick's Day fare. Corned beef, colcannon... eh.

So we go the silly route, with an all-green meal. If you're looking for something more appetizing than mashed potatoes tinted with green food coloring, these might help you out:


What do you serve for St. Patrick's Day? We'd love to hear about in the comments!

And finally, congratulations to Jennifer, the winner of our first giveaway. (Jennifer, I'll be sending you an e-mail.) She'll be getting a copy of our first recipe collection, just in time for spring. Thanks so much, everyone, for enthusiastic support. We're so glad you're enjoying the ideas we share here -- and sharing your own as well.

Sunday, March 14, 2010

Second Helping: Chocolate Fudge Balls, the Brigadeiros


I couldn't resist the temptation to share this delicious treat. The reason is that the sweetened condensed milk, the main ingredient of this recipe is  so fashionably current.

Condensed milk has always been a base for most desserts in Brazil, and we also have other recipes that use it here, such as Pink Pudding and its variation, Pumpkin Pudding.

First, a bit of history: Brigadeiros are the most popular sweet bites in Brazil. They are easy to prepare, easy to eat, and are a never-forgotten staple on a birthday table. New versions of the classic recipe are being prepared in elegant restaurants and reinterpreted creatively everywhere. My twist on the recipe is just its coat: instead of chocolate sprinkles, I substitute high-quality Belgium milk chocolate. With you, the smooth sweetness of brigadeiros!

Chocolate Fudge Balls (Brigadeiros)

Sweetened condensed milk is available at Asian markets, Trader Joe's carries an organic version seasonally (according to my local manager), and Target sometimes has its own brand. In mainstream grocery markets, such as Raley's/Nob Hill, condensed milk La Lechera can be found in the Mexican food section.

1 tablespoon butter or vegetable spread (I use Earth Balance)
1 can condensed milk
3 tablespoons unsweetened cocoa powder (Ghirardelli is a good option)
40 grams milk chocolate (about 1 1/2 ounces), grated on a cheese grater, or good-quality chocolate sprinkles

Melt butter or vegetable spread in a heavy-bottomed pan. Gradually add condensed milk, stirring vigorously with a heat-proof spatula such as Le Creuset. Add powdered cocoa and keep stirring. Lower flame and stir constantly, always taking care for the dough not to burn at the bottom of pan. When a caramel fudge texture is reached, turn off the heat and transfer mix to a plate coated with butter or vegetable oil and let cool. When completely cold, roll in small balls (about one teaspoon) and coat with grated chocolate.

Saturday, March 13, 2010

Second Helping: Leprechaun Cookies


CPE_Leprechaun Cookies_Mar2010

These mint-kissed meringues, dusted with a wee bit of leprechaun magic, are melt-in-your-mouth yummy -- light, crunchy and not too sweet. They're simple to prepare, though waiting for them to slooooowly crisp in the oven can be agony. The reward, however, is better than gold.

This is the last day for a chance to win an e-book of our favorite spring recipes! Leave a comment today, and you're in the running!

Leprechaun Cookies

Separate the egg whites and let them sit out of the refrigerator for 30 minutes so they'll whip up well. If you don't have superfine sugar, just whir regular granulated sugar in a food processor or blender for 30 seconds or so. To make colored sugar, dab a tiny bit of food coloring paste onto a sheet of wax paper. Add a tablespoon or two of sugar and blend thoroughly. You could also use mint sugar -- see the variation below.

3 egg whites, at room temperature
1/4 teaspoon cream of tartar
3/4 cup superfine sugar (see note)
1/4 teaspoon peppermint extract
1 tablespoon green sugar (optional)

Preheat oven to 225 F. In a very clean mixer bowl fitted with a whisk attachment, beat egg whites until foamy. Add cream of tartar and continue beating until soft peaks form. Add sugar gradually and continue beating until meringue is glossy and forms stiff peaks. To check that it's done, rub a pinch of meringue between two fingers -- if it feels grainy, keep beating. Add peppermint extract and beat briefly to combine.

Cover a baking sheet with parchment paper. (You can use masking tape or a dab of meringue under the paper to hold it in place.) Put a large tip on a pastry bag and fill with meringue; pipe 2-inch rounds onto sheet. Alternatively, you can use spoons to form dollops of meringue. Sprinkle meringues with colored sugar, if desired.

Bake for an hour and a half to two hours, rotating the baking sheet every 30 minutes to ensure even baking. Meringues are done when they are crisp to the touch. If they start to brown, turn the oven temperature down by 25 degrees.

Remove from oven and let cool a few minutes before removing to a wire rack to cool completely. Store meringues in an airtight container for up to a week.

Variation: I reduced the peppermint extract by half and used mint sugar. To make mint sugar, just tuck some clean, dry mint leaves in a jar of sugar. Let it sit for a few weeks, and it will have a lovely mint flavor. You can use the same technique to flavor sugar with lavender, vanilla, and more.

Tuesday, March 9, 2010

Playdate Special: Ham and Broccoli Calzones

CPE_calzones_Mar2010

You might think we're super moms. That we do it all. That we twirl happily through spotless homes, humming as we casually whip up a four-course meal while dispensing hugs to the little ones.

In reality, though, it's more often like this: Shortly before Anna was due at my door with kids in tow, I plunked my preschooler in front of "Handy Manny," swept up most of the cereal under the kitchen table, and cracked open the lid on the flour canister.

Huh.

A half-cup of all-purpose flour. That left me ... about five and a half cups short.

I improvised pizza dough, tossing in a few cups of white whole wheat and bread flour. The result: Well, it would have made a lovely loaf.

But the stuffing! Ricotta, ham, broccoli, and mozzarella, yum. These folded-up pizza pockets are tasty, easy, and portable -- a great on-the-go meal, even for breakfast. Use your favorite pizza dough, be it made from scratch or refrigerated.

The kids ate them right up, scarcely noticing the tell-tale green bits indicating the presence of a vegetable.

Not only did I mess up the dough, I messed up the portions. I divided dough for one pizza round into four calzones, which resulted in mighty hefty calzones. Way too much dough. Dividing the dough into six portions will yield a much thinner crust, more evenly matched to the fillings inside.

Ham and Broccoli Calzones

You can prepare prepare these a day before baking. The assembled calzones can also be frozen until ready to bake.

1/2 cup ricotta
1/2 cup broccoli florets, chopped
2/3 cup ham, diced
1/3 cup mozzarella
salt, to taste
freshly ground pepper, to taste
one pizza dough, homemade or prepared
cornmeal
1 egg
1 tablespoon water
tomato sauce (optional)

Preheat oven to 450 degrees.
In a medium bowl, combine ricotta, broccoli, ham, mozzarella, and salt and pepper.
Divide pizza dough into 6 equal portions. Roll out each portion into a circle about 6 inches across. Place a half-cup of filling in the center, then fold over dough to create a half-circle. Press edges with your fingers or a fork to seal. Sprinkle a baking sheet with cornmeal; set calzones on sheet, leaving a few inches between them.
In a small bowl, whisk egg with water. Using a pastry brush, brush egg and water mixture over the calzones.
Bake until dough is lightly browned, 14-18 minutes.
Serve with tomato sauce for dipping.

Monday, March 8, 2010

Giveaway: Our Favorite Recipes for Spring


This is a big week for us: We're going to publish our 100th recipe! We're thrilled to be reaching this milestone so soon after launching Cook Play Explore in the fall. To celebrate, we're offering our first giveaway: an e-book compilation of our favorite recipes for spring, which is just budding here in the Bay Area. Before you know it, we'll be savoring summer's bounty!

To enter, all you need to do is comment on any one of this week's posts. Tell us about a recipe you loved, share one of your own, let us know what you think of the site, or just say hello! We'll pick a winner at random to receive our first e-book.

As we celebrate, a big thank-you to everyone who has helped make this project so much fun. We love sharing our kitchens with you!

Friday, March 5, 2010

Second Helping: The Crunchy Factor of Green Beans

There I was for the first time in Paris on my late 20's when I heard a French friend describing her recipe for Haricots Verts. Her enthusiasm puzzled me. I was asking myself how a simple vegetable -- even with that elegant name -- was considered so amazing... It took me more than a decade to unveil something similar to that recipe and to understand all the goodness and charm of fresh green beans, and their similarity to the French variety, the sleek Haricot Vert.
So, when I prepared green beans for Lunar New Year's potluck, thanks to Darienne,  who suggested the side dish but ended up preparing delicious prawns, I had all that memory of those irresistible haricots verts from my friend.  To add an Asian touch to the dish, I added rice vinegar and soy sauce.

During my search of green beans literature, I was amazed to find all about it. Green beans are loaded with vitamins, including the awesome Vitamin K, full of fiber, low in calories, and last but not least, full of flavor. Than I learned that it is considered a symbol of longevity for the New Year. And, for my surprise, a hit for my 3-year-old boy.  With all those nutritional qualities, texture and flavor, long life for green beans! From now on they will always be a favorite in my home, Lunar New Year and beyond. 


Crunchy Marinated Green Beans

The beans I bought were from Trader Joe's and came trimmed and washed. The main part of the process is never overcook the beans if you want to experience the irresistible crunchiness they bring to a plate.

1 pound fresh green beans, trimmed and washed
2 teaspoons freshly grated ginger
2 teaspoons powdered California garlic (or 1 1/2 teaspoon crushed fresh garlic)
3 tablespoons reduced sodium soy sauce
2 teaspoons rice vinegar
1 teaspoon sesame oil

Cook beans for about 6 to 8 minutes on medium heat with a tablespoon of water, or enough to cover the surface of the pot. If beans are from a ready-washed and trimmed package, follow the instructions for cooking, choosing the minimum time. Transfer to a heat-proof dish  and while still very hot add all seasonings and mix well. Cover and let it stand for at least 2 hours before serving. It can be reheated for about 3 more minutes or served at room temperature.

LinkWithin

Related Posts Plugin for WordPress, Blogger...