Showing posts with label Drinks. Show all posts

Sunday, January 15, 2017

Butter Beer Our Way


Double Vanilla Butter Beer

We finally made it! D's 10th birthday was celebrated with a Hogwarts style dinner with a 3-course menu that made 16 kids really happy. But the highlight of the feast was not the food, or even the fantastic cake and jell-o extravaganza inspired on Aunt Petunia Pudding, but our interpretation of butter beer.

The mix was really easy to make and combined four delicious ingredients. The literal butter was "covered" by adding the whipped cream, looking like beer foam. To add mystery to the drink I added creamed honey as yet another mystery butter, which worked really fine, because the guests had to guess what was the "pretend" butter that was added to the mix in front of them. To celebrate a birthday or a grown-up cocktail party (just add 2 oz vanilla vodka to it), here's the recipe:

1/2 cup French Vanilla Ice Cream (TJ's)
4 oz Dry Sparkling Vanilla Bean
1/2 teaspoonTrader Joe's Creamed Honey
Dairy Whipping Topping (Berkeley Farms)

Add ice-cream to the bottom of a transparent cup, top with vanilla soda, add honey (the wannabe butter), stir with a spoon, and top with cream. Serve immediately. Enjoy!


Wednesday, September 4, 2013

Soda experiments, part 2: Ginger ale


Soda remains a rare treat for my kids. My husband and I kicked a vicious Coke Zero addiction not too long ago, and we try to avoid having soda in the house. But on special occasions, my sons delight in a simple Shirley Temple cocktail: ginger ale, a bit of grenadine, and a sickly sweet maraschino cherry.

Given their love of ginger ale and the success of our home-brewed root beer (three years ago — how can it have been that long ago?!), I thought we should give ginger ale a try. I did a bit of research and decided to try two different approaches.

1. The fancy brew

First we tried a truly home-brewed soda, requiring a bit of yeast for carbonation. We used this recipe, subbing dry ale yeast for the champagne yeast (and you can use regular bread yeast, to keep things simple). Other than the yeast, the ingredients were straightforward: fresh ginger, water, salt, lemon juice, and only half a cup of sugar per 2-liter. Nice!


The boys took turns grating ginger and squeezing lemons. We made a double batch to fill two recycled bottles, then let the kids shake things up.


The original recipe recommends keeping the bottle out at room temperature for 12 to 48 hours, until the bottle is firm to the touch — the important sign that your soda is carbonated and should be refrigerated before it explodes. Our bottle took longer, about 60 hours.

We chilled it for a day, then cautiously cracked it open ... but there was almost no fizz. Disappointing. We poured out three glasses, straining out bits of ginger, and eagerly took a sip.

This is ginger beer, probably best for grownups. Even with a dash of grenadine, my sons agreed it had way too much bite for their tastes. (I'll work it into some adult cocktails with pleasure, however.)

UPDATE: We cracked this open after another five days in the refrigerator — it was much mellower and fizzier. This is the winner!

2. The simple syrup

On to the next version: a gingery simple syrup to mix with sparkling water. We chopped the rest of our ginger and combined one part ginger with one part sugar and three parts water, used an immersion blender to whirl everything together, then brought it to a boil on the stove. We let it simmer for 45 minutes or so until it was reduced by half, then took it off the heat to steep for another half-hour. Finally, we poured it through a fine-mesh strainer and chilled it in the fridge.

For our taste test, we poured a bit of ginger syrup into each glass and added sparkling water. This was the reaction:


I preferred this version, but it still has quite a bite. Strong, tasty stuff for ginger lovers like me, but it looks like I'm the only one who'll be drinking it. My sons preferred the fancy brew with yeast (and less sugar!). (UPDATE: And after a few days, it was very drinkable and much tastier.)

We have a few more soda experiments planned — I'll share them here if they're more successful than this adventure!


Tuesday, January 29, 2013

Frozen whipped cream for cocoa

121113_CPE_whipped-topping-5

One of my boys' favorite after-school treats is a mug of hot chocolate topped with whipped cream. My older son asks every single time for me to make a snowman face atop the whipped cream — with a candy corn nose and mini chocolate chips for the eyes and mouth.

But in the just-got-home bustle of artwork and notes from school and homework, gathering candy to adorn his cocoa just so is pushing dangerously into super-mom territory. I'm not that awesome, and we don't keep a stash of candy corn and mini chocolate chips around the house.

I do like to make him happy, however. And I appreciate how that smiling snowman in his cup warms his heart. So I whipped up some snowmen and stuck them in deep freeze, ready to be called into action.  Now I have a small stash of frozen snowmen and other special toppings, sprinkled with mint candies and colored sugar, ready to add a little smile to my boys' hot chocolate. Bonus:

121113_CPE_whipped-topping-3

Frozen whipped cream decorations

If you're more artful than I am, you can make whipped cream hearts and stars, whatever suits your fancy. I don't think this works with whipped cream from a can, but I haven't tried it. Whipping it up fresh is quick and easy, and so worth the minimal effort!

1 cup heavy whipping cream
1-2 tablespoons sugar
assorted toppings: chopped candies, chocolate chips, sprinkles, colored sugar, crushed candy canes

121113_CPE_whipped-topping-1


Chill a metal mixing bowl and a whisk in the freezer for 15 minutes. Pour cream into the bowl and add sugar. Whisk until the cream forms stiff peaks. You use a stand mixer as well — just chill the whisk attachment and beat on high speed.

 Line a tray or plate with waxed paper. Fill a piping bag with whipped cream and squeeze out dollops of whipped cream, or just plop the whipped cream down with a spoon. Tip: If you're making these for cocoa mugs, you might want to trace the top of the mug on the reverse side of the waxed paper to make sure you don't make these too big.

121113_CPE_whipped-topping-2

Now add candy decorations. Some, like colored sugar, may melt or sink into the whipped cream so work quickly! Slide tray into freezer and freeze until firm. (I left mine for an hour.)

Gently peel frozen dollops off tray and pack in an airtight container, lining layers with waxed paper, and freeze for up to two months.

To use, gently place a decorated dollop on top of hot chocolate and enjoy!

121113_CPE_whipped-topping-4

Friday, September 28, 2012

Cereal Energy Shake

       
Yes, after all these years writing about attempts to raise brave, adventurous and healthy kids I have a confession: My 7-year-old is currently and frequently too busy to eat. I had to call an emergency plan to make sure he's getting enough fuel for his daily jumping and running.

I am sure his calorie expenditure is high: When not sitting in the classroom, the boy is, most of the time, in action, and seems to have endless energy. What I am also sure of is that some days he is extremely distracted, not interested in food of any color or shape, and his lunchbox comes home still full of food from the school.
       
For those days, when he is not in the mood to eat his whole bowl of cereal, drink his milk, eat the recommended fruit portion for his age, and "no way Mom" he's not going to eat almonds,  I just use my new Waring blender and pack as much nutrition in a cup as I can.

After testing some ready-made shakes to help with kids who don't want to eat, I made our own. It's not gourmet, and far from trendy, but it works. It seems like after drinking the cereal drink in the morning, his day goes smoother, and he's less cranky and has more appetite. Cheers!

Cereal  Energy Shake

I am still testing other mixes that may include almond butter or peanut butter.

7 ounces cold coconut milk (from cartons, or soy, or regular milk)
1/2 frozen banana
1/2 cup fortified oat-based cereal (or any cereal in your cabinet)
2 tablespoons slivered almonds
2 tsp cocoa (optional )
Pinch of cinnamon (optional)

Mix all ingredients in a blender on high speed until smooth and mixed well,  and serve immediately in an attractive tall cup. 

Monday, July 2, 2012

5 summer sippers

Summer time, and the living is easy... but hot. Really hot. When the mercury climbs, we reach for these delightful cool-down drinks. Some are for grownups (like cold-brewed iced coffee) and others are kid favorites (coconut frappé), and still others can be enjoyed as virgin or alcoholic drinks (strawberries and grapes cocktail).


This is one of our popular posts, and it may be the simplest. This cold-brewing method makes a wonderfully smooth-tasting cup of coffee. It tastes great iced or hot, and the concentrate lasts at least a week or two in the fridge.


This frosty tropical drink works just as well with soy or almond milk as it does with cow's milk, making it a versatile option for those with special diets.


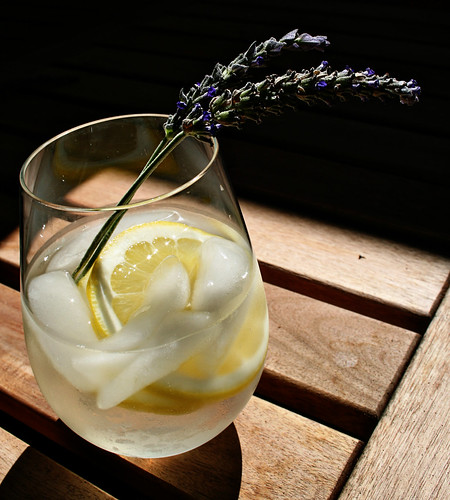
Floral-infused syrup adds an intriguing note to classic lemonade. If lavender isn't your thing, you can substitute basil or mint.


A blend of ripe berries with milk — regular or almond — make an irresistible drink rich in healthy antioxidants.


This refreshing drink, dressed up with juniper berries and mint, is the perfect kid-friendly cocktail for a barbecue. For a grownup version, add some limoncello or gin.


Wednesday, January 25, 2012

Simply citrus: Homemade syrups, salts, and preserved lemons


Citrus season is in full swing here, and I'm making the most of it. My lemon tree is churning out a generous bounty, and I'm loading my market bag with blood oranges, grapefruit, and some of the most spectacular navel oranges I've ever enjoyed. Today I have a handful of recipes to help you make full use of winter citrus while it's at its peak. These are all simple and economical recipes to help preserve the best of the season: syrups and frozen concentrates, finishing salts, and preserved lemons.

It's worth seeking out organic fruit for these recipes, particularly those that make use of the peel. This is a good time to score a bargain on organic citrus. These are easy to make with kids, too (be sure to supervise them if they use a grater).

If you're crazy for still more citrus, start a batch of limoncello that will be ready in time for summer, make lemon curd (or mango-lime curd, swoon!), or treat your favorite people to candied citrus peels.


Blood orange juice
Lemonade Syrup, and Blood Orange Variation

Store the syrup in the refrigerator for up to a week, or freeze as homemade juice concentrate. I love the taste of raw or organic sugar, but it adds a golden-brown tint. It's barely noticeable in lemonade, but it blunts the the vivid color of blood orange juice. This recipe yields four 8-oz. drinks; scale up or down to meet your needs.

1 cup sugar
1 cup water
1 cup lemon juice

Combine sugar and water in a saucepan and bring to a boil, stirring to dissolve sugar. Let cool, the combine with lemon juice.

To prepare a drink, combine equal parts lemonade syrup with water — you may need to adjust proportions to suit your taste.

For concentrate, freeze portions in plastic containers, then store the frozen blocks in an airtight freezer bag or container.

Blood Orange Syrup: Substitute blood orange juice for lemon juice. This syrup is also especially good poured over shave ice or added to a glass of sparkling water. 

Frozen blocks of lemonade concentrate, waiting for summer


Citrus Salt

I intended to make this ages ago, after seeing it over at Steamy Kitchen, but only just got around to it after it was featured at 101 Cookbooks. Try citrus salt as a finishing touch with chicken, seafood, and vegetable dishes. Be sure to juice the fruit after removing the zest and use it to make the syrup recipes that follow.

organic lemons, oranges, and/or limes
sea salt

Scrub fruit well and dry thoroughly. Zest fruit, being careful not to remove the bitter white pith. Combine about 1 tablespoon of zest with 1/2 cup sea salt, mixing thoroughly with a fork.

Lay salt blend on a baking sheet lined with parchment paper. Let it sit out a while to dry, or put it in a 200 degree oven for 75 minutes to two hours, until zest is dry and crumbles easily between your fingers. You could do this in a dehydrator, too.

Store in an airtight container and it should keep for a few months.

Lemon salt, top, and orange-lime salt

Preserved Lemons

Try dicing preserved lemons and whisking them with a bit of olive oil, salt, and pepper for a fantastic dressing, as in my Persimmon and Fennel Salad. They're delicious with rice and other grains, in marinades, and atop simply cooked chicken and fish.

organic lemons
kosher salt or coarse sea salt
a large jar with tight-fitting lid
optional spices: cinnamon stick, cloves, cardamom pods, bay leaves, coriander seeds, fennel seeds, peppercorns

Be sure to have enough lemons to fill your jar, plus a few more for juice. First, sterilize your jar and lid by boiling them in water for 10 minutes.

Scrub lemons well and trim away any stems. Slice the lemons almost completely in half, but not all the way through. Make another cut, perpendicular to the first, so you've cut the lemons nearly into quarters. Sprinkle some salt in the bottom of the jar. Pack the cuts in the lemons with salt and put them in the jar. Pack firmly, squishing out some of the juice. Add any spices, if you wish, top off with another sprinkle of salt, and add enough lemon juice to completely submerge the lemons.

Shake the jar every day or two to evenly distribute juice and salt. As lemons soften, add a few more.

Your lemons will be ready in 3 to 4 weeks. They're very salty: You may want to rinse them before using, and taste before adding more salt to a dish.

I've been assured the jar never needs refrigeration, but I stick it in the fridge after opening it and try to use them up within 6 to 8 months.

091204_persimmon salad_3
Preserved lemons are perfect for Persimmon and Fennel Salad

Tuesday, June 28, 2011

Tips and Gadgets: Pink Panther's Smoothie

For a long time I tried to convince my boys to change their taste for "only a bowl of cereal" for breakfast to something fresher, seasonal and, obviously,  healthier.

About a month ago—after buying a Smart Stick hand blender, by Cuisinart (easy to use and wash), I started myself to drink smoothies first thing in the morning. Mine are made of almond milk, half a tablespoon of flax seed meal, and tons of antioxidants from fresh seasonal berries.

When they saw me making and drinking it, they were puzzled. And finally, when they asked me why I was not having my coffee with toast, I answered: "Oh, because I want to be just like the Pink Panther's mother, so I drink this pink smoothie."

That story seemed to be good enough. We watch, sometimes, the newest version of the classic cartoon, where the pink panther is looking not so thin, never smokes, and takes care of the garden and the planet. Besides running from the inspector, of course.

And since then, they are having fruit loaded milk every morning and are very happy indeed. Maybe it's because they just would like to be like... tada tada... tada....the Pink Panther !

The Pink Panther Mom's Smoothie

1 cup 2% very cold milk or unsweetened vanilla almond milk
3 large ripe fresh strawberries
15 small blueberries
3 slices of banana or 2 tablespoons applesauce
1/2 cup raspberries
1/2 tablespoon flax seed meal (optional)

Add milk, fruit, and flax seed meal at the end. Blend for about 30 seconds. Pour in glass and enjoy very cold!

Wednesday, June 1, 2011

Strawberry Season Special - Cheers Strawberries Cocktail


Who can resist to the redness and sweetness of a ripe strawberry? My family and I can't.

Last weekend we were in the windy fields of one organic farm close to Santa Cruz, California, buying some of the Chandler variety of organic strawberries. The music playing in my mind was "Strawberry Fields Forever." All of a sudden I traveled back in time: I had learned, with a bit of disappointment, that the Beatles' song was not really a psychedelic inspiration on a strawberry field—but was mentioning a children's home close to Lennon's place. That revelation happened while I was working with my friend, photographer Tina, on a feature for a magazine in Liverpool in the mid-'90s.

When I realized that our weekend program, to pick organic strawberries, was not really possible, I also got disappointed. On top of that, my camera had just run out of batteries! The strawberries were not ready yet—as many were still in the need of more sun to mature, and spring had unusual cold weather, compromising some of the crop. The boys were able to understand that the plants needed more time, and off we went to buy strawberries already picked from other fields of the farm—delicious ones—and a jar of their extraordinary jam.

This short series of strawberry based recipes is going to be online from today to Sunday. We hope you enjoy them as much as we do! Cheers!


Kids are always asking me to have some more exciting drinks, once they set up their own paperboard clubhouse in the backyard!
One of the good reasons to love it, it's because you can use those not-so-fresh strawberries that were left behind. This is a reinterpretation of a recipe created two years ago for Mother's Day.

Strawberry Cocktail

With some not-so-fresh strawberries, I prepared a syrup-like compote, simmering the fruits with orange juice. I used the mix as a base for the cocktail. 

2 tablespoons strawberry compote (recipe below)
1/2 cup sparkling mineral water with lime
1/4 cup apple juice (optional)
4 leaves fresh mint, chopped
Ice (optional)

Combine all ingredients, stir slowly, and add fresh chopped mint on the top.

Strawberry Compote

2  cups whole strawberries
1 cup fresh orange juice
1 tablespoon orange zest
5 or 6 juniper berries, dried

Simmer all for about 30 minutes or until the fruits are smooth. Remove juniper berries. Refrigerate and reserve for the drink.

Tuesday, April 26, 2011

Vanilla Milk Syrup

2011_CPE_vanilla-milk

My younger son has become a huge fan of a certain organic, sugary vanilla-flavored milk that comes only in single-serving boxes. I don't like the price or the excessive packaging, but I also don't like endlessly cajoling the boy to eat something -- anything! -- with calcium. As vanilla milk boxes became a once- or twice-a-week treat, I experimented with homemade versions that would make us both happy.

First I tried adding a few drops of vanilla extract to his milk. Easy and done! Except... My extract is just vanilla beans steeped in rum and vodka. Great in cakes, not in my kid's glass of milk. Imitation vanilla is a non-starter for me. There's sugar-free Torani syrup, if you don't mind Splenda.

So I tried steeping a vanilla bean in simple syrup, then added a large spoonful to my son's milk. He drained his cup, happily.

It still isn't guilt-free: An 8-ounce glass of low-fat or skim milk with two teaspoons of this vanilla syrup recipe contains about 25 grams of sugar, just a bit less than the 29 grams in the boxed version. So it's still in the "treat" category at my home, and you can certainly use a smaller amount of syrup to suit you -- or your child's -- taste.

I buy vanilla beans in bulk for a song, so my homemade organic vanilla milk in a reusable cup costs less than half what I pay for the version in a throwaway box.

Vanilla Milk Syrup

This makes 12 two-teaspoon servings. Save the vanilla bean and steep it with coffee grounds for cold-brewed coffee, or dry it and tuck it in a container of sugar. You can also add the syrup to cocoa, iced or hot coffee, lemonade, or adult beverages.

1 cup water, boiling
3/4 cup sugar
1 vanilla bean, split in half

Put sugar in a bowl. Pour in boiling water and stir to thoroughly dissolve sugar. Add vanilla bean, cover, and steep for 8 hours.

Put a paper coffee filter in a fine-meshed strainer and set over a bowl. Pour the steeped syrup through the filter, straining out the vanilla. (If your child doesn't mind vanilla bean flecks, you can skip this step.) Store in the refrigerator for a week or two, or freeze portions in an ice cube tray for longer storage.

To serve, add 1 or 2 teaspoons of syrup to 8 ounces milk, warm or cold. Stir and enjoy!

Wednesday, March 16, 2011

Shamrock-ish Shake

110315_shamrockish1

I'm not above taking my kids to the Happy Meal Place now and again, or indulging them in a Shamrock Shake. I am, however, above taking them for a lot of Shamrock Shakes. We whipped up this homemade version using fresh mint for natural flavoring. We even threw in a bunch of spinach, knowing full well that a dose of leafy greens doesn't magically make this healthy. It does, however, help us feel a little better about it.

110315_shamrockish2You can forgo the spinach, if you wish, but it's a fun way to play with veggies. For the record, I don't advocate hiding healthy stuff in kids' food, though I understand and appreciate why some parents do it. If your kid is open to experimentation, let her toss the leaves into the blender and taste the results. My older son, for example, hates spinach, but he loves making Brainy Brownies precisely because of the spinach and blueberry puree -- he thinks it's neat those ingredients can disappear so completely.

Shamrock-ish Shake

Feel free to green this up with a bit of food coloring. If you're short on time, skip the steeping part -- but add more mint leaves to the blender.

2 cups low-fat milk, or 1 1/2 cups milk and 1/2 cup half-and-half
1 bunch fresh mint, divided
2-3 cups vanilla ice cream
1 generous handful of baby spinach

Warm milk (and half-and-half, if using) in a saucepan over medium heat, stirring, until mixture begins to steam. Remove from heat, stir in half of mint, and let steep in refrigerator at least two hours or up to overnight.

Pour milk-and-mint mixture through a fine-meshed strainer into a blender. Add 2 cups ice cream, spinach, and a handful of mint leaves and blend to combine. Add more ice cream if mixture is too thin. Taste and add more mint if desired. Makes 2 to 3 drinks.

Thursday, December 9, 2010

Second Helping: Home-Brewed Root Beer

100918_CPE_rootbeer_3

I fondly remember the days when I regarded soda as a special treat. My favorites were birch beer, cream, and the crazy fruit flavors of Squeeze soda. I loved visiting the small Squeeze plant nearby and picking among the lollipop-colored sodas. My dad relished Moxie, which I found horribly bitter. But we did find common ground with root beer, which we occasionally brewed ourselves.

My boys love "root berry," a rare treat reserved for the handful of baseball games we attend each summer. And Anna's boys savored a souvenir pack of Route 66 root beer from a vacation on the fabled highway.

So we opened the Little Monsters Root Beer Brewing Co. for an afternoon to learn how soda is made -- kitchen science! The kids were thrilled, and intrigued by the element of danger: a large, bubbling cauldron, and a small chance of exploding bottles.

100917_rootbeer_03Anna turned scanned copies of the kids' drawings into custom labels. The kids cut them out while we prepared the ingredients.

You can buy a modest brewing kit online for $15 to $30. In retrospect, I should have gone this route. I thought I'd do better  at a local brewing supply shop. I hadn't done my research, and had no idea it was OK -- in fact, even preferable -- to make root beer in recycled plastic bottles. Instead, I spent more than I should have on things like a $15 gadget to secure metal caps onto our recycled glass bottles.

100917_rootbeer_14


We used a Gnome soda recipe that called for yeast, honey, cane sugar, water, and root beer extract.

It's easy to make: You need to use a thermometer to monitor the temperature of the mixture, but there's nothing tricky about the process. The kids took turns dumping ingredients into the giant canning pot, marveling at the amount of sugar. We talked about how yeast works, in foods like bread and in root beer.

100917_rootbeer_27
While mixing up the soda was easy, bottling and storing it was more problematic. Because of that yeast.

Yeast basically eats sugar, creating the carbonation. Chilling the bottles gets the yeast to quiet down. If the carbonation process continues unchecked, pressure builds up and bottles can explode.

So the bottles need to stay warm long enough for the yeast to do its thing, but not so long that the bottles burst. What I read and was told recommended letting the bottles to sit out for 24 to 48 hours. That seems a long window when you risk an explosion.

Exploding bottles are no fun. As Anna could tell you.

Which brings me back to plastic. If you use plastic bottles, there's no risk of shattered glass in your kitchen or refrigerator. And you'll know it's time to chill your soda and quiet down the yeast when the plastic bottle becomes firm.

We chilled ours after 24 hours, and waited a few days to open the first bottle. The kids were giddy ... and then they picked up on the aftertaste. Strong, dark, a little medicinal. It didn't stop them from enjoying their custom soda, but they didn't gulp it down like they do at the ballpark. But they didn't mind at all: The soda was OK, but the grand experiment was "awesome!"

Two months out, and I find the flavor in the few remaining bottles has mellowed some and is more enjoyable from start to finish. We might experiment with another brand of extract, a smaller batch, and plastic bottles in the future.

Tuesday, August 17, 2010

Playdate Special: Coconut Frappé

There are two happy thoughts that always are in my mind when I think about motherhood: The first is to remember how my mom used to feed me. The second is the possibility of being a child again while taking care of my kids. Coconut Frappé brings me both of these feelings when I sip it . My mother used to prepare it in the hot summer of Rio, and I loved it. The simplicity of this recipe is exactly its beauty.
Last playdate I served for all kids: three out of fours enjoyed it, while one was not in the mood not to drink, or eat. Just play.
Mothers also enjoyed it. Darienne would add some cardamom to it, and I am still wondering what else I could add to it.
So, here's the beauty of a very simple drink that looks like milk, smells like summer and mainly makes everybody happy:

Silky Coconut Frappé
I also tried a second version with Almond Vanilla Milk, and loved it. So, if you have a lactose intolerant loved one, that's a good alternative. This recipe is for two cups of frappé.

1/2 cup coconut milk
1 cup 2% milk or Almond Milk (or rice dream, soy etc)
Sugar to taste
6 ice cubes
Shaved unsweetened coconut to garnish

In a blender, mix all in low speed. Serve cold in a tall glass, while the white foam is still there. If you don't have a electric blender, just use a cocktail shaker, but make sure to not strain it.

Friday, July 16, 2010

Cold-Brewed Iced Coffee


Most moms I know have complained, at one point or another, about not being able to fit in a morning shower. But they always get their coffee.

I have the opposite problem. I've never skipped the shower, but there's rarely time to brew coffee. I'm the only one with a java habit in our home, so no one else misses it.

Come summer, cold-brewed coffee solves my problem (and saves me from dropping a lot of cash at a certain coffee shop). Just after the kids go to bed, I stir coffee grounds into a jar of water and leave it on the counter. In the morning, I strain it through a coffee filter once or twice, toss the used grounds in the grass or compost heap, and enjoy some strong, smooth iced coffee.

This coffee concentrate stays good in the refrigerator at least a week or two. It works well in recipes requiring strong coffee. You also can zap it in the microwave for a hot cup.

Cold-Brewed Iced Coffee

Scale the recipe to make as much as you want. I usually make a double or quadruple batch.

3-4 tablespoons ground coffee
1 cup water

Put coffee in a glass jar and add water. Stir with a chopstick or butter knife to combine. Put lid on jar and let sit on counter for 12 hours (overnight).

Line a small fine-mesh strainer with a coffee filter, and set strainer over a small bowl. Pour coffee and water through strainer; repeat if strained coffee looks sludgy. Rinse remaining coffee grounds from jar and lid. Pour coffee concentrate into jar and store in refrigerator.

To make coffee, combine equal parts water and coffee concentrate, or to taste, adding milk, cream or sweetener as desired. And lots of ice. Try adding sweetened condensed milk for an easy Vietnamese coffee. For hot coffee, heat in microwave.

Friday, June 11, 2010

Second Helping: Lavender Lemonade


Growing up in the Northeast, I was smitten on road trips south by the idea of oranges or lemons growing in your own yard. Years later, I'm living the dream, with a small but thriving lemon tree that keeps us well-supplied ... through winter. It's wonderful to cut into a freshly picked lemon on Christmas Day, but come summer, when I want to make lemonade by the bucket and plunk perfect yellow citrus slices into pitchers of water and iced tea, my little tree is stubbornly setting out flowers for fall fruit.

So in late winter I collect quarts of lemon juice, portioned out and frozen to see me through my summer lemonade needs. Happily, once summer hits there's a flush of fresh lavender flowers and other herbs to infuse the lemonade.

Basil and mint are great alternatives to the lavender in this syrup, and probably easier to obtain. The syrup stores well in the refrigerator, without the lemon juice, and freezes for months.

Lavender Lemonade

Try adding a splash of the lavender syrup to iced tea or frozen drinks, or use it in baking or sorbet. Be sure to use pesticide-free lavender. Grow your own, clip it from a trusted friend's plant, or find it at Whole Foods or the farmer's market. Alternatively, you can substitute basil, mint, or other herbs. This makes a lightly sweet lemonade, which suits my taste; you may want to adjust the amount of sugar.

1/3 cup culinary lavender flowers
1 cup sugar
6 cups water, divided
1 cup fresh lemon juice (from about 4 lemons)

In a small saucepan, combine lavender, sugar, and 2 cups water over medium heat, stirring to dissolve sugar. Bring to a boil, then cover and remove from heat. Let steep 45 minutes, then strain to remove herbs.

Pour syrup into pitcher and stir in lemon juice and remaining water. Taste, and add more lemon juice (to cut sweetness) or water (to dilute) to suit your preference. Garnish with lemon slices, if desired, and serve.

Friday, May 28, 2010

Second Helping: Strawberry Grapes Cocktail with Juniper Berries and Mint


It was a sunny and lazy Sunday.  All needed to add charm to my backyard BBQ was a fresh cocktail with no alcohol. Last time I was in that mood I tried a virgin mojito in a local tapas bar. The mix of sugary soda and mint didn't please me, so I decided to create my own. Here it is.  I shared the drink later on our playdate and the kids and moms loved it.  Cheers!

Strawberry and Grapes Cocktail

With some not so fresh strawberries and grapes, I prepared a syrup-like compote, simmering the fruits with orange juice. I used the mix as a base for the cocktail. If you are willing to try an alcoholic variation you can add some gin or limoncello.

2 tablespoons Strawberry and Grapes Compote (recipe below)
1/2 cup sparkling mineral water with lime
1/4 cup apple juice (optional)
4 leaves fresh mint, chopped
Ice (optional)

Add all ingredients, stir slowly and add fresh chopped mint on the top.

Strawberry and Grapes Compote

1 cup whole strawberries
1 cup seedless red grapes
1 cup fresh orange juice
5 or 6 juniper berries, dried

Simmer all for about 30 minutes or until the fruits are smooth. Refrigerate and reserve for the drink.

LinkWithin

Related Posts Plugin for WordPress, Blogger...